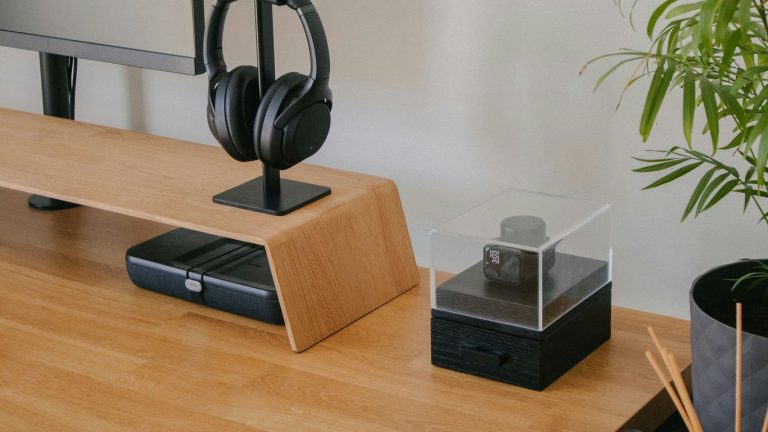
So, you’ve got a project in mind that needs some clear plastic, maybe for a display case, some custom shelving, or even a cool art piece. Acrylic sheets are pretty awesome for this kind of stuff – they’re lighter than glass and don’t shatter as easily. But, you might be wondering, how do you actually cut these things without making a mess? Don’t worry, it’s not as complicated as it sounds. This guide will walk you through how to cut acrylic sheet at home, step-by-step, so you can get your project looking just right.
Key Takeaways
- Acrylic sheets are versatile plastic materials, great alternatives to glass for many DIY projects due to their clarity and durability.
- Before cutting, gather the right tools, prepare your workspace, and clearly mark your cut lines for accuracy.
- Common cutting methods include scoring and snapping for straight lines, using a jigsaw for curves, and a circular saw for longer straight cuts.
- Achieving smooth, clean edges involves sanding and polishing after the initial cut to remove any roughness or imperfections.
- Always prioritize safety by wearing protective gear like gloves and eye protection, and manage dust and debris effectively.
Understanding Acrylic Sheets For Your Projects
What is Acrylic Sheet?
Acrylic plastic, often known by trade names like Plexiglas or Perspex, is a transparent thermoplastic material that has become a go-to for many DIYers and professionals alike. It’s essentially a synthetic polymer, specifically polymethyl methacrylate (PMMA), that offers a fantastic alternative to glass. It’s been around for quite some time, and its popularity continues to grow because it’s just so adaptable. Think of it as a super-versatile plastic that’s tough, clear, and surprisingly easy to work with, even if you’re just starting out with projects. It’s a material that’s found its way into everything from simple picture frames to complex architectural designs.
Key Characteristics of Acrylic Plastic
So, what makes acrylic so special? For starters, it’s incredibly clear. We’re talking about 92% light transmission, which means it looks a lot like glass, but it’s actually much more forgiving. It’s significantly more impact-resistant than regular glass – up to 30 times stronger, in fact. This means it’s less likely to shatter if dropped or hit. Plus, it’s considerably lighter than glass, making it easier to handle, transport, and install, especially for larger pieces. Acrylic also holds up well against weather and UV light, so it won’t yellow or degrade quickly when used outdoors. It’s also pretty resistant to chemicals, which is a bonus for certain applications. These combined properties make it a practical choice for a wide variety of uses.
Here’s a quick rundown of its main features:
- Clarity: Offers excellent optical clarity, similar to glass.
- Durability: Highly impact-resistant and shatterproof.
- Weight: Significantly lighter than glass.
- Weather Resistance: Stands up well to outdoor conditions and UV exposure.
- Workability: Easy to cut, drill, and shape.
Types of Acrylic Sheet Available
When you’re looking to buy acrylic, you’ll find it comes in a few different forms, each suited for different jobs. The most common type is clear acrylic, which is your standard glass-like sheet. Then there are colored acrylics, available in a huge range of hues, perfect for adding a splash of color to signs, displays, or decorative items. You can also find frosted acrylic, which has a matte finish that diffuses light and offers a bit of privacy, making it great for partitions or shower screens. Opal acrylic is another option, often used for light-sensitive applications or when a solid, opaque look is desired. And don’t forget mirror acrylic, which gives you a reflective surface but is much lighter and safer than a traditional glass mirror. Some suppliers even offer custom cuts, so you can get the exact size you need for your project, which is super handy.
Acrylic sheets are a fantastic material for home projects because they balance aesthetics with practicality. Their clarity and strength mean you don’t have to sacrifice quality for safety or ease of use.
When choosing, consider the thickness you need. Sheets can range from a thin 1mm or 2mm all the way up to 50mm or more for heavy-duty applications. Standard sheet sizes are common, but many suppliers can cut them down to your specific dimensions. This flexibility is a big reason why acrylic sheets are so popular for DIY projects and professional work alike.
Essential Tools and Preparation For Cutting Acrylic
Before you even think about making a cut, getting your tools and workspace ready is super important. It’s not just about having the right stuff; it’s about setting yourself up for success so you don’t end up with a mangled piece of plastic. Trust me, I’ve been there.
Gathering Your Cutting Tools
Having the right tools makes all the difference. You don’t need a professional workshop, but a few key items will make the job much easier and safer. The most basic tool you’ll need is a scoring tool, which is perfect for making precise, shallow cuts that guide a break.
Here’s a quick rundown of what you might need:
- Scoring Tool: A specialized acrylic scoring tool, often with a carbide blade, is ideal for straight lines. Some have ergonomic handles for a better grip, which is helpful for consistent scoring. You can find these at most hardware stores or online.
- Jigsaw: If you plan on cutting curves or intricate shapes, a jigsaw is your best bet. Make sure you have a fine-toothed blade designed for plastics. Using a slow speed is key here to prevent melting or chipping.
- Circular Saw: For long, straight cuts, a circular saw can be very efficient. Use a fine-toothed blade specifically made for cutting acrylic or plastic to get a clean edge.
- Measuring Tape and Ruler: Accuracy is vital, so don’t skip these.
- Marker or Pencil: For marking your cut lines. A fine-tip permanent marker usually works well.
- Clamps: To secure the acrylic sheet while you’re cutting.
- Safety Gear: This is non-negotiable. We’ll cover this more later, but think safety glasses, gloves, and a dust mask.
Preparing Your Workspace
Your cutting area needs to be stable and clean. A workbench or a sturdy table is ideal. Make sure there’s enough space to move around the acrylic sheet comfortably. Clear away any clutter that could get in the way or become a hazard. If you’re working indoors, consider laying down a drop cloth to catch any dust or small plastic shavings. Good lighting is also a plus, so you can clearly see your markings and the cutting line.
Marking Your Cut Lines
Precision starts with a clear mark. Use a fine-tip marker or a pencil to draw your cutting line directly onto the protective film of the acrylic sheet. If you’re using the scoring and snapping method, you’ll want to draw a single, straight line. For more complex shapes with a jigsaw, you might want to draw the entire shape. Double-check your measurements before you make any marks. It’s easy to make a mistake, and a misplaced line can ruin your piece.
Always remember to keep the protective film on the acrylic sheet for as long as possible. This film helps prevent scratches during the cutting process. You’ll only want to remove it after you’ve finished all your cutting and any necessary sanding or polishing.
Techniques for How to Cut Acrylic Sheet at Home
Cutting acrylic at home might seem a little intimidating at first, but with the right approach, it’s totally manageable. There are a few ways to go about it, depending on the thickness of your sheet and the kind of cut you need to make.
Scoring and Snapping Method
This is a great technique for thinner acrylic sheets, usually up to about 3/16 of an inch thick. It’s similar to how you’d cut glass.
- Mark your line: Use a pencil or a fine-tip marker to draw a clear cutting line on the protective film of the acrylic sheet.
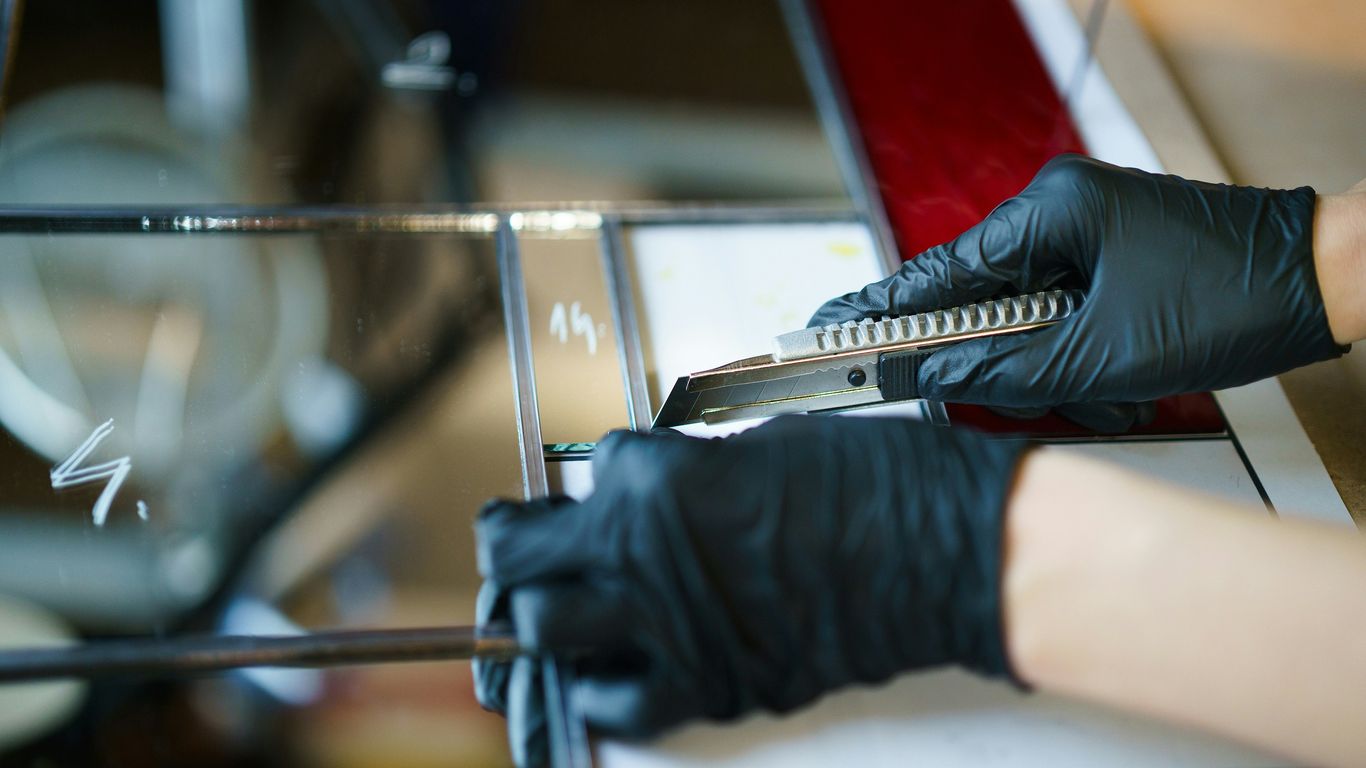
- Score the line: Using a specialized acrylic scoring tool or a utility knife with a fresh blade, make a deep, continuous score along your marked line. You’ll want to go over it several times to create a good groove. The deeper the score, the cleaner the snap.
- Position for the snap: Place the scored line just over the edge of a sturdy table or workbench. Make sure the majority of the sheet is hanging off the edge.
- Snap the sheet: Apply firm, even pressure downwards on the overhanging part of the sheet. It should snap cleanly along the scored line. You might need to give it a quick, sharp tap to finish the break.
This method is quick and doesn’t create a lot of dust, which is a nice bonus. It’s perfect for straight cuts on smaller pieces. For more tips on scoring, you can check out guides on how to cut acrylic sheets.
Using a Jigsaw for Curves
When you need to make curved cuts or cut thicker acrylic, a jigsaw is your best friend.
- Blade selection is key: Use a fine-toothed blade designed for plastic or metal. A blade with more teeth per inch will give you a smoother cut and reduce the chance of melting or chipping.
- Slow and steady: Set your jigsaw to a medium speed. Going too fast can cause the acrylic to melt and gum up the blade, or even crack the sheet.
- Support the material: Make sure the acrylic sheet is well-supported on both sides of your cut line. This prevents vibration and helps maintain a clean cut.
- Cut on the waste side: If you’re cutting along a marked line, try to keep the blade on the side of the line that you’ll be discarding. This way, any minor imperfections from the blade won’t be visible on your final piece.
Employing a Circular Saw for Straight Cuts
For long, straight cuts on thicker acrylic sheets, a circular saw can be very effective.
- Use the right blade: Just like with a jigsaw, a fine-toothed blade made for plastics is important. A blade with a high tooth count will slice through the acrylic cleanly.
- Support is crucial: Ensure the acrylic is firmly supported and won’t flex during the cut. Clamps are your friend here.
- Feed rate: Maintain a consistent, moderate speed as you push the saw through the material. Avoid forcing the saw, as this can lead to melting or chipping.
- Consider a zero-clearance insert: If your saw allows, a zero-clearance insert can help support the acrylic right up to the blade, minimizing chipping.
When using power tools on acrylic, it’s common for the material to heat up. This can sometimes cause the plastic to melt slightly, leading to a rougher edge or even gumming up your blade. Keeping your blade sharp and using a steady, moderate pace are the best ways to combat this. If you notice melting, try slowing down your feed rate or even pausing briefly to let the material cool.
Remember, practice makes perfect. Don’t be afraid to test your chosen method on a scrap piece of acrylic first to get a feel for it before tackling your main project. Acrylic sheets are quite versatile, and with these techniques, you’ll be cutting them like a pro in no time.
Achieving Clean Edges After Cutting
So, you’ve made your cuts, and now you’re looking at the edges. They might be a little rough, maybe a bit fuzzy, or even have some small burrs. Don’t worry, this is totally normal. Getting those edges smooth and clean is the next step to making your acrylic project look really professional. It’s not super complicated, but it does take a bit of patience and the right approach.
Sanding Acrylic Edges
Sanding is your go-to for smoothing out those rough cut edges. You’ll want to start with a coarser grit sandpaper and work your way down to finer grits. Think of it like this: you’re gradually refining the surface.
- Start Coarse: Begin with something like 180 or 220 grit sandpaper. This will knock down any high spots or sharp bits left from cutting. Use a sanding block to keep the pressure even.
- Move to Medium: Step down to around 320 or 400 grit. This starts to really smooth things out and removes the deeper scratches from the coarser grit.
- Finish Fine: Finally, use a very fine grit, like 600 or even 1000 grit. This will make the edge feel much smoother to the touch and prepare it for polishing.
Always sand in one direction, and try to keep the sandpaper flat against the edge. If you’re using wet sanding, a little water can help keep dust down and prevent the sandpaper from clogging up. For projects not needing a full professional polish, simple sanding or beveling can effectively smooth rough-cut edges. This DIY-friendly approach is a practical solution for achieving a cleaner finish without complex techniques.
Polishing for a Smooth Finish
After sanding, the edge will be smooth but might look a bit cloudy or hazy. Polishing is what brings back that crystal-clear, glass-like finish. You can use a plastic polish specifically designed for acrylics. These polishes usually contain very fine abrasives that buff out the microscopic scratches left by the fine-grit sandpaper.
Apply a small amount of polish to a soft, lint-free cloth. Then, rub it onto the acrylic edge using firm, circular motions. You’ll need to work it in for a few minutes until you see the haze disappear and the edge start to look clear again. Buff off any excess polish with a clean part of the cloth.
Removing Scratches and Imperfections
Sometimes, even after cutting and sanding, you might notice a few stubborn scratches or tiny imperfections. For light scratches, the polishing step mentioned above might be enough. If they’re a bit deeper, you might need to go back to a finer grit of sandpaper (like 1000 or 1500 grit) and then re-polish.
For really deep gouges that sanding and polishing won’t fix, you might need to consider filling them with a clear epoxy or even replacing the piece if it’s a critical part of your project. It’s often better to prevent deep scratches during cutting and handling than to try and fix them later.
Remember, patience is key here. Rushing the sanding or polishing process can lead to more visible marks. Take your time, work methodically, and you’ll end up with edges that look as good as the rest of your acrylic sheet. Acrylic holders often benefit from these finishing techniques to maintain their aesthetic appeal.
Safety Precautions When Cutting Acrylic
Working with acrylic sheets, while rewarding for DIY projects, does come with its own set of safety considerations. It’s really important to take the right steps to protect yourself and keep your workspace clean. Ignoring these can lead to injuries or a messy environment.
Protective Gear Essentials
Before you even pick up a cutting tool, make sure you’re geared up. Eye protection is non-negotiable. Acrylic can splinter or create small, sharp fragments when cut, and these can easily get into your eyes. Safety glasses or goggles are a must. You’ll also want to wear sturdy gloves. Not just any gloves, but ones that offer good grip and some protection against sharp edges. Think work gloves, not thin fabric ones. Long sleeves and pants are also a good idea to protect your skin from any stray debris. If you’re using power tools that create a lot of dust, a dust mask or respirator is also highly recommended to avoid inhaling fine plastic particles.
Handling Sharp Edges
Once you’ve cut the acrylic, the edges can be surprisingly sharp. Treat them with respect. Always handle cut pieces carefully, holding them by the edges or surfaces that aren’t sharp. When you’re moving pieces around, especially larger ones, it’s best to have a second person help you. This reduces the risk of dropping the sheet or cutting yourself. If you’re stacking pieces, make sure they are stable and won’t slide off unexpectedly. Remember, even though acrylic is lighter than glass, its edges can still cause a nasty cut if you’re not careful.
Managing Debris and Dust
Cutting acrylic, especially with power tools, can generate a fair amount of dust and small plastic shavings. It’s important to keep your work area tidy as you go. A shop vacuum is incredibly useful for cleaning up dust and debris as it’s created. This not only keeps your space safer by reducing trip hazards but also helps maintain a cleaner environment for your project. If you’re working indoors, consider setting up a temporary workspace near an open window or using a fan to help ventilate the area. Proper cleanup after you’re done is also key. Sweep up all visible debris and vacuum any remaining dust. This attention to detail helps prevent accidents later on and keeps your tools and materials in good condition. For more on safe practices, check out these essential safety tips.
Always double-check your tools before you start cutting. Make sure blades are sharp and properly installed, and that any power cords are in good condition. A faulty tool is a recipe for disaster.
Here’s a quick rundown of what you need:
- Eye Protection: Safety glasses or goggles.
- Hand Protection: Sturdy work gloves.
- Body Protection: Long sleeves and pants.
- Respiratory Protection: Dust mask or respirator (especially for power tools).
- Cleanup Tools: Shop vacuum, broom, dustpan.
Joining and Finishing Your Cut Acrylic Pieces
So, you’ve successfully cut your acrylic sheet. Now comes the part where you put it all together. There are a few ways to join pieces, and how you finish the edges can really make a difference in the final look.
Using Acrylic Glue for Bonds
When you need a strong, clear bond between acrylic pieces, a specialized acrylic glue is your best bet. It’s not like regular glue; it actually melts the surfaces slightly, creating a solid weld. Make sure the surfaces you’re joining are perfectly clean and free of dust or oils before you start.
Here’s a general approach:
- Preparation: Clean both edges thoroughly with a cleaner recommended for acrylic. Any dirt or residue will show up in the bond.
- Application: Apply a small, even bead of acrylic cement along one edge. You don’t need a lot – too much can squeeze out and make a mess.
- Joining: Carefully press the two pieces together. Hold them firmly in place while the glue sets. Some glues require clamping.
- Curing: Let the bond cure completely. This can take anywhere from a few minutes to several hours, depending on the type of glue. Rushing this step can weaken the joint.
For simpler projects, especially with non-clear acrylic, a peel-and-stick adhesive might be easier to manage. This method is straightforward for basic applications.
Heat Bending Techniques
Acrylic can be bent into curves or custom shapes using heat. This is great for making display stands, custom enclosures, or decorative elements. You’ll need a heat gun or a strip heater for this.
- Heating: Gently and evenly heat the area you want to bend. Keep the heat source moving to avoid scorching or melting one spot.
- Bending: Once the acrylic is pliable, carefully bend it to your desired shape. You might want to use a jig or form to help you achieve a consistent curve.
- Cooling: Hold the acrylic in place until it cools and hardens. Trying to move it too soon can ruin the shape.
Be patient with this process. Overheating can cause bubbles or discoloration, so practice on scrap pieces first.
Securing Pieces with Solvents
Solvent welding is another method for joining acrylic, similar to using acrylic glue but often involving liquid solvents. This technique can create very strong, almost invisible seams. It’s important to work in a well-ventilated area when using solvents because they can have strong fumes.
- Ventilation: Always work in a space with good airflow, like an open garage or outdoors.
- Application: Apply the solvent carefully to the edges that will join. A syringe or applicator can help with precision.
- Fusion: Press the pieces together. The solvent will soften the acrylic surfaces, allowing them to fuse as it evaporates. Handle solvents with care due to their properties.
- Drying: Allow ample time for the solvent to fully evaporate and the bond to harden. This is critical for a durable joint.
Working with solvents requires attention to detail and safety. Always read the manufacturer’s instructions for the specific solvent you are using and wear appropriate protective gear, including gloves and eye protection. Proper ventilation is non-negotiable to avoid inhaling fumes.
Putting your cut acrylic pieces together can be tricky, but it’s also where your project really starts to shine! Whether you’re gluing, snapping, or using special connectors, getting a clean finish makes all the difference. Want to see how easy it can be? Visit our website for step-by-step guides and tips to make your acrylic creations look amazing.
Wrapping Up Your Acrylic Project
So, cutting acrylic at home might seem a bit daunting at first, but with the right tools and a little patience, it’s totally doable. We’ve gone over the basics, from scoring to snapping, and hopefully, you feel more confident tackling your own projects now. Remember to always prioritize safety, wear your protective gear, and take your time. Whether you’re making a simple shelf or a more complex design, cutting acrylic yourself can be a really rewarding part of the process. Happy crafting!
Frequently Asked Questions
What exactly is an acrylic sheet?
An acrylic sheet is basically a strong, clear plastic that’s often used instead of glass. It’s super clear, tough, and can handle different weather conditions and chemicals pretty well. People use it for all sorts of things like signs, displays, furniture, and even art projects.
Why is acrylic plastic a good choice for projects?
Acrylic is great because it’s really clear, almost like glass, but it’s way tougher and won’t break as easily. It’s also lighter and usually less expensive than glass. Plus, it’s pretty easy to cut, shape, and put together, making it a favorite for DIYers.
What are the different kinds of acrylic sheets I can get?
You can find acrylic sheets in many forms! There’s the standard clear kind, colored ones, frosted versions that give a soft look, and even mirrored sheets. Each type is good for different uses, like making signs, decorative items, or privacy screens.
How do I cut acrylic sheets safely at home?
When cutting acrylic, always wear safety glasses and gloves to protect yourself from sharp edges and flying bits. Make sure your workspace is clean and well-lit. If you’re using a saw, keep it steady and let the tool do the work without pushing too hard. For thinner sheets, scoring and snapping can work well.
Can I make the edges of my cut acrylic smooth?
Yes, you absolutely can! After cutting, you can sand the edges to get rid of any rough spots. Start with a coarser sandpaper and move to finer grits. For a really shiny, smooth finish, you can even polish the edges with a special plastic polish or buffing wheel.
What’s the best way to stick acrylic pieces together?
The best way to join acrylic is by using a special acrylic glue, sometimes called a solvent cement. You just apply a little bit to the clean edges you want to join, press them together firmly, and let it dry completely. This creates a super strong bond that looks almost invisible.