Scratches on your acrylic sheets can be a real bummer, right? Whether it’s a coffee table, a display case, or even a window, those little marks can make something look old and worn out. But don’t worry, you don’t always need to replace the whole thing. Learning how to remove scratches from acrylic is a skill that can save you time and money. This guide will walk you through some simple methods to get your acrylic looking good as new again.
Key Takeaways
- Acrylic is a versatile plastic, often used as a glass alternative due to its clarity and durability.
- Assess the damage to your acrylic sheet to determine the best removal method.
- Start with the gentlest cleaning methods for minor scratches, like mild soap and water.
- For deeper scratches, consider using fine-grit sandpaper or specialized acrylic polishing compounds.
- Always finish by buffing the surface to a shine and inspecting for any remaining marks.
Understanding Acrylic Sheet Properties
The Versatility of Acrylic Materials
Acrylic, often known by its scientific name Polymethyl Methacrylate (PMMA), is a really popular plastic for a bunch of reasons. It’s super clear, letting about 92% of light through, which is pretty impressive. Plus, it’s way tougher than regular glass – about 30 times more impact resistant, actually. This makes it a safer choice for many projects. It also weighs less than glass and is generally more affordable. Because it’s easy to work with, it’s used in all sorts of things, from signs and displays to furniture and even parts for medical equipment. You can find it in clear, colored, frosted, and even mirrored finishes, making it a flexible material for DIYers and professionals alike. It’s also pretty good at resisting weather, so it holds up well outdoors.
Key Characteristics of Acrylic Plastic
Acrylic plastic has a unique set of traits that make it stand out. Its high transparency and luster are often compared to glass, but without the fragility. It’s known for being lightweight, which makes installation easier and safer compared to heavier materials. Acrylic also boasts excellent weather resistance, meaning it won’t degrade quickly when exposed to sunlight or rain. Its surface hardness is notable, though it can still scratch if not cared for properly. It also shows good resistance to various chemicals.
Here’s a quick look at some of its main features:
- Transparency: Offers exceptional clarity, similar to glass.
- Impact Resistance: Significantly stronger and less prone to shattering than glass.
- Weight: About half the weight of glass, making it easier to handle.
- Weather Resistance: Stands up well to outdoor conditions and UV exposure.
- Workability: Can be easily cut, drilled, and shaped.
Acrylic vs. Glass: A Comparative Overview
When you’re deciding between acrylic and glass, it helps to know the differences. Glass is, well, glass – it’s brittle and can shatter easily, which is a safety concern. Acrylic, on the other hand, is much more impact-resistant. Think about it: if you drop a glass pane, it’s likely to break into sharp pieces. Drop an acrylic sheet, and it’s far more likely to just crack or maybe not break at all. This makes acrylic a safer bet, especially in places where safety is a priority, like in homes with kids or in public spaces.
| Feature | Acrylic Plastic | Glass |
|---|---|---|
| Impact Resistance | High | Low |
| Weight | Lightweight | Heavy |
| Shatter Risk | Low | High |
| Clarity | Excellent | Excellent |
| Scratch Resistance | Moderate | High |
While glass is harder and more resistant to scratching, acrylic’s durability and safety benefits often make it the preferred choice for many applications. Plus, acrylic can be joined using special glues or even heat, creating strong bonds. Scratches on acrylic can often be buffed out, which isn’t really an option with glass.
Acrylic is often called "the Queen of Plastics" because of its outstanding clarity, weather resistance, and appealing look compared to other transparent plastics. It’s a material that balances performance with ease of use and cost-effectiveness.
Assessing the Damage to Your Acrylic
Before you can fix those scratches, you need to know what you’re dealing with. Not all scratches are created equal, and trying to fix a deep gouge with a gentle polish won’t do much. Likewise, using aggressive methods on a minor scuff can actually make things worse.
Identifying Different Types of Scratches
Scratches on acrylic can range from barely visible surface marks to deep gashes. Understanding the difference is key to choosing the right repair method. Generally, scratches fall into three main categories:
- Light Scratches: These are superficial marks that don’t catch your fingernail when you gently run it across the surface. They often look like haziness or fine lines, especially when viewed at an angle. These are usually caused by dust or improper cleaning.
- Moderate Scratches: You can feel these scratches when you run your fingernail over them. They are deeper than light scratches and might appear as more distinct lines. These can result from slightly more abrasive contact, like sliding a rough object across the surface.
- Deep Scratches: These are significant gouges that your fingernail will catch on easily. They can penetrate quite deeply into the acrylic material and often require more intensive repair techniques, like sanding. These might happen from sharp objects or significant impact.
Evaluating Scratch Depth and Severity
To figure out which category your scratch falls into, try the fingernail test. Gently drag your fingernail across the scratch. If your nail doesn’t catch, it’s likely a light scratch. If your nail catches slightly, it’s moderate. If your nail digs in noticeably, it’s a deep scratch. This simple test helps determine the best approach for repair.
Factors Influencing Scratch Formation
Several things can contribute to how easily acrylic gets scratched and how severe those scratches become. The quality of the acrylic itself plays a role; some finishes are more prone to marking than others. The type of abrasive that caused the scratch is also important – fine dust is less damaging than coarse grit. Even the environment matters; extreme temperatures can sometimes make acrylic more brittle and susceptible to damage. It’s also worth noting that while acrylic is tough, it’s not indestructible.
The material’s inherent properties, like its surface hardness and the way it reacts to different pressures, dictate how it will hold up over time and under stress. Understanding these factors helps in both preventing damage and planning effective repairs.
Preparing Your Acrylic Surface for Restoration
Before you even think about polishing or buffing, the most important step is to get your acrylic surface clean. You wouldn’t try to fix a scratch on a dirty car, right? Same idea here. Any dirt, dust, or grit left on the surface can turn into more scratches when you start working on it. So, let’s get it spotless.
Cleaning Acrylic Sheets Thoroughly
Start with a good dusting. Use a soft, dry microfiber cloth to gently wipe away any loose particles. Don’t scrub; just a light sweep is needed. If there’s anything more stubborn, like fingerprints or smudges, it’s time for a cleaning solution. A mild soap, like dish soap, mixed with water is usually your best bet. Apply this solution with a clean, soft cloth – again, microfiber is ideal [b817]. Avoid paper towels or rough rags, as they can leave their own fine scratches. Wipe the surface gently, working from the center outwards to avoid spreading dirt. Rinse the cloth frequently and use a clean section to wipe away any soap residue. Finally, dry the acrylic with another clean, dry microfiber cloth. Make sure it’s completely dry to avoid water spots.
Gathering Necessary Cleaning Supplies
To get your acrylic ready, you’ll need a few things:
- Soft microfiber cloths: At least two – one for cleaning, one for drying.
- Mild dish soap: Just a drop or two in water.
- A clean bucket or basin: For your soapy water.
- Optional: Specialized acrylic cleaner: If you have one on hand, it can be effective.
Creating a Safe and Well-Lit Workspace
Find a spot where you have good lighting. This is really important for seeing those scratches clearly and making sure you’ve cleaned the surface properly. A well-lit area helps you spot any missed spots or new imperfections. Also, make sure the area is free from dust and debris. If you’re working outdoors, try to pick a calm day to avoid dust blowing onto your wet acrylic. Indoors, clear off your workbench or table completely. You want a clean, stable surface to work on, and enough space to move around the acrylic sheet without bumping into things. This preparation makes the whole scratch removal process much smoother and less frustrating.
Proper preparation is half the battle when it comes to restoring acrylic. Rushing this step can lead to more problems than it solves, so take your time and do it right.
Gentle Methods for Minor Acrylic Scratches
Even with careful handling, minor scuffs and light scratches can appear on acrylic surfaces. Fortunately, these are often fixable without resorting to drastic measures. The key is to start with the least abrasive methods and only escalate if necessary. This approach helps preserve the integrity and clarity of your acrylic.
Using Mild Soaps and Soft Cloths
For the most superficial marks, a simple cleaning solution might be all you need. The goal here is to gently lift any debris that might be caught in the scratch, which can sometimes make it appear worse than it is. Always use a soft, lint-free cloth – microfiber is ideal – to avoid introducing new scratches.
- Mix a mild cleaning solution: Combine a few drops of dish soap with warm water. Avoid harsh detergents or abrasive cleaners.
- Dampen the cloth: Lightly moisten the soft cloth with the soapy water. Wring it out well so it’s not dripping wet.
- Wipe gently: In a circular motion, carefully wipe the scratched area. Don’t apply excessive pressure.
- Rinse and dry: Use a separate, clean, damp cloth to wipe away any soap residue. Then, dry the surface with another clean, dry microfiber cloth.
This method is particularly effective for removing smudges or light abrasions that haven’t penetrated the surface deeply.
The Role of Baking Soda Paste
If mild soap and water don’t quite do the trick, a baking soda paste can offer a bit more cleaning power. Baking soda is a mild abrasive, meaning it can help to gently buff out very fine scratches. It’s important to use it correctly to avoid making the problem worse.
- Create the paste: Mix baking soda with a small amount of water until it forms a thick paste, similar in consistency to toothpaste. You want it to be spreadable but not runny.
- Apply with care: Using a soft cloth, apply the paste to the scratched area. Rub it in gently using small, circular motions. Focus on the scratch itself.
- Wipe away: Once you’ve worked the paste into the scratch for a minute or two, wipe it away with a clean, damp cloth. Rinse thoroughly to remove all residue.
- Dry and inspect: Dry the area with a clean, dry cloth and check the results. You might need to repeat this process a couple of times for best results.
Remember, the goal with baking soda is gentle abrasion. Too much pressure or scrubbing too hard can create more noticeable marks.
Exploring Specialized Acrylic Cleaners
For those who prefer a dedicated solution, there are commercial cleaners specifically designed for acrylic surfaces. These products are formulated to be safe for acrylic and often contain mild polishing agents that can help reduce the appearance of minor scratches. When choosing a cleaner, look for products labeled as non-abrasive and safe for plastics. Always follow the manufacturer’s instructions carefully. Some cleaners might require specific application techniques or drying times. Using a product designed for acrylic can be a reliable way to maintain the clarity of your sheets, especially for items like acrylic stands or display cases.
These gentle methods are your first line of defense against minor imperfections. If the scratches are deeper, you might need to consider more advanced techniques, but always start here.
Advanced Techniques for Deeper Acrylic Scratches
Sometimes, the scratches on your acrylic aren’t just surface-level. They might feel like a groove when you run your fingernail across them. For these deeper marks, you’ll need to step up your game from simple cleaning. This is where sanding and polishing come into play. It’s a bit more involved, but totally doable if you’re patient.
Polishing with Fine-Grit Sandpaper
When you’re dealing with scratches that have some depth, you’ll want to start with very fine-grit sandpaper. We’re talking about grits like 800, 1000, and even up to 2000. The key here is to work gradually. Start with the lowest grit that seems to make a difference on the scratch. Always sand in a consistent direction, usually in straight lines across the scratch. Wet sanding is often recommended for acrylic; it helps keep the sandpaper from clogging and reduces the risk of generating too much heat, which can damage the plastic. You’re essentially leveling down the edges of the scratch so it becomes less noticeable.
Applying Acrylic Polishing Compounds
After you’ve used sandpaper to smooth out the scratch, you’ll likely be left with a hazy or dull spot. This is where polishing compounds come in. These are specially formulated to restore the shine and clarity of acrylic. You can find them in paste or liquid form. Apply a small amount to a clean, soft cloth and rub it into the dulled area using a circular motion. You might need to apply a bit of pressure, but don’t go overboard. The goal is to bring back the original gloss of the acrylic. Think of it like waxing a car – you’re bringing out the shine.
The Importance of Gradual Abrasion
No matter which method you choose for deeper scratches, the most important thing is to be patient and work slowly. Acrylic can be sensitive, and trying to rush the process can lead to more damage, like creating more scratches or even melting the plastic. Always start with the least aggressive method or grit and only move to something stronger if absolutely necessary. It’s better to make several light passes than one aggressive one. This careful approach helps you maintain the integrity and appearance of your acrylic sheets.
Here’s a quick rundown of the process:
- Assess the scratch: Determine its depth. If you can feel it with your fingernail, it’s likely deeper.
- Start sanding (if needed): Use fine-grit wet sandpaper, starting with 800 grit and moving up.
- Polish: Use an acrylic polishing compound to restore shine.
- Clean: Wipe away residue with a soft cloth.
Rushing the sanding or polishing process is the quickest way to turn a minor issue into a major problem. Take your time, use light pressure, and check your progress frequently. It’s always easier to remove more material than to put it back.
Remember, these techniques are for deeper scratches. For very minor scuffs, the gentler methods mentioned earlier are usually sufficient. If you’re unsure, it’s always best to test any technique on an inconspicuous area first. This helps you get a feel for how the acrylic will react before tackling the main scratch. For items that are particularly valuable or delicate, like a collectible display case, you might consider consulting a professional if you’re not confident in your abilities.
Finishing Touches for a Flawless Surface
Buffing to a High Shine
After you’ve worked out those deeper scratches, it’s time to bring back that original gleam. This is where the real magic happens, transforming your acrylic sheet from ‘repaired’ to ‘perfect’. You’ll want to use a clean, soft microfiber cloth for this. Start with gentle, circular motions, applying just a little bit of pressure. The goal here is to create an even sheen across the entire surface, not just the areas you worked on. If you used a polishing compound earlier, you might want to use a separate, clean cloth for this buffing stage to avoid smearing any residue.
Final Inspection and Cleaning
Once you’ve buffed the entire sheet, take a step back and really look at it under good light. Check for any lingering haziness, swirl marks, or missed spots. Sometimes, what looks like a scratch in certain light is actually just a smudge. A final, light cleaning with a dedicated acrylic cleaner or a mild soap and water solution can help reveal the true finish. Make sure to dry it thoroughly with another clean, lint-free cloth to prevent water spots. A truly flawless surface should look as good as new, with no visible imperfections.
Preventative Measures Against Future Scratches
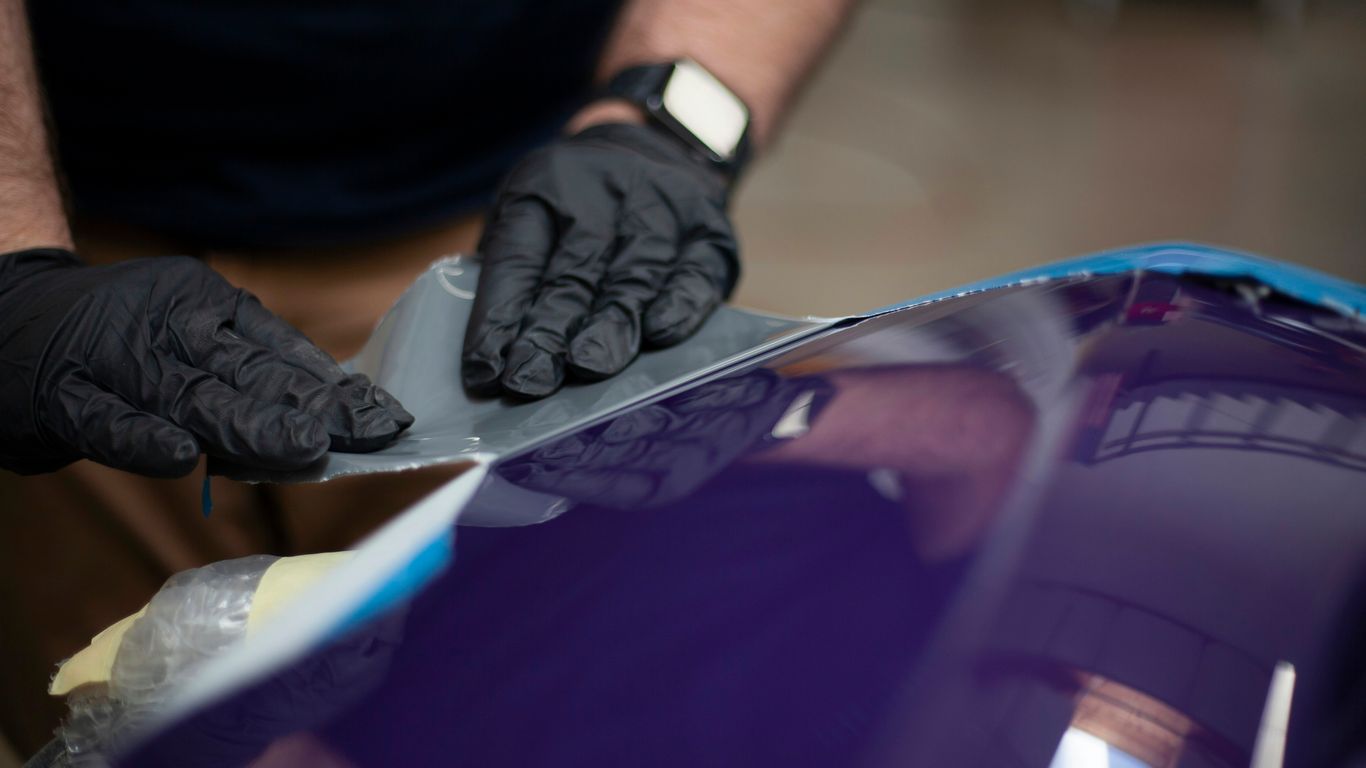
Now that you’ve put in the effort to restore your acrylic, you’ll want to keep it looking its best. Think about how the sheet is used and stored. If it’s part of furniture or a display, consider adding felt pads to the bottom of objects that will rest on it. When cleaning, always use soft cloths and approved acrylic cleaners. Avoid abrasive materials or harsh chemicals at all costs. If you need to stack sheets, always place a protective layer, like a soft cloth or paper, between them. For long-term storage, consider covering the acrylic with its original protective film if available, or a soft, breathable fabric.
- Use only microfiber cloths for cleaning and buffing.
- Always clean in a single direction or in gentle, overlapping circles.
- Store acrylic sheets with protective layers between them to prevent contact scratches.
Taking a little extra care during the cleaning and handling stages can save you a lot of work down the line. It’s much easier to prevent a scratch than to remove one, after all.
Want that super smooth finish? We’ve got the final tips to make your surfaces look perfect. Ready to see the difference? Visit our website for more.
Bringing It All Together
So, there you have it. Fixing those scratches on your acrylic sheets doesn’t have to be a big ordeal. With the right approach and a bit of patience, you can get them looking good as new again. Whether you’re dealing with minor scuffs or slightly deeper marks, these methods should help restore the clarity and shine of your acrylic. Remember to always test any cleaning or polishing compound in an inconspicuous spot first, just to be safe. Happy restoring!
Frequently Asked Questions
What’s the best way to clean acrylic before trying to fix scratches?
Before you start fixing any scratches, it’s super important to get the acrylic really clean. Use a soft cloth and some mild soap mixed with water. Gently wipe the surface to get rid of any dust, dirt, or grease. This stops you from making the scratches worse when you try to buff them out.
Can I really use baking soda to fix scratches on acrylic?
Yes, you can! Baking soda is a mild abrasive that works well for light scratches. Mix baking soda with a little water to make a paste. Gently rub this paste onto the scratch with a soft cloth in a circular motion. Then, wipe it clean and see if the scratch has faded.
What’s the difference between a light scratch and a deep scratch on acrylic?
A light scratch usually just affects the very top layer of the acrylic and might feel smooth to the touch. You can often fix these with simple cleaning or mild polishing. A deep scratch, however, goes further into the plastic and you can usually feel it with your fingernail. These need more careful work, like sanding or special polishing compounds.
Is it safe to use sandpaper on my acrylic sheet?
You can use sandpaper, but you have to be very careful! Always use very fine-grit sandpaper, like 1000 grit or higher. Sand gently in one direction, and make sure to keep the area wet to avoid overheating the acrylic. It’s best to start with the finest grit and only move to slightly coarser grits if absolutely necessary for deeper scratches.
How do I make my acrylic sheet look shiny again after fixing scratches?
After you’ve dealt with the scratches, you’ll want to bring back the shine. Use a clean, soft cloth and buff the area in a circular motion. You can also use a specialized acrylic polish for an extra glossy finish. Make sure the surface is completely clean and dry before you start buffing.
What can I do to stop my acrylic from getting scratched in the future?
To keep your acrylic looking good, avoid using harsh cleaners or rough cloths. Always wipe away dust gently. When you’re not using the acrylic sheet, it’s a good idea to cover it or store it somewhere safe where it won’t get bumped or scratched. Applying a protective film can also help prevent minor scuffs.