So, you’ve got these cool acrylic sheets, maybe for a project or just because. They look great, right? But keeping them looking that way can be a bit tricky. You want them super clear, no smudges, no weird lines. Cleaning acrylic sheets without streaks is the goal, and it’s totally doable if you know a few tricks. This guide will walk you through the best ways to get that perfect, clear finish, making sure your acrylic looks as good as new.
Key Takeaways
- Acrylic sheets are versatile but need gentle cleaning to avoid damage.
- Always start by removing loose dust and dirt to prevent scratching.
- Use mild soap and water with soft microfiber cloths for best results.
- Avoid harsh chemicals, abrasive cleaners, and rough materials like paper towels.
- Drying thoroughly and consistently is vital for a streak-free shine.
Understanding Acrylic Sheets
What Are Acrylic Sheets?
Acrylic sheets, often known by trade names like Plexiglas or Perspex, are a type of plastic that’s become super popular for all sorts of projects. Think of it as a modern alternative to glass, but with some pretty neat advantages. It’s basically a thermoplastic resin, which means it can be molded and shaped.
The main reason people go for acrylic is its clarity and toughness. It’s remarkably clear, letting in a lot of light, and it’s way more resistant to breaking than regular glass. This makes it a safer choice for many applications where glass might be too risky. Plus, it’s lighter, which makes it easier to handle and install.
Key Characteristics of Acrylic
Acrylic plastic has a few standout features that make it a go-to material. For starters, it’s incredibly transparent, often boasting around 92% light transmission, similar to glass. It’s also quite durable and resistant to weather and chemicals, meaning it holds up well both indoors and outdoors.
Here’s a quick rundown of what makes acrylic special:
- Clarity: Offers excellent optical clarity, making it ideal for displays and windows.
- Impact Resistance: Significantly stronger than glass, making it shatter-resistant.
- Lightweight: Easier to transport, handle, and install compared to glass.
- Versatility: Can be cut, drilled, and shaped relatively easily for custom projects.
- Weather Resistance: Stands up well to outdoor conditions without degrading.
While acrylic is tough, it can still get scratched. That’s why knowing how to clean it properly is so important for keeping it looking good over time.
Types of Acrylic Sheets Available
Acrylic isn’t just one-size-fits-all; there are different types available, each suited for specific uses. You’ll find standard clear acrylic, which is your go-to for a glass-like appearance. Then there are colored acrylics, perfect for adding a splash of color to signs or decorative pieces.
Some other common types include:
- Frosted Acrylic: This has a matte finish that diffuses light, offering a bit of privacy and a softer look. It’s great for partitions or shower screens.
- Opal/White Acrylic: This type is opaque and often used for light-sensitive applications or when a solid white look is desired, like in signage or furniture.
- Mirror Acrylic: Offers a reflective surface but is much lighter and less prone to shattering than a glass mirror, making it safer for many installations.
Knowing these differences can help you pick the right sheet for your needs, whether it’s for signage making or something else entirely.
Preparing Your Acrylic Surface for Cleaning
Before you even think about grabbing a cleaning spray, it’s a good idea to get your workspace and supplies ready. This step might seem small, but it really makes a difference in getting that streak-free finish.
Gathering the Right Cleaning Supplies
Having the correct tools on hand is half the battle. You don’t need much, but what you do need is important.
- Mild dish soap: Just a tiny bit mixed with water is usually enough. Avoid anything with harsh degreasers or abrasive additives.
- Clean water: Tap water is fine, but distilled water is even better if you have it, as it has fewer minerals that can leave spots.
- Soft cloths: This is where you can’t skimp. You’ll need at least two, preferably more, of super-soft microfiber cloths. These are designed to pick up dirt without scratching. Think of the ones you use for cleaning eyeglasses or camera lenses.
- A clean bucket or basin: For mixing your cleaning solution.
Removing Loose Debris
Before you start wiping with a wet cloth, it’s important to get rid of any loose bits. Dust, dirt, or small particles can act like sandpaper under your cloth if you’re not careful.
- Gentle dusting: Use a dry, clean microfiber cloth to gently dust the surface. Don’t press hard; just let the cloth lift the dust.
- Compressed air: For hard-to-reach corners or textured surfaces, a can of compressed air can be really helpful to blow away debris without touching the surface.
Choosing a Suitable Cleaning Location
Where you clean your acrylic can also impact the results. You want a spot that lets you work comfortably and see what you’re doing.
- Good lighting: Make sure the area is well-lit so you can spot any missed spots or streaks.
- Stable surface: If the acrylic piece isn’t fixed in place, ensure it’s on a stable, flat surface where it won’t wobble or slide around.
- Avoid direct sunlight: Cleaning in direct sunlight can cause the cleaning solution to dry too quickly, leading to streaks before you can even wipe it off properly.
Taking a few minutes to prepare your supplies and your cleaning area can save you a lot of frustration later on. It sets you up for success in achieving that perfectly clear, streak-free shine on your acrylic.
The Do’s of Cleaning Acrylic Sheets Without Streaks
Keeping your acrylic surfaces looking their best doesn’t have to be a chore. By following a few simple guidelines, you can maintain that crystal-clear finish without the frustration of streaks and smudges. It’s all about using the right approach and materials.
Using Mild Soaps and Water
When it comes to cleaning acrylic, gentleness is key. The best way to start is with a simple solution of warm water and a mild, non-abrasive soap. Think dish soap – the kind you use for your everyday dishes. Mix a small amount of soap into a bucket of water. This mixture is effective enough to lift away dust and light grime without damaging the acrylic’s surface. Always test your cleaning solution on an inconspicuous area first if you’re unsure about how it will react with your specific acrylic product.
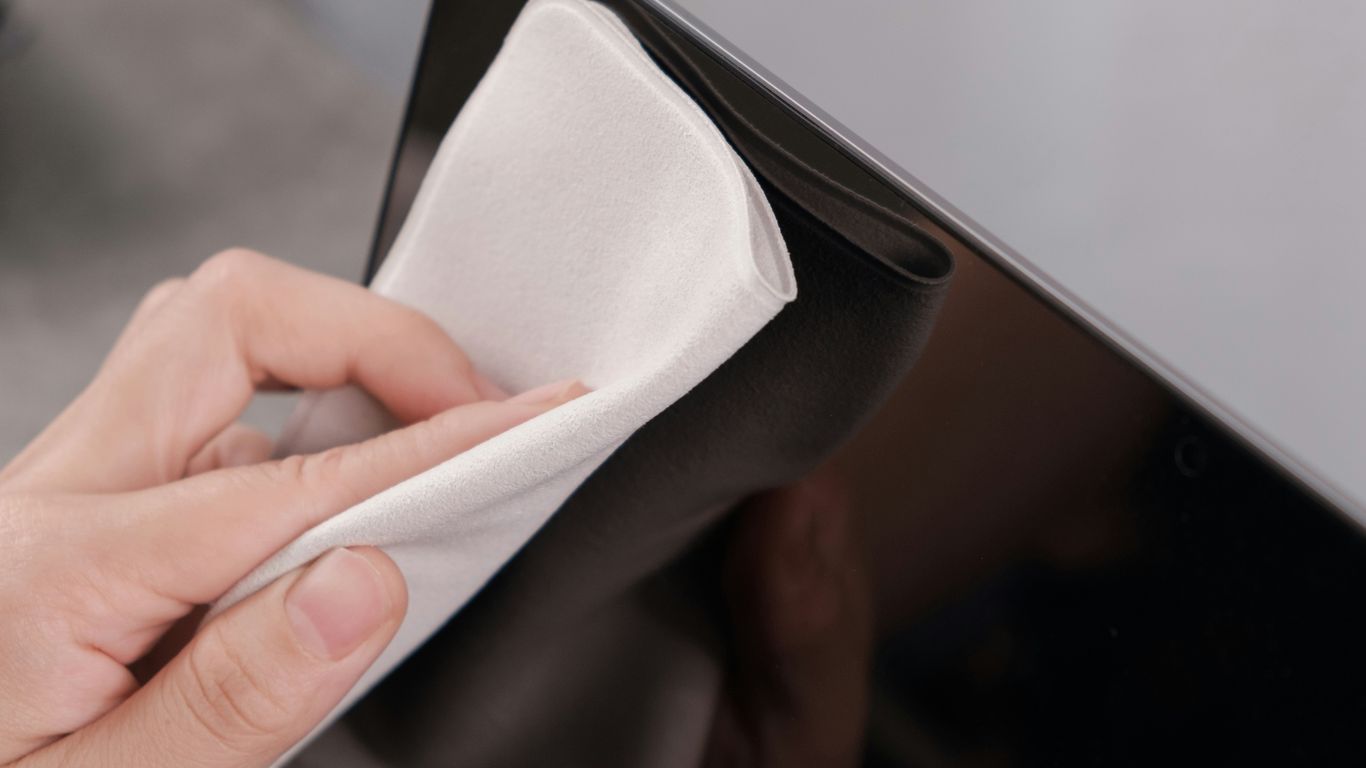
Employing Soft Microfiber Cloths
Your choice of cloth makes a big difference. Microfiber cloths are your best friend when cleaning acrylic. They are designed to be soft and absorbent, which means they can pick up dirt and moisture without scratching the surface. You’ll want at least two cloths: one for washing and one for drying. Avoid using rough sponges, paper towels, or old rags, as these can leave behind fine scratches that dull the finish over time. For larger surfaces, consider using a microfiber mop head designed for delicate surfaces.
Wiping in a Consistent Direction
This might sound a little odd, but how you wipe matters. To avoid creating a hazy appearance or leaving behind faint lines, always wipe in a single, consistent direction. Whether you choose to wipe horizontally or vertically, stick with it. This methodical approach helps to lift dirt evenly and prevents it from being smeared around, which is a common cause of streaky finishes. After washing, use your second, dry microfiber cloth to gently buff the surface in the same consistent direction until it’s completely dry and streak-free. This technique is particularly helpful for large acrylic sheets used in displays or as protective barriers.
The Don’ts of Cleaning Acrylic Sheets
When it comes to cleaning acrylic, it’s easy to accidentally cause damage if you’re not careful. Some common household items and cleaning methods can actually harm the surface, leading to scratches or cloudiness. It’s important to know what to avoid to keep your acrylic looking its best.
Avoiding Abrasive Cleaners and Tools
Never use abrasive cleaners or rough materials on your acrylic surfaces. Think of things like scouring powders, steel wool, or even stiff-bristled brushes. These items can easily scratch the acrylic, and once those scratches are there, they’re pretty tough to get out. Even seemingly gentle scrubbing with the wrong tool can leave tiny marks that dull the shine over time. It’s better to be safe than sorry, so stick to soft materials.
Here’s a quick rundown of what to steer clear of:
- Abrasive Powders: Comet, Ajax, or any powdered cleanser.
- Scrubbing Pads: Steel wool, green scouring pads, or anything with a rough texture.
- Stiff Brushes: Even a dish brush can be too harsh.
- Razor Blades or Knives: Unless you’re an expert and know exactly what you’re doing, avoid sharp objects for scraping.
Steering Clear of Harsh Chemicals
Certain chemicals can react poorly with acrylic, causing it to craze (develop fine cracks) or become permanently discolored. You might think a strong cleaner will get the job done faster, but it’s usually not worth the risk. Always check the label to make sure a cleaner is safe for plastics or acrylic specifically. If you’re unsure, it’s best to avoid it altogether.
Some common culprits to avoid include:
- Ammonia-based cleaners: Like Windex (unless specifically stated as safe for acrylic).
- Solvents: Acetone, paint thinner, or mineral spirits can dissolve or damage the surface.
- Window Cleaners with Ammonia: Many standard glass cleaners contain ammonia, which can harm acrylic.
- Degreasers: Some heavy-duty degreasers can be too aggressive.
It’s a common mistake to treat acrylic like glass. While they might look similar, their chemical compositions are very different, and what works for one can be detrimental to the other. Always err on the side of caution and use products designed for or known to be safe for plastics.
Refraining from Using Paper Towels
While paper towels seem convenient, they can actually cause micro-scratches on the acrylic surface. The fibers in paper towels, especially cheaper varieties, can be surprisingly abrasive when rubbed against the plastic. Over time, this can lead to a hazy appearance. For a truly streak-free and scratch-free finish, always opt for soft, lint-free microfiber cloths. These cloths are specifically designed to clean delicate surfaces without causing damage. You can find good quality microfiber cloths for cleaning various surfaces and they make a big difference in maintaining the clarity of your acrylic items.
Advanced Cleaning Techniques
Addressing Stubborn Marks
Sometimes, regular cleaning just won’t cut it. For those tougher spots, like dried-on paint or adhesive residue, you’ll want to be a bit more strategic. Start by gently scraping with a plastic scraper or a credit card. If that doesn’t work, try a mild solvent like isopropyl alcohol. Apply it to a soft cloth, not directly to the sheet, and rub the mark gently. Always test solvents in an inconspicuous area first to make sure they don’t damage the acrylic. Remember, patience is key here; you don’t want to scrub too hard and risk scratching the surface.
Polishing Out Minor Scratches
It’s almost inevitable that your acrylic sheets will pick up a few minor scratches over time. Don’t panic! Many of these can be buffed out. For very light scratches, a simple polishing compound designed for plastics can work wonders. Apply a small amount to a clean microfiber cloth and rub the scratched area in a circular motion. You might need to repeat this a few times. For deeper scratches, you might need a more specialized acrylic scratch remover kit, which often involves a multi-step process. It’s important to follow the product instructions carefully. You can find these kits at most hardware stores or online. For really deep gouges, professional repair might be your best bet, but for most everyday scuffs, a good polish can make a big difference.
Drying for a Streak-Free Finish
The final step is crucial for that perfect, streak-free look. After washing and rinsing, you need to dry the acrylic properly. The best method is to use a clean, dry microfiber cloth. Gently wipe the surface, again using consistent, overlapping strokes. Avoid letting the water air dry, as this is a common cause of water spots and streaks. If you notice any remaining moisture or faint lines, a quick buff with a dry section of the cloth should clear them up. The goal is to remove all moisture without leaving any residue behind.
Here’s a quick rundown of what to keep in mind:
- Stubborn Marks: Use plastic scrapers or mild solvents like isopropyl alcohol. Always test first.
- Minor Scratches: Try plastic polishing compounds or specialized scratch remover kits.
- Drying: Always use a clean, dry microfiber cloth to prevent water spots and streaks.
Taking these extra steps can really make your acrylic surfaces look like new again. It’s all about using the right techniques and materials to avoid causing more harm than good.
Maintaining Your Clean Acrylic Surfaces
Keeping your acrylic surfaces looking their best after a good cleaning is all about a little bit of regular attention. It’s not complicated, but doing it right means your acrylic will stay clear and scratch-free for a long time. Think of it like taking care of any nice surface in your home; a little effort goes a long way.
Regular Dusting Practices
Dust is the enemy of clear surfaces. It settles in and can become abrasive if you’re not careful when you wipe it away. The best way to handle everyday dust is with a dry, soft microfiber cloth. Just a gentle sweep across the surface is usually enough to lift the dust particles without scratching.
- Always use a dry microfiber cloth for dusting. This is the most important rule.
- Dust frequently, ideally every few days, especially in high-traffic areas.
- If the dust is a bit more stubborn, you can slightly dampen the cloth, but make sure to dry the surface immediately afterward.
Protective Measures Against Scratches
Scratches happen, but you can take steps to prevent them. It’s mostly about being mindful of what comes into contact with your acrylic.
- Avoid placing rough or abrasive objects directly on the acrylic surface. This includes things like ceramic pots, metal tools, or even rough-backed picture frames.
- When moving items across the surface, lift them instead of dragging them.
- Consider using felt pads on the bottom of objects that will be placed on acrylic, especially furniture or decorative items.
Being aware of potential scratch hazards is key. Even seemingly harmless items can cause micro-scratches over time, dulling the finish. It’s better to be a little cautious than to deal with permanent damage later.
Long-Term Care for Clarity
For the long haul, consistent care is what keeps acrylic looking new. This means sticking to good cleaning habits and being mindful of environmental factors.
- Periodically re-clean your acrylic surfaces using the mild soap and water method described earlier in the article. This removes any buildup that regular dusting might miss.
- Protect acrylic from extreme heat, as it can warp or discolor. While it has good weather resistance, prolonged direct sunlight can sometimes affect certain types of acrylic over many years.
- When storing acrylic sheets or items, ensure they are protected from dust and physical damage. Using soft microfiber cloths for wrapping can help prevent scratches during storage.
By following these simple maintenance tips, you can ensure your acrylic surfaces remain clear, bright, and free from damage for years to come. It’s about gentle handling and consistent, proper care. Remember, a little bit of preventative action can save a lot of trouble down the line, and keeping your acrylic looking its best is easier than you might think if you follow the right steps.
Keeping your acrylic surfaces looking great is simple! A gentle wipe with a soft cloth and a mild cleaner is usually all it takes to remove dust and smudges. Avoid harsh chemicals or abrasive materials, as they can scratch the surface. For tougher spots, a specialized acrylic cleaner can work wonders. Want to learn more about keeping your acrylic looking its best? Visit our website for detailed guides and product recommendations!
Wrapping Up
So, keeping your acrylic sheets looking good really comes down to a few simple things. Avoid harsh chemicals and abrasive scrubbers, and always go with a soft cloth. A little bit of gentle cleaning goes a long way in preventing those annoying streaks and scratches. By following these tips, you can keep your acrylic looking clear and new for a long time, no matter what you’re using it for.
Frequently Asked Questions
What’s the best way to clean acrylic sheets without leaving streaks?
To get a streak-free shine, always use a soft microfiber cloth. Gently wipe the acrylic surface in one direction, like from top to bottom or side to side. Avoid scrubbing back and forth, which can cause streaks.
Are there any cleaning products I should absolutely avoid using on acrylic?
Yes, definitely! Never use rough sponges, abrasive cleaners, or paper towels. These can easily scratch the surface of acrylic. Also, steer clear of harsh chemicals like ammonia or window cleaners with ammonia, as they can damage the plastic.
What kind of soap is safe for cleaning acrylic?
Mild dish soap mixed with warm water is your best friend for cleaning acrylic. It’s gentle enough not to harm the surface but strong enough to cut through most everyday dirt and grime.
How can I remove stubborn marks or smudges from acrylic?
For tougher spots, try a paste made from baking soda and water. Gently rub the paste onto the mark with a soft cloth. Rinse thoroughly and dry with a microfiber cloth. For really tough grime, a plastic cleaner specifically designed for acrylic might be needed.
Can I use regular window cleaner on my acrylic sheets?
It’s best not to. Many common window cleaners contain ammonia or other strong chemicals that can cloud or damage acrylic over time. Stick to mild soap and water or specialized acrylic cleaners for the best results.
What’s the secret to drying acrylic without streaks?
The key is to use a clean, dry microfiber cloth. After washing, gently pat or wipe the surface dry in a single direction. You can also let it air dry in a dust-free area, but a final wipe with a microfiber cloth ensures that no water spots are left behind.