Creating your own acrylic display case can seem like a big project, but breaking it down makes it manageable. Here are the main things to remember to get a great result.
Key Takeaways
- Gather the right materials like clear acrylic sheets and special solvent cement, and have the correct tools ready before you start.
- Plan your design carefully by deciding what you’ll display and measuring everything precisely.
- Use the right methods for cutting acrylic to get clean edges, and take your time sanding and polishing for a smooth finish.
- Assemble the case using solvent cement for strong bonds, making sure all the pieces fit together squarely.
- Add extras like hinges, shelves, or locks to make your case more functional and attractive.
Gathering Your Materials And Tools

Before you start cutting and assembling, it’s important to get all your supplies together. Having everything ready beforehand makes the whole process go much smoother. You don’t want to be halfway through a step and realize you’re missing something vital.
Essential Materials For Your Acrylic Case
The main ingredient, of course, is the acrylic sheet itself. You’ll want to pick a thickness that suits the size and purpose of your case. For smaller, lighter items, a thinner sheet might be fine, but for larger displays or if you plan to add a lock, you’ll need something more substantial. You can find acrylic sheets in various thicknesses, often starting around 2-3 mm for small projects and going up to 4-5 mm or more for bigger builds. It’s also good to think about the type of acrylic; standard clear acrylic is common, but tinted or frosted options can add a unique look.
Beyond the acrylic panels, you’ll need a few other things:
- Solvent Cement: This isn’t your average glue. Solvent cement actually melts the edges of the acrylic slightly, creating a strong, permanent bond when they fuse together. It’s what gives your case that seamless, professional finish.
- Painter’s Tape: This is super useful for protecting the edges of your acrylic sheets while you’re cutting or handling them, and it helps prevent scratches.
- Optional Add-ons: Depending on your design, you might need hinges for a door, small shelves or supports, and maybe even some LED strip lights to really make your collectibles pop.
Tools For Precise Acrylic Work
Working with acrylic requires specific tools to get clean cuts and smooth edges. Trying to force standard tools can lead to cracks or a messy finish. Having the right tools makes all the difference.
Here’s a basic rundown of what you’ll likely need:
- Measuring Tools: A reliable tape measure, a ruler, and a carpenter’s square are key for marking accurate cut lines. A caliper can be handy for precise measurements.
- Cutting Tools: A fine-tooth saw, like a hand saw with many teeth per inch or a jigsaw with a fine-tooth blade, works well for straight cuts. For more advanced projects, a laser cutter or a CNC machine can provide extremely precise results.
- Sanding and Polishing Supplies: Sanding blocks with various grits of sandpaper (from coarse to very fine) are needed to smooth the edges after cutting. A polishing kit or buffing wheel will give those edges a crystal-clear, professional shine.
- Clamps: These are invaluable for holding pieces together securely while the solvent cement cures. You’ll want a few different sizes.
Prioritizing Safety During Construction
Working with tools and chemicals always comes with some risks, so it’s smart to prepare. You don’t want to end up with a cut or a chemical burn when you’re just trying to build a nice display. Think of safety gear as part of your material list.
- Eye Protection: Always wear safety glasses or goggles to protect your eyes from plastic dust or flying debris.
- Gloves: Nitrile or chemical-resistant gloves are a good idea when working with solvent cement to protect your skin.
- Respiratory Protection: A mask can help prevent you from inhaling acrylic dust during sanding or fumes from the solvent cement.
Working in a well-ventilated area is also a good practice, especially when using solvent cement. Open windows or use a fan to keep the air circulating. This helps dissipate fumes and keeps your workspace more comfortable.
Getting these materials and tools ready is the first step toward building a fantastic display case for your treasures. It might seem like a lot, but being prepared upfront saves a lot of hassle later on. You can find many of these supplies at your local hardware store or online retailers specializing in plastic sheets.
Designing Your Custom Acrylic Display
Design is where your acrylic display case goes from just a box to something that actually fits your space and makes your collectibles look their best. Don’t skip this part, because planning now saves a lot of headaches and wasted material later. Let’s break down how to sort out the look and size of your case so it’s unique, useful, and just right for what you’re displaying.
Defining The Purpose Of Your Display Case
Before you get out your ruler, think about the why. Are you showing off action figures, a single model plane, or something else? Your case needs to protect and highlight these specific items. Here’s what to consider:
- Type of collectibles: Fragile items may need more space and padding, while books or flat objects need less depth.
- Display location: Wall-mounted, cabinet, or tabletop—knowing this will steer your dimension choices.
- Access needs: Will you need frequent access (for dusting or changing items)? If so, plan for removable panels or a front-opening design.
It’s smart to actually list out what you want to display, including their sizes. That way, nothing gets left out or cramped.
Determining The Ideal Dimensions
Measuring is the most important step. Get this wrong, and nothing else will fit right! Here’s a simple way to nail down your measurements:
- Measure every item you want to display—height, width, and depth.
- Add at least 1-2 inches of clearance around each item (more for bulkier collectibles).
- Decide how many shelves or rows you want, based on the number of pieces.
- Consider door or lid clearance if you want easy access.
Here’s a handy example table for keeping things organized:
| Item | Height (inches) | Width (inches) | Depth (inches) |
|---|---|---|---|
| Diecast car | 3.0 | 7.0 | 2.5 |
| Action figure | 6.5 | 2.2 | 2.0 |
| Miniature house | 4.5 | 5.0 | 4.0 |
Always measure twice and plan your layout on paper before cutting anything. This will help you avoid costly mistakes later on.
Sketching Your Display Case Blueprint
Once you know what the case needs to hold and where it’s going, sketch the design on paper (or use a basic computer drawing tool). Don’t worry if your sketches are a bit messy—the goal is to work out the sizes and proportions before moving to construction.
Important things to include in your blueprint:
- Shape and layout: Rectangle, cube, or something a bit different.
- Number and placement of shelves or dividers.
- Opening mechanism (lid, door, or removable panel).
- Notes on hardware, like hinges or locks, if you want them.
Your sketch becomes a visual guide that makes the cutting and assembling go much smoother. You can take inspiration from custom acrylic display options in various commercial settings if you want more unique layouts or functions.
Taking your time with the design means your final case will fit your collectibles perfectly and actually look good in your space. Planning carefully now saves you time (and headaches) later on.
Cutting Acrylic Sheets With Precision
Getting your acrylic sheets cut to the exact size is a really important step. The cleaner and more accurate your cuts are, the easier the rest of the assembly will be, and the better your final display case will look. It might seem straightforward, but there’s a knack to it. Let’s get into how to make sure your cuts are spot on.
Choosing The Right Cutting Method
The best way to cut acrylic really depends on the thickness of your sheet and the type of cut you need to make. For thinner sheets, like 1/8 inch, you might get away with a scoring knife. You score a line repeatedly with firm pressure and then carefully snap the sheet along the score. It’s a bit like cutting thick cardstock. For thicker sheets, or if you need a really long, straight cut, you’ll want to use a power saw. A circular saw or a table saw works well here. The key is using a blade specifically designed for cutting plastic. A fine-toothed blade meant for acrylic will prevent chipping and melting. If you happen to have access to a laser cutter, that’s the gold standard for precision and clean edges, but it’s not usually practical for most home projects. For most DIYers, a circular saw with the right blade is a solid choice for getting those straight cuts.
Techniques For Clean Acrylic Cuts
Once you’ve picked your tool, how you use it matters a lot. First, always mark your cut line clearly with a fine-tip marker. Then, apply a strip of painter’s tape along the line. This helps reduce chipping. When you’re cutting, go slow. Rushing creates heat, and heat can melt or warp the acrylic, leading to a messy edge. Let the saw do the work; don’t force it. You want a steady, consistent speed. If you’re making a long cut, it’s a good idea to support the acrylic sheet well on both sides of the cut line. This prevents the sheet from flexing or vibrating, which can cause cracks. A good setup might involve placing the acrylic on some scrap wood to keep it stable and off your workbench. Remember, patience is your best friend here. A slow, controlled cut will always look better than a fast, jagged one.
Managing Acrylic Sheets During Cutting
Handling acrylic sheets properly during cutting is just as vital as the cutting itself. Before you start, make sure your work surface is clean and flat. You don’t want any grit getting under the sheet and causing issues. Support the sheet fully, especially if it’s large. You can use sawhorses or a workbench with some sacrificial boards underneath. This prevents the sheet from bowing or snapping under its own weight or the pressure of the saw. If you’re using a circular saw, consider using a guide or fence to keep your cut perfectly straight. This is where those measuring tools you gathered come in handy. After cutting, don’t immediately peel off all the protective film if it has one. Sometimes leaving it on until assembly can help prevent scratches. Label each piece clearly with a marker so you know exactly what goes where when it’s time to put your case together. Store the cut pieces flat on a soft surface, like a blanket or foam board, to avoid any accidental damage before assembly.
Achieving Smooth Acrylic Edges
So, you’ve got your acrylic panels cut, but those edges might be a bit rough. Nobody wants a display case with sharp edges, right? Getting them smooth and clear makes a huge difference in how professional your project looks. It’s not super complicated, but it does take a bit of patience and the right approach.
Sanding Techniques For Acrylic
Sanding is your first step to getting those edges looking good. You’ll want to start with a coarser grit sandpaper and work your way up to finer ones. This process removes any burrs or unevenness left from cutting and starts to make the edge clearer.
- Start with 220-grit sandpaper: This grit is good for knocking down any high spots or rough bits.
- Move to finer grits: Progress through grits like 400, 600, and even 800. Each finer grit removes the scratches left by the one before it.
- Use steady pressure: Don’t press too hard. Light, even pressure is key to avoid creating new marks.
- Sand in one direction: Avoid going in circles. Straight, consistent strokes work best.
Keeping your sandpaper flat against a sanding block can give you more control, especially on longer edges. It helps keep things even.
Polishing Acrylic For A Professional Finish
After sanding, the edges will be smooth but might look a bit dull or hazy. Polishing is what brings out that crystal-clear, glass-like finish. If you’re looking for professional results, consider edge polishing services.
- Use a polishing wheel: If you have a rotary tool, a buffing wheel designed for plastics can give you a consistent, high-gloss shine. Go slow and don’t let it get too hot.
- Choose the right compound: Make sure you’re using a polishing compound made specifically for acrylic. The wrong kind can damage the surface.
- Manual polishing: For smaller areas or if you don’t have power tools, you can use a soft microfiber cloth and a mild acrylic polish. Work in steady, circular motions until you get the desired shine.
Tools For Edge Smoothing And Buffing
Having the right tools makes the job much easier. For sanding, you’ll want sandpaper in various grits. A sanding block can be helpful for keeping your strokes even. When it comes to polishing, a rotary tool with a buffing wheel attachment is great for larger projects. For smaller touch-ups or if you prefer not to use power tools, a good quality microfiber cloth and an acrylic polishing compound will do the trick. Remember to keep things cool; overheating can cloud the acrylic, so take breaks as needed. Working in a clean, dust-free area is also important to prevent scratches. If you’re unsure about the process, practicing on scrap pieces first is always a good idea, much like how cybersecurity experts practice before real-world scenarios.
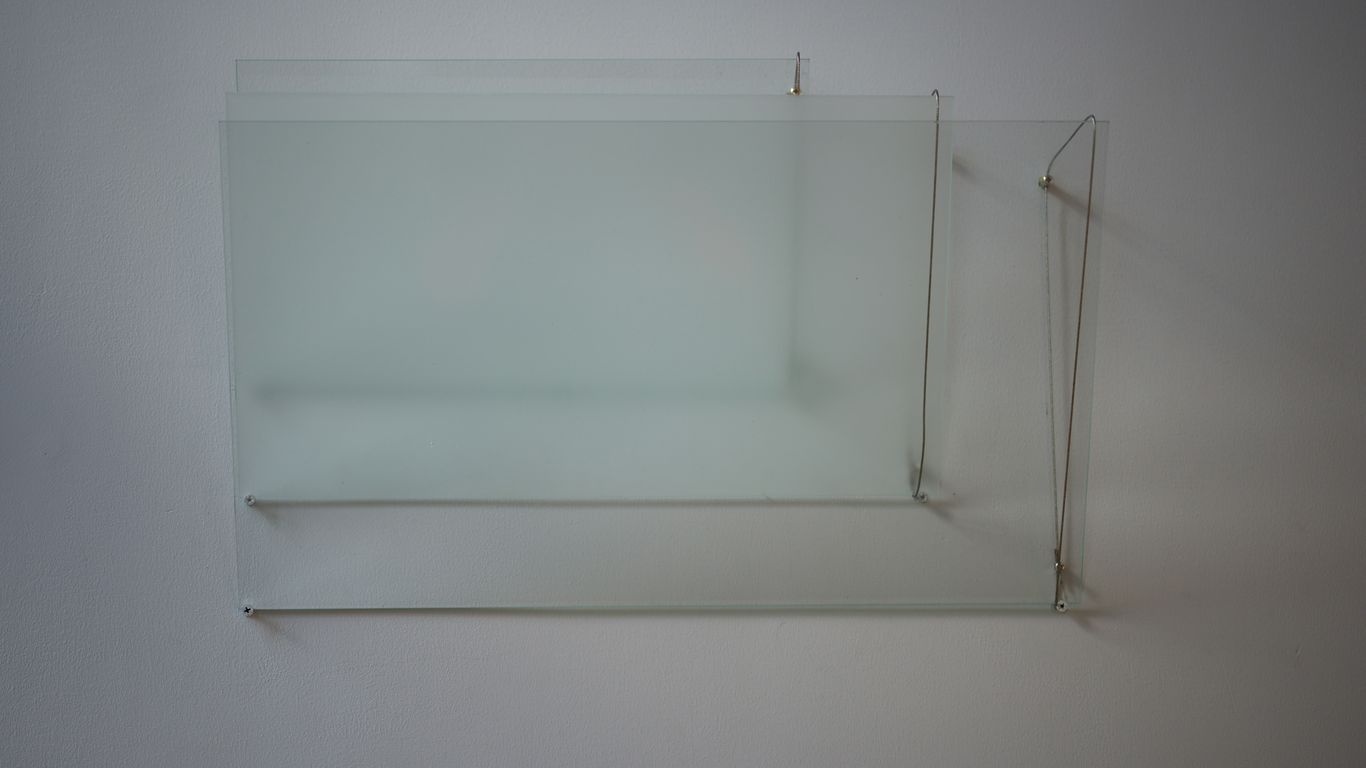
Assembling Your Acrylic Display Case
Alright, so you’ve got your acrylic panels cut perfectly, and those edges are looking smooth and ready. Now comes the part where it all comes together – literally. Assembling your display case is where your project really starts to look like something special. It’s not super complicated, but you do need to be careful. Rushing this step can undo all the good work you’ve done so far.
Using Solvent Cement For Strong Bonds
Forget your typical craft glue. For acrylic, you need solvent cement. This stuff is pretty neat because it doesn’t just stick things together; it actually melts the edges of the acrylic slightly, creating a molecular bond. When it dries, the two pieces become one solid piece of acrylic. It’s pretty strong stuff, but it does mean you need to be precise. Once it’s bonded, it’s bonded.
- Apply the cement sparingly: Too much can ooze out and make a mess.
- Work in a well-ventilated area: The fumes can be strong.
- Use a syringe or applicator: This helps control where the cement goes.
A dry fit before applying any cement is a really good idea. It lets you check that everything lines up just right before it’s too late to make changes. It’s like a practice run for the real thing.
Securing Panels During Assembly
Once you’ve applied the solvent cement, you need to hold the panels in place while the bond sets. This is where clamps and jigs come in handy. You don’t want the pieces shifting around, or you’ll end up with a crooked case or a weak seam. You can use specialized acrylic clamps, or even just painter’s tape in some cases to hold things steady. For larger cases, you might need something a bit more robust, like corner braces or even a helping hand from a friend. If you’re building a custom-sized case, check out options for ready-to-assemble display cases that come with hardware to make this part easier.
Ensuring Squareness And Stability
As you’re joining the panels, keep an eye on whether everything is staying square. Use a carpenter’s square to check your corners. If your case isn’t square, it won’t just look off; it might not be as stable as it should be. For bigger projects, or if you’re adding shelves, you might need to think about reinforcements. Small triangular pieces, called gussets, can be glued into the inside corners for extra strength. This is especially important if your case is going to hold heavier items. Watching a tutorial on assembling an acrylic display case can also give you some visual tips on how to keep things stable during the process.
Enhancing Your Acrylic Display Case
So, your acrylic display case is all put together, and it looks pretty good, right? But why stop there? This is where you can really make it shine and turn a simple box into something special for your collectibles. Think of it as adding the finishing touches that make your display pop.
Installing Hinges For Access
Adding hinges to your case is a game-changer for accessibility. It means you can easily open the case to rearrange items or give them a good dusting without having to take the whole thing apart. You’ve got a couple of main options here:
- Piano Hinges: These run the full length of the door, giving a really clean, continuous look. They’re strong and distribute weight evenly.
- Acrylic Hinges: These are designed to blend in more, almost disappearing into the acrylic itself. They offer a very minimalist aesthetic.
When you’re installing them, remember to measure carefully. A small gap between the door and the case is important so it doesn’t bind when you open or close it. Getting this right makes the case feel much more professional. You can find ready-to-assemble cases that come with these features already considered.
Incorporating Shelving For Organization
Shelves are great for more than just holding things. They add depth and allow you to arrange your items in a more dynamic way. You can use clear acrylic shelves for a seamless look, or maybe try tinted or frosted shelves to create different visual effects. Planning the spacing of your shelves is key, especially if you have items of varying heights. You don’t want anything to feel cramped.
Adding A Lock Or Latch For Security
If your collectibles are particularly valuable or if the case will be in a shared space, adding a lock or latch is a smart move. It keeps your items safe and gives you peace of mind. There are many types available, from simple magnetic catches to more robust keyed locks. Choosing one that fits the style of your case will make it look even better.
Adding these functional elements not only makes your display case more practical but also significantly boosts its overall appearance. It’s about making sure your case is as impressive as the items it holds.
Adding Functional And Aesthetic Enhancements

Your acrylic display case is fully assembled, and the hard part is behind you—but why stop at “done” when you can aim for “wow”? This is your chance to transform a functional case into a head-turning centrepiece. By adding thoughtful enhancements, you can create a display that’s as stunning as the treasures inside. Let’s explore how to level up your project with flair and function.
Installing Hinges For Access
A hinged door is the ultimate convenience for display cases. It makes it easy to rearrange items or examine them closer, and it adds a polished, professional touch.
- Piano Hinges: Run the full length of the door for a sleek, continuous look.
- Acrylic Hinges: Blend right into the design, almost disappearing.
Installation Tips:
- Measure Twice: Double-check alignment to ensure your door opens and closes smoothly.
- Leave a Gap: A small clearance between the door and the case prevents binding.
Adding a lock or latch is a great way to keep your items secure, especially if the case is in a public or high-traffic space. Now your display is both accessible and secure—practicality never looked so good.
Incorporating Shelving For Organization
Shelves don’t just add storage; they create visual depth and allow you to arrange your collection in a more dynamic way. You can use clear acrylic shelves for a minimalist look, or opt for tinted or frosted shelves to add a pop of color or subtle privacy.
Consider the spacing between shelves carefully. You want enough room for your items without making the case look cluttered. Planning shelf placement based on item dimensions is key to a clean look.
Proper shelf placement can make a significant difference in how your collection is perceived. It guides the viewer’s eye and can highlight specific pieces.
Adding A Lock Or Latch For Security
For valuable items or displays in shared spaces, a lock or latch provides peace of mind. Simple latches can be purely decorative, while keyed locks offer a higher level of security. Ensure the hardware you choose complements the overall style of your case. You can find a variety of decorative hardware options that will match your aesthetic.
By adding hinges, shelves, lighting, and custom details, you’ve turned your DIY project into a gallery-worthy masterpiece. All that’s left is to unveil it to the world and soak up the compliments. You’ve earned it—now go show off that stunning display!
Customizing Your Acrylic Display Case
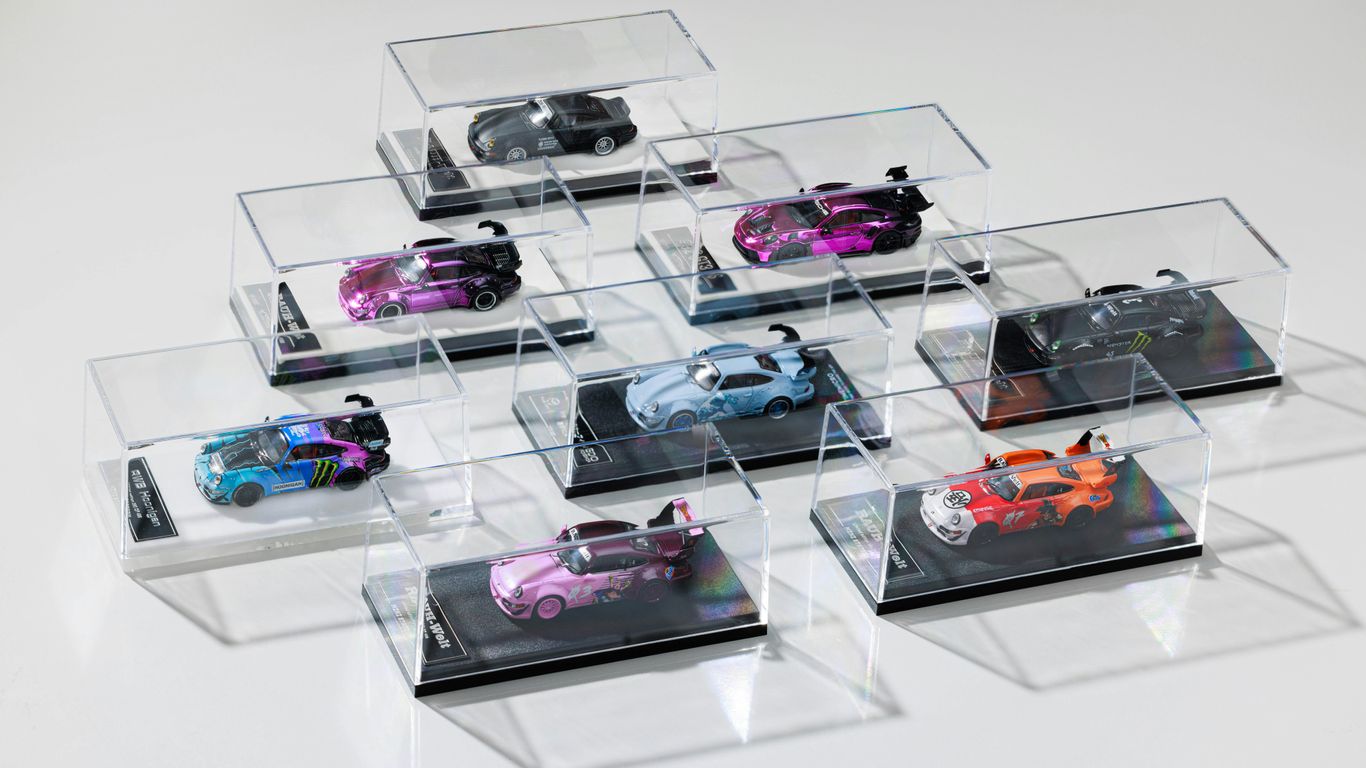
Now that your acrylic display case is built and looking sharp, it’s time to make it truly yours. This is where you can add those special touches that turn a good display into a great one. Think of it as giving your case a personality that matches what’s inside.
Exploring Tinted Or Frosted Acrylic Options
Sometimes, a clear case is just too… clear. You might want to add a bit of mystery or a specific mood. Tinted acrylic can give your display a sophisticated look, like a high-end boutique. It can help reduce glare too, which is nice if your case is in a sunny spot. Frosted acrylic, on the other hand, offers a softer, more diffused look. It’s great for hiding the background clutter behind your items and focusing all attention on the display itself. You can even get panels that are frosted on one side and clear on the other for a cool effect. It’s a simple change that makes a big difference in how your collection is perceived.
Adding Engravings Or Custom Graphics
Want to add your name, a logo, or a special message? Engraving is a fantastic way to do it. You can have initials etched directly onto the acrylic, or maybe a small plaque with the name of the item inside. This makes the case feel really personal and professional. If you’re feeling more artistic, you could even consider custom graphics. Think about adding a subtle pattern to the back panel or a border around the edges. It’s a way to add visual interest without taking away from the main display. For a really polished look, consider getting custom graphics applied professionally.
Incorporating Unique Shapes And Forms
Who says display cases have to be simple boxes? You can get creative with the shape of your case. Maybe you need a specific size that isn’t standard, or perhaps you want something more eye-catching. You could design a case with angled sides, a curved top, or even a multi-tiered setup. For smaller items, cube-shaped cases can look really neat, especially when grouped together. Wall-mounted cases are another option if you want to save space and add a decorative element to your room. The possibilities are pretty wide open when you’re working with acrylic, as it can be shaped and formed in many ways. It’s all about finding a form that best suits your collection and your space. You can find some great examples of custom-sized cases that might spark some ideas.
Maintaining Your Acrylic Display Case
Acrylic display cases make collectibles look sharp, but keeping them sparkling can be a little more involved than just wiping them down once in a while. Regular upkeep helps your case stay as clear as the day you built it—and keeps those prized items safe and on show.
Cleaning Acrylic Surfaces Properly
Dust and grime can quickly dull the look of your acrylic display. Here’s how to keep things spotless with less hassle:
- Always start with a dry microfiber cloth—this is the safest for lifting dust without scratching the surface.
- For more stubborn fingerprints or dirt, mix lukewarm water with a drop of mild dish soap. Dip your cloth into the soapy water, wring it out well, and gently wipe the acrylic.
- Avoid spraying cleaners directly on the case; instead, apply cleaning solution to the cloth, then wipe. This stops any liquid from seeping into the case seams.
- Skip ammonia-based or abrasive cleaners, which can cause hazing and damage over time.
If you’re not sure where to start, you might find simple tips on proper display case maintenance handy for safe cleaning.
Protecting Against Scratches And Damage
Acrylic is tougher than glass but still prone to marks from sharp or rough objects. Keeping scratches to a minimum means paying attention to how you use and move the case.
- Use only soft cloths, never paper towels or brushes, for cleaning.
- If you spot a scratch, you can often buff out small marks with acrylic-safe polish and a clean microfiber cloth.
- Deeper scratches may need sanding, starting with fine-grit sandpaper and working up to a polish for clarity.
- When transporting or rearranging your case, wrap it in a soft towel or padding to prevent accidental scuffs.
Here’s a quick comparison table for treating different levels of scratches:
| Scratch Depth | What to Use | Steps |
|---|---|---|
| Light | Acrylic polish, cloth | Buff gently, small circles |
| Moderate | Fine-grit sandpaper | Sand lightly, then polish |
| Deep | Sandpaper (400-1200 grit) | Progress from coarse to fine polish |
Long-Term Care For Clarity
Long-term care keeps your acrylic case looking good for years. These steps are easy but they make a difference:
- Keep your display out of direct sunlight, which can cause yellowing and weaken adhesives.
- Inspect hinges and joints every few months; tighten or reapply solvent cement if seams start to separate.
- Check any lighting features, ensuring wires or LED strips are secure and dust-free.
- If you’re storing the case or moving it, cushion it well to avoid cracks.
Sometimes it’s the small routines—like a quick weekly dust or a careful inspection—that keep acrylic as clear as new, without much extra effort.
For more details on gentle cleaning and ongoing upkeep, these display case care instructions explain how to avoid accidental scratches or cloudiness for the long haul.
Keeping your acrylic display case looking clean is quick and easy. Use a soft cloth and mild soap—no harsh cleaners! If you ever have questions or need help, visit our website to learn more or reach out for support.
Conclusion: From Panels to Perfection
Assembling your acrylic display case is the moment when all your effort starts to shine. Watching those seams disappear into crystal-clear joints is so satisfying. Standing back and admiring your perfectly aligned, polished case, you can feel the pride bubbling up. With the structure complete, you’re ready for the finishing touches—lighting, shelves, and that all-important personal flair. Get ready to show off your collection in style. Let’s finish this masterpiece strong!
Frequently Asked Questions
What’s the best way to cut acrylic sheets for a display case?
You can use a fine-tooth saw for straight cuts, or if you have access to one, a laser cutter gives very clean edges. It’s important to go slow and steady to avoid cracking or chipping the acrylic. Always follow the protective film’s scoring line if you’re using a scoring tool.
How do I make the edges of the acrylic smooth and shiny?
After cutting, you’ll need to sand the edges. Start with a coarser grit sandpaper and move to finer grits until the edge feels smooth. Then, use a polishing kit or a buffing wheel with a plastic polish to get a really clear, shiny finish. It takes a bit of elbow grease!
What kind of glue should I use for acrylic?
You can’t just use any old glue. You need a special ‘solvent cement’ made for acrylic. This stuff actually melts the edges of the acrylic together, creating a super strong, clear bond. Regular glues won’t work and might even damage the plastic.
Is it hard to assemble an acrylic display case?
It can be tricky if you rush, but if you follow the steps carefully, it’s totally doable. The hardest parts are usually getting perfectly straight cuts and making sure the pieces join up squarely. Patience is key!
How do I protect my collectibles inside the case?
Acrylic cases offer good protection from dust and general handling. If your items are sensitive to light, look for acrylic that offers UV protection. You can also add padding or custom inserts inside the case to keep delicate items from moving around.
Can I add shelves or doors to my acrylic case?
Absolutely! You can add shelves by gluing small supports inside the case. For doors, you can attach hinges, just like you would on a cabinet. Make sure to measure carefully so the door opens and closes smoothly.
How do I clean an acrylic display case without scratching it?
The best way is to use a soft microfiber cloth and a mild soap with water. Avoid paper towels or rough cloths, as they can scratch the surface. Never use ammonia-based cleaners, as they can damage acrylic.
What are the benefits of using acrylic instead of glass for a display case?
Acrylic is much lighter than glass, making it easier to handle and move. It’s also way more impact-resistant, meaning it’s less likely to break if dropped. Plus, it’s clearer than most glass and doesn’t yellow over time, so your items will always look bright.