Getting a clean cut on acrylic doesn’t have to be tricky. Keep these main points in mind to avoid problems like cracking or melting.
Key Takeaways
- Always keep the protective film on the acrylic or use masking tape to prevent scratches and guide your cut.
- Make sure the entire sheet is supported on a flat surface to stop it from bending or vibrating, which can cause cracks.
- Use sharp blades designed for plastic or fine-tooth blades. Avoid aggressive blades that create too much heat or force.
- Cut slowly and steadily, letting the tool do the work. Forcing the cut creates heat and can lead to melting or cracking.
- After cutting, smooth any rough edges with sandpaper for a clean and safe finish.
Preparing Your Acrylic For Cutting
Before you even think about making a cut, taking a few minutes to prep your acrylic sheet can save you a lot of trouble later on. It’s all about setting yourself up for success and avoiding those frustrating cracks or rough edges. Think of it like getting your workspace ready before you start a big project – it just makes everything go smoother.
Maintaining Surface Protection During Cutting
Most acrylic sheets come with a protective film on both sides. It’s tempting to peel it all off right away, but it’s actually a good idea to leave it on as much as possible while you’re cutting. This film acts as a shield against scratches and scuffs that can happen when your tools or the material itself moves around. If you do need a clearer view along your cut line, you can carefully apply masking tape along the edge. This tape gives you a visible guide and helps keep the surface pristine. Keeping that protective layer on is key to a clean finish.
Ensuring Full Sheet Support
Acrylic doesn’t like to flex or bend, especially when you’re cutting it. If the sheet isn’t fully supported, it can easily crack or chip. When you’re cutting, make sure the entire piece is resting on a flat, stable surface. This could be a workbench, sawhorses, or even a large piece of plywood. Avoid letting the part you’re cutting hang off the edge of your table. Proper support minimizes vibration and prevents the material from bowing, which are common causes of unwanted breaks. For larger panels, you might need to get creative with supports to make sure the whole sheet is stable throughout the cutting process.
Marking Your Cut Line Accurately
Getting your cut line right the first time is pretty important. Use a fine-tip marker or a pencil that won’t scratch the surface. If you’re using the protective film, you can often mark directly on it. For really straight cuts, a metal ruler or a straight edge clamped firmly to the acrylic is your best friend. This guide will help you keep your marking tool steady and ensure your line is exactly where you want it. Remember, precision here means less cleanup and fewer mistakes down the line. If you’re using a laser cutter, you might need to apply a special film to the surface to help the laser beam cut cleanly, preventing melting.
Proper preparation is more than just a step; it’s the foundation for a successful acrylic cutting project. Taking the time to protect surfaces, support the material fully, and mark lines precisely will significantly reduce the risk of errors and improve the final outcome.
Choosing the Right Cutting Tools
Picking the correct tool for cutting acrylic is pretty important. It’s not just about having something sharp; it’s about matching the tool to the thickness of the acrylic and the kind of cut you need to make. Using the wrong tool can lead to a lot of frustration, like cracked edges or a messy finish.
Selecting Appropriate Blades for Acrylic
When you’re using a saw, the blade makes a big difference. For acrylic, you generally want a blade with a fine tooth pitch. Think of blades designed for cutting metal; they often work well. Avoid blades with fewer teeth, like those for rough wood cutting. Those can grab the acrylic, causing chips or even melting. A blade with too many teeth can also cause issues if it’s not designed for plastics. The goal is a blade that cuts cleanly without excessive heat or force.
Here’s a quick rundown:
- Fine-tooth blades: Best for most acrylic cutting. Look for blades with 60-80 teeth per inch (TPI) for circular saws, or specialized plastic-cutting blades.
- Metal-cutting blades: Often a good substitute if you can’t find specific acrylic blades.
- Avoid coarse-tooth blades: These are designed for wood and can easily chip or crack acrylic.
Utilizing Hand Tools for Thin Sheets
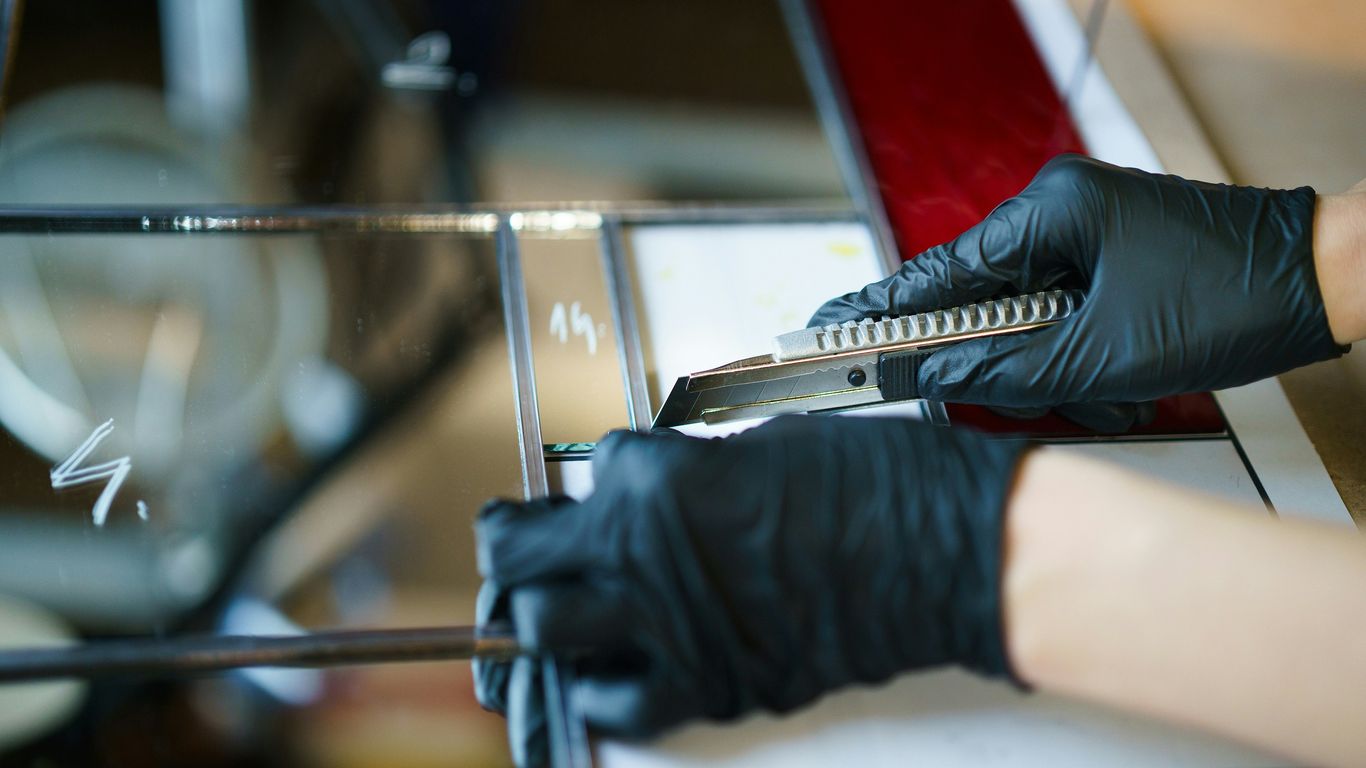
For thinner acrylic sheets, you don’t always need a power tool. A simple scoring tool or a sharp utility knife can do the job for straight cuts. The technique here is to score the line repeatedly, applying steady pressure. You’re not trying to cut through in one go; you’re creating a deep groove. Once you have a good score line, you can carefully snap the acrylic along that groove. This method is quite effective for pieces up to about 1/8 inch thick and is a great way to get clean lines without a lot of fuss. It’s a good starting point if you’re new to cutting acrylic, and you can find scoring tools at most hardware stores.
Remember, the key with hand tools is patience. Multiple light scores are better than one heavy, forced cut. This helps prevent stress fractures.
Employing Power Saws for Thicker Materials
When you’re dealing with thicker acrylic, power saws become necessary. A jigsaw is useful for curves and more intricate shapes, while a circular saw or a table saw is better for long, straight cuts. The most important thing with power saws is to control the heat. Acrylic can melt if it gets too hot, gumming up your blade and ruining the cut. Using a slow, steady feed rate and the right blade is key. Some people also use a coolant, like water or a specialized cutting fluid, to keep things cool. If you’re doing a lot of straight cuts, a table saw can offer more accuracy, but make sure the sheet is well-supported. For makers who want more consistent results in a desktop workflow, a CNC router is a practical option worth exploring. It brings stable precision and a more streamlined workflow to acrylic cutting, making it easier to get clean edges on detailed acrylic parts.
Mastering the Cutting Process
Cutting acrylic cleanly really comes down to managing a few key things during the actual cut. It’s not just about having the right tool; it’s about how you use it. Getting this right means fewer headaches later and a much better final product.
Controlling Heat Generation
Acrylic doesn’t like heat. When you cut, friction builds up, and if it gets too high, the material can start to melt. This is bad news because melted acrylic can gum up your blade, make the cut sticky, and even cause the edges to fuse back together. To keep things cool:
- Use a sharp blade: A dull blade has to work harder, creating more friction and heat.
- Maintain a steady feed rate: Don’t push too fast. A consistent, moderate pace is better than a jerky, aggressive one. If you notice melting or a sticky cut, slow down.
- Consider a coolant: For power tools, a little bit of water or alcohol sprayed on the cut line can help a lot. It lubricates the blade and cools the material. Compressed air can also help blow away heat and chips.
Maintaining a Steady Cutting Pace
This ties right into heat control. A jerky or inconsistent feed rate is a recipe for disaster with acrylic. It can cause the blade to bind, leading to chips, cracks, or even a broken blade. The goal is a smooth, uninterrupted cut. Think of it like drawing a line – you want to keep your hand moving steadily, not stop and start. This steady pace helps the blade do its job efficiently without stressing the material. If you’re using a power saw, try to let the saw do the work; don’t force the acrylic through. For hand tools like a scoring knife, multiple passes with even pressure are better than one hard push.
Applying Consistent Pressure
Pressure is another factor where less is often more. When you’re cutting, especially with hand tools or when scoring, you need enough pressure to make a clean mark or cut, but not so much that you deform the acrylic or create stress points. Over-tightening clamps can also cause issues, leading to cracks radiating from the clamped areas. When using power tools, let the tool’s weight and speed do the cutting. You’re guiding it, not wrestling it. A light, consistent pressure ensures the blade stays on your intended path without digging in or skipping, which helps prevent those dreaded cracks and chips. For detailed work, consider looking into tools designed for precision, like a desktop CNC.
The key takeaway here is that acrylic is sensitive. It needs a gentle but firm approach. Avoid sudden movements, excessive force, or letting it get too hot. Think smooth, steady, and controlled throughout the entire cutting process. This mindful approach will save you material and frustration.
Techniques for Specific Cutting Methods
Different acrylic projects call for different approaches to cutting. The method you choose really depends on the thickness of your sheet and the kind of line you need to make. Trying to force a method that isn’t suited for the material can lead to cracks or a messy edge.
Scoring and Snapping for Straight Lines
This is a great technique for thinner acrylic sheets, usually up to about 3mm or 4mm thick, and it’s perfect for getting nice, straight cuts. It’s pretty straightforward, but you have to be patient and precise.
- Leave the protective film on. This is super important for preventing scratches during the process.
- Mark your cut line clearly. Use a ruler or straightedge and a marker. Double-check your measurements.
- Secure the sheet. Clamp it down firmly to a stable surface, making sure the marked line is just at the edge where you’ll be snapping.
- Score the line. Use a sharp scoring tool or a utility knife. You’ll need to make multiple passes, applying steady, even pressure. Don’t try to cut all the way through in one go; you’re creating a controlled groove.
- Snap the sheet. Align the score line with the edge of your work surface and apply firm, downward pressure. The acrylic should break cleanly along the scored line. If it doesn’t quite separate, you might need to score a bit deeper or try snapping again. This method is ideal for simple DIY projects.
Using a Jigsaw for Curves and Thicker Sheets
When you need to cut curves or work with thicker acrylic (say, 5mm and up), a jigsaw is a good tool to have. It gives you more freedom than scoring and snapping.
- Blade Choice: Use a fine-tooth blade, often one designed for metal or plastics. Avoid blades with fewer teeth per inch, as they can cause chipping.
- Speed Control: Keep the saw speed on the lower to medium setting. High speeds generate heat, which can melt the acrylic and make a mess.
- Orbital Action: If your jigsaw has an orbital setting, turn it off or set it to its lowest level. You want the blade to move straight up and down, not oscillate back and forth.
- Coolant: For thicker cuts or if you notice melting, consider using a coolant. A stream of water or even rubbing alcohol can help lubricate the blade and keep the temperature down. Compressed air can also help dissipate heat.
Always support the acrylic sheet well when using a jigsaw. If the material isn’t fully supported, it can vibrate with the blade, leading to cracks or uneven cuts. Make sure the sheet is clamped securely, with the area to be cut well-supported from underneath.
Table Saw Techniques for Large Panels
Table saws are excellent for making long, straight cuts on larger panels, offering accuracy and efficiency. However, they require careful setup and execution.
- Blade: Use a blade with a fine tooth count, similar to what you’d use for metal or plastics. A blade designed for acrylics is best if available.
- Feed Rate: Maintain a slow, steady feed rate. Rushing the cut will generate excess heat and can cause melting or chipping.
- Support: Ensure the panel is well-supported on the table saw and that the offcut piece is also supported as it leaves the blade. This prevents bending and stress on the acrylic.
- Dust Collection: Acrylic dust can be fine and sticky. Make sure your dust collection system is adequate to manage it.
Achieving a Clean Finish
Getting the edges of acrylic board to look neat after cutting makes a huge difference. If you skip this part, your project can end up with sharp edges, foggy surfaces, or tiny chips that catch on fabric and skin. Taking time on finishing steps helps your acrylic work look more refined and safe to handle.
Smoothing Rough Edges with Sandpaper
Right after making a cut, the edge of the acrylic will feel gritty or sometimes sharp. Sandpaper is your best friend here:
- Start with 120-grit if your edge is extra rough; don’t go lower as acrylic sands fairly easily.
- Move up through finer grits (220, then 400, even up to 2000 if you’re dedicated) until the edge feels smooth to the touch.
- Stick with each grit long enough to remove the scratches left by the one before.
- If you use a power sander, don’t let it linger, as too much heat can melt the material.
Take your time and sand every exposed edge—it’s worth it for both looks and safety when handling your finished piece.
Polishing for a Professional Look
If you want to take things further, polishing brings out a crystal-clear, glass-like look:
- After sanding, use a plastic polish or an automotive compound with a soft cloth. Rub gently in small circles.
- Buff the edge until it shines. Specialty polishers or buffing wheels make this part even easier.
- Each round of polishing removes the last of the fine scratches, leaving an almost mirror-like gloss.
For larger or precision projects, you might consider laser cutting acrylic, since it creates very clean edges that need less finishing work. Laser edges sometimes still want a touch of polish for full clarity, though.
Inspecting for Imperfections
Before calling it finished, give your piece a good look in strong, even light:
- Inspect every edge for haze, chips, or cracks. Small flaws are easier to fix now than after installation.
- Check the surface, especially near any curves or cutouts.
- Feel along the edge for any rough patches you may have missed.
Here’s a basic checklist:
| Issue | Quick Fix |
|---|---|
| Small chips | Extra sanding |
| Cloudiness | More polishing |
| Sharp edges | Finer final sand |
A clean finish sets apart professional-looking acrylic projects from quick, rough DIY jobs. Spend time on the last details so your project stands out—and feels nice to handle, too.
Understanding Acrylic’s Cutting Behavior
Acrylic might look straightforward, but it has its own quirks when you try to cut it. Unlike wood or metal, acrylic can get fussy. If you’re not careful, you can end up with melted edges, chips, or worse, cracks that run through the whole sheet. It’s all about how the material reacts to heat, pressure, and stress.
Why Acrylic Cracks Under Stress
Cracking in acrylic usually happens when the material is put under too much strain. This stress can build up from a few different things. Clamping the sheet down too hard is a common culprit. If you bend or flex the sheet too much while cutting, that also introduces stress. Using a dull blade or trying to force the cut too quickly can also lead to cracks. The key to avoiding cracks is to minimize stress points throughout the entire cutting process.
Heat Sensitivity of Acrylic Materials
Acrylic is quite sensitive to heat. When you cut, friction from the blade generates heat. If this heat isn’t managed, the acrylic can start to soften and melt instead of being cleanly cut. This melted plastic looks messy, like a gummy residue, and it’s the opposite of the clean edge you’re aiming for. Different types of acrylic have different melting points, but generally, keeping things cool is important. For fabrication, you’ll want to be aware of temperature ranges to avoid issues.
Differences Between Cast and Extruded Acrylic
There are two main types of acrylic you’ll likely encounter: cast and extruded. They behave a bit differently when cut. Cast acrylic is made by pouring liquid acrylic into a mold. This process generally results in a harder, more scratch-resistant material that’s also less prone to stress cracking during cutting. Extruded acrylic is made by forcing molten acrylic through a die. It’s typically less expensive and easier to work with in some ways, but it can be more susceptible to chipping and cracking when cut, especially if you’re not careful with your technique. Knowing which type you have can help you adjust your cutting approach. For example, extruded acrylic might benefit more from techniques that reduce heat buildup, like using a slower feed rate on a CNC machine.
Acrylic sheets have a general service temperature range, typically between -40°F and 176°F. Going outside these limits, especially with heat from cutting, can cause problems like warping or changing the material’s properties.
Essential Safety Precautions

When you’re working with acrylic, safety should always be the top priority. It might seem like a simple material, but it can still cause injuries if you’re not careful. Taking a few simple steps can make a big difference in preventing accidents.
Protecting Your Eyes and Hands
- Always wear safety glasses or goggles. Small chips or shards can fly off unexpectedly during cutting, and you don’t want them in your eyes. This is non-negotiable, especially when using power tools. Eye protection is your first line of defense.
- Wear sturdy gloves when handling acrylic sheets, particularly after cutting. Edges can be surprisingly sharp, and a clean break isn’t always guaranteed. Gloves help prevent accidental cuts. Just remember to keep gloves away from spinning saw blades, as they can get caught.
Ensuring a Well-Lit and Stable Workspace
A good workspace setup is key. Make sure the area where you’re cutting is well-lit so you can see exactly what you’re doing. A stable surface is also important; you don’t want the acrylic sheet or your workbench shifting while you’re in the middle of a cut. This stability helps maintain control and reduces the risk of mistakes that could lead to injury or a ruined piece.
Avoiding Unnecessary Force and Pressure
Acrylic can crack or chip if you try to force it. This material doesn’t respond well to excessive pressure. Instead of pushing hard, focus on using the right tools and techniques. Let the tool do the work. If you feel like you’re struggling, it’s often a sign that something isn’t right – maybe the blade is dull, or you’re moving too quickly. Proper handling techniques are more effective than brute force.
Remember that acrylic is sensitive to heat and stress. Applying too much force or cutting too fast can generate heat, leading to melting or cracking. A steady, controlled approach is always best for clean cuts and your own safety.
When working with acrylic, always keep safety first. Make sure you’re in a well-ventilated area and wear protective eyewear. For more detailed safety tips and guidelines, visit our website today!
Conclusion
Cutting acrylic cleanly is all about picking the right method for the job and keeping stress low. Whether you’re working by hand, using power tools, or setting up a more advanced setup, the basic rules stay the same: support the sheet well, cut at a steady pace, and take care of the edge when you’re done. With the right approach, you can get results that look like they came from a pro, even when you’re working at home.
Frequently Asked Questions
What’s the easiest way to cut thin acrylic sheets?
For thin sheets, you can often use the score-and-snap method. This involves making a deep line with a sharp knife and then carefully breaking the sheet along that line. It works best for straight cuts and requires a bit of practice to get right.
Why does my acrylic keep cracking when I cut it?
Acrylic usually cracks because it’s under too much stress. This can happen if you cut too fast, use a dull blade, bend the sheet while cutting, or don’t support it properly. Reducing heat and pressure is key.
Can I use a regular saw to cut acrylic?
Yes, but you need to use the right kind of blade. A fine-tooth blade, often one meant for metal or plastic, works best. Avoid blades with fewer teeth that are meant for rough wood cutting, as they can cause problems.
How do I get a really smooth edge after cutting?
After cutting, you can smooth the edge with sandpaper. Start with a medium grit and then move to a finer grit. For a super clear edge, some people use flame polishing, but this takes practice and is best left for experienced users.
Is there a difference between cutting cast and extruded acrylic?
Yes, there can be. Cast acrylic is generally a bit easier to cut and drill without chipping, and it often gives a cleaner edge. Extruded acrylic can be more prone to melting when cut due to its manufacturing process.
What safety gear do I need when cutting acrylic?
You should always wear safety glasses to protect your eyes from flying bits. Gloves are also a good idea to protect your hands from sharp edges. Make sure your workspace is well-lit and stable.
How can I stop the acrylic from melting while I cut?
Melting happens because of heat. To avoid this, cut slowly and use a blade that’s sharp and has the right number of teeth. You can also use a coolant, like water or rubbing alcohol, to help keep the blade and the acrylic cool as you cut.
What if I need to cut a curve in the acrylic?
For curves, a jigsaw is a good tool to use. You’ll want to set it to a medium speed to avoid too much heat buildup. Make sure the sheet is well-supported as you cut along the curve.