Here are the most important things to remember when cleaning your acrylic display case to keep it looking clear and scratch-free.
Key Takeaways
- Always use soft microfiber cloths or 100% cotton cloths. Avoid paper towels, rough sponges, or abrasive fabrics.
- Stick to mild soap and water or specialized acrylic cleaners. Never use ammonia, alcohol, or harsh chemical cleaners.
- Gently wipe surfaces in one direction or in slow, circular motions. Never scrub or apply too much pressure.
- Rinse thoroughly with clean water after cleaning to remove any soap residue.
- For minor scratches, consider using an acrylic polish or a plastic polishing compound.
Understanding Acrylic’s Unique Cleaning Needs

Why Acrylic Requires Gentle Handling
Acrylic, often known by brand names like Plexiglas, is a fantastic material for display cases. It’s lighter and more shatter-resistant than glass, which is a big plus. However, this material has its own set of quirks when it comes to cleaning. Unlike glass, acrylic is a type of plastic, and that means it’s much softer and more prone to scratching. Even seemingly gentle materials can leave tiny marks if you’re not careful. These small scratches might not be obvious at first, but over time, they build up and can make your display case look cloudy or dull. It’s really important to remember that acrylic and glass are chemically different, and what works for one won’t necessarily work for the other. Treating acrylic with the right kind of care from the start will save you a lot of trouble down the line.
Acrylic vs. Glass: Key Differences in Care
When you’re used to cleaning glass, you might think acrylic is similar, but it’s not. Glass is much harder and can withstand more vigorous cleaning methods. You can often use standard glass cleaners and paper towels on glass without much issue. Acrylic, on the other hand, is quite sensitive. The biggest difference lies in its susceptibility to scratches. While glass might resist minor abrasions, acrylic can easily get marked by things you wouldn’t expect. This means you need to be very selective about the tools and cleaning agents you use. For instance, paper towels, which are common for glass, can actually cause micro-scratches on acrylic because of their texture and the way they can trap dust. It’s a good idea to start with a gentle rinse to remove loose particles before any wiping begins.
The Importance of Maintaining Clarity
The main reason people choose acrylic display cases is for their clarity. You want to see your items clearly, without distortion or haziness. Improper cleaning is one of the quickest ways to ruin that crystal-clear view. Using the wrong cleaners can cause the acrylic to become permanently cloudy, a condition sometimes referred to as crazing or yellowing. Similarly, abrasive cloths or scrubbing can create a web of fine scratches that scatter light, making the surface appear frosted rather than transparent. Maintaining the optical quality of your acrylic display case means being diligent about using only soft materials and appropriate cleaning solutions. This attention to detail ensures your display remains as visually appealing as the day you bought it.
The key to keeping acrylic looking its best is to treat it with respect. Think of it as a sensitive surface that needs a gentle touch. Avoid anything that feels rough or looks like it could scratch. This simple mindset shift makes a big difference in how your display case holds up over time.
Essential Tools for Cleaning Acrylic Displays
When it comes to keeping your acrylic display case looking its best, the tools you use are just as important as the cleaning solutions. Because acrylic is softer than glass, it can easily get scratched if you’re not careful. Using the wrong materials can turn a simple cleaning job into a frustrating mess, leaving your display case looking dull and damaged. So, let’s talk about what you actually need to get the job done right.
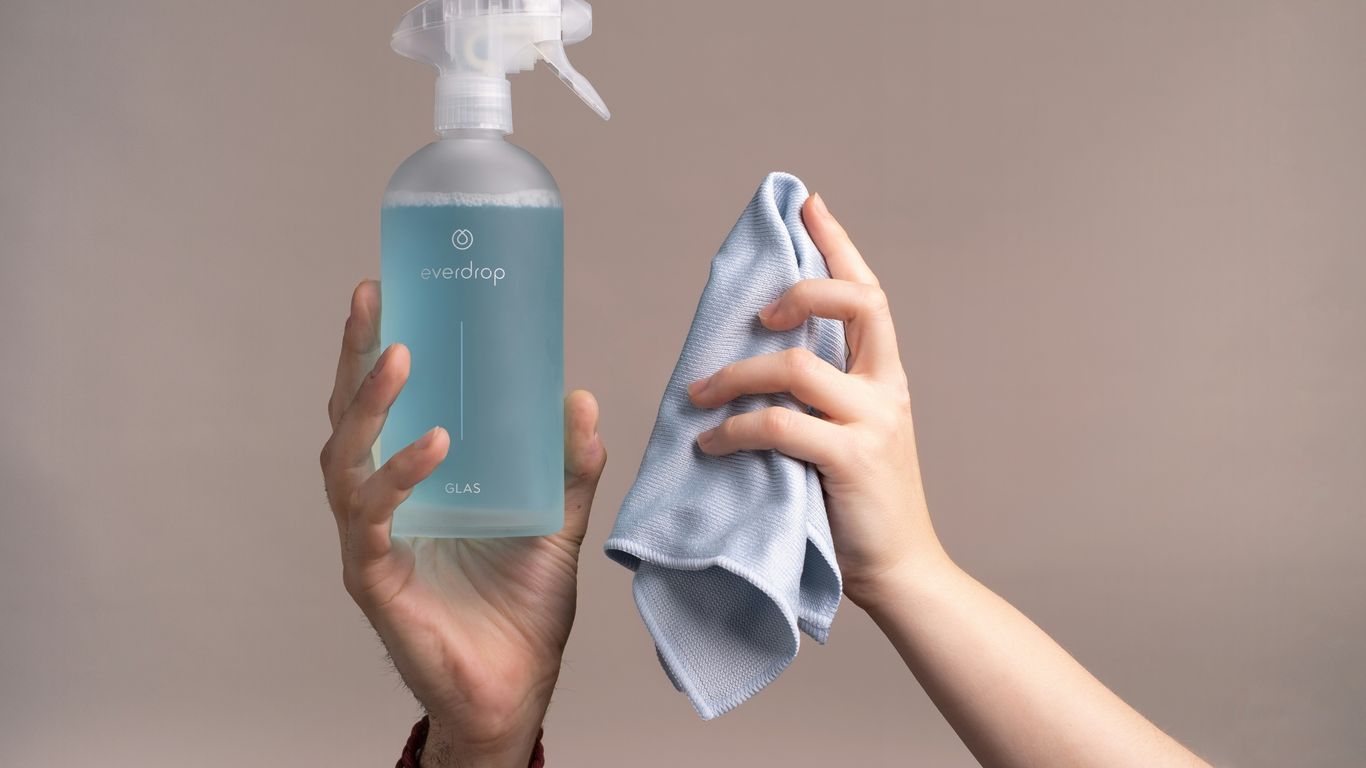
Choosing the Right Microfiber Cloths
Microfiber cloths are your best friend when cleaning acrylic. These cloths are made of tiny synthetic fibers that are incredibly effective at picking up dust and dirt without scratching the surface. They are designed to be non-abrasive and lint-free, which is exactly what you want for delicate acrylic. It’s a good idea to have a few on hand – maybe one for general cleaning and another for drying. If you’re dealing with a particularly dusty case, you might even want to designate one cloth specifically for dusting before you start any wet cleaning. For a good selection of cleaning supplies, check out cleaning supplies.
Alternative Soft Cloth Options
If you don’t have microfiber cloths readily available, don’t worry. A 100% cotton, soft cloth can work in a pinch. Think of old, well-worn t-shirts or soft flannel. The key here is softness. Anything with a bit of texture or roughness is a no-go. You want something that feels gentle against your skin; if it feels that way, it’s likely safe for your acrylic. Just make sure whatever cotton cloth you use is clean and hasn’t been washed with fabric softener, as that can leave a residue.
What to Avoid: Abrasive Materials
This is where most people run into trouble. There are several common household items that you absolutely should not use on your acrylic display case:
- Paper towels and tissues: These might seem soft, but they contain wood pulp that can leave behind fine scratches and lint. They also tend to trap grit.
- Regular dishcloths or kitchen towels: These often have a rougher texture than you realize and can easily cause micro-scratches.
- Sponges and scrub brushes: Even the soft side of a sponge can be too abrasive. Scrub brushes are a definite no.
- Abrasive pads: Anything labeled as a scouring pad or abrasive cleaner is out of the question.
Using the wrong materials is the quickest way to damage your acrylic. It’s better to be safe and stick to known gentle options, even if it takes a little longer. The long-term clarity of your display is worth the extra care.
Here’s a quick rundown of what to steer clear of:
| Item | Why It’s Harmful |
|---|---|
| Paper towels | Can cause micro-scratches, leaves lint |
| Rough cloths | Too abrasive, leads to visible scratches |
| Sponges/Scrubbers | Will scratch the surface |
| Ammonia cleaners | Damages and clouds the acrylic |
| Alcohol-based | Can dull or crack the acrylic over time |
Remember, the goal is to clean without leaving any trace of damage. Sticking to soft cloths and appropriate cleaners is the best way to maintain the pristine look of your acrylic display case for years to come. For more tips on what to avoid, you can look into acrylic care.
Selecting Appropriate Cleaning Solutions
When it comes to cleaning your acrylic display case, the solution you choose is just as important as the cloth you use. Using the wrong cleaner can quickly turn a simple wipe-down into a costly mistake, leaving your case cloudy or scratched. It’s all about being gentle and using products that are specifically designed for or compatible with acrylic.
Recommended Mild Soap and Water Solution
For everyday cleaning and tackling light dust or smudges, a simple mixture of mild dish soap and warm water is often the best approach. You don’t need anything fancy here. Just a few drops of a basic, unscented dish soap in a bowl of warm water should do the trick. This solution is effective at breaking down oils and grime without being harsh on the acrylic surface. It’s a safe bet for regular maintenance and keeps your display case looking clear.
Specialized Acrylic Cleaners
If you’re dealing with tougher grime or want to restore a bit of shine, there are specialized cleaners made just for acrylic. Products like Brillianize or Novus Polish #1 are formulated to clean acrylic safely and often leave a bit of a protective, anti-static finish. These can be great for giving your display case that extra bit of polish. Always check the product label to confirm it’s safe for acrylic or plastics before purchasing. You can find these types of cleaners at many hardware stores or online retailers specializing in plastic care.
Cleaners to Absolutely Avoid
This is where you really need to pay attention. Certain common household cleaners can wreak havoc on acrylic. Ammonia-based cleaners, like many glass cleaners (Windex, for example), are a big no-no. They can cause the acrylic to become cloudy or even crack over time. Similarly, avoid cleaners containing alcohol or acetone, as these can also damage the surface. Even things like paper towels or abrasive sponges can cause micro-scratches that build up and make the acrylic look dull. Stick to what you know is safe, and when in doubt, just use the mild soap and water solution. It’s better to be safe than sorry when it comes to preserving the clarity of your display case. For more information on what to avoid, check out this guide on acrylic donation box cleaning.
| Cleaner Type | Why It’s Harmful for Acrylic |
|---|---|
| Ammonia-based cleaners | Can cause clouding, cracking, or surface erosion. |
| Alcohol/Acetone | May dull or crack the acrylic surface over time. |
| Abrasive pads/sponges | Will cause visible scratches, especially on glossy surfaces. |
| Paper towels/tissues | Can create micro-scratches and trap grit. |
| Multi-surface sprays | Often contain solvents that are incompatible with plastics. |
Step-by-Step Guide to Cleaning Your Display Case
Cleaning your acrylic display case doesn’t have to be a chore that ends in frustration. By following a few simple steps, you can keep it looking clear and new without introducing any unwanted scratches. It’s all about being gentle and using the right materials. Let’s get started.
Initial Rinse to Remove Loose Debris
Before you even think about touching the surface with a cloth, give it a good rinse. Use warm water – not hot, as extreme temperatures can sometimes affect acrylic. This initial rinse is important because it washes away any loose dust or grit that might be sitting on the surface. If you skip this, those tiny particles can act like sandpaper when you start wiping, leading to those dreaded micro-scratches. A gentle spray from a hose or even just pouring water over it will do the trick. Avoid high-pressure sprays, though, as they can sometimes damage glued seams or decals on older cases.
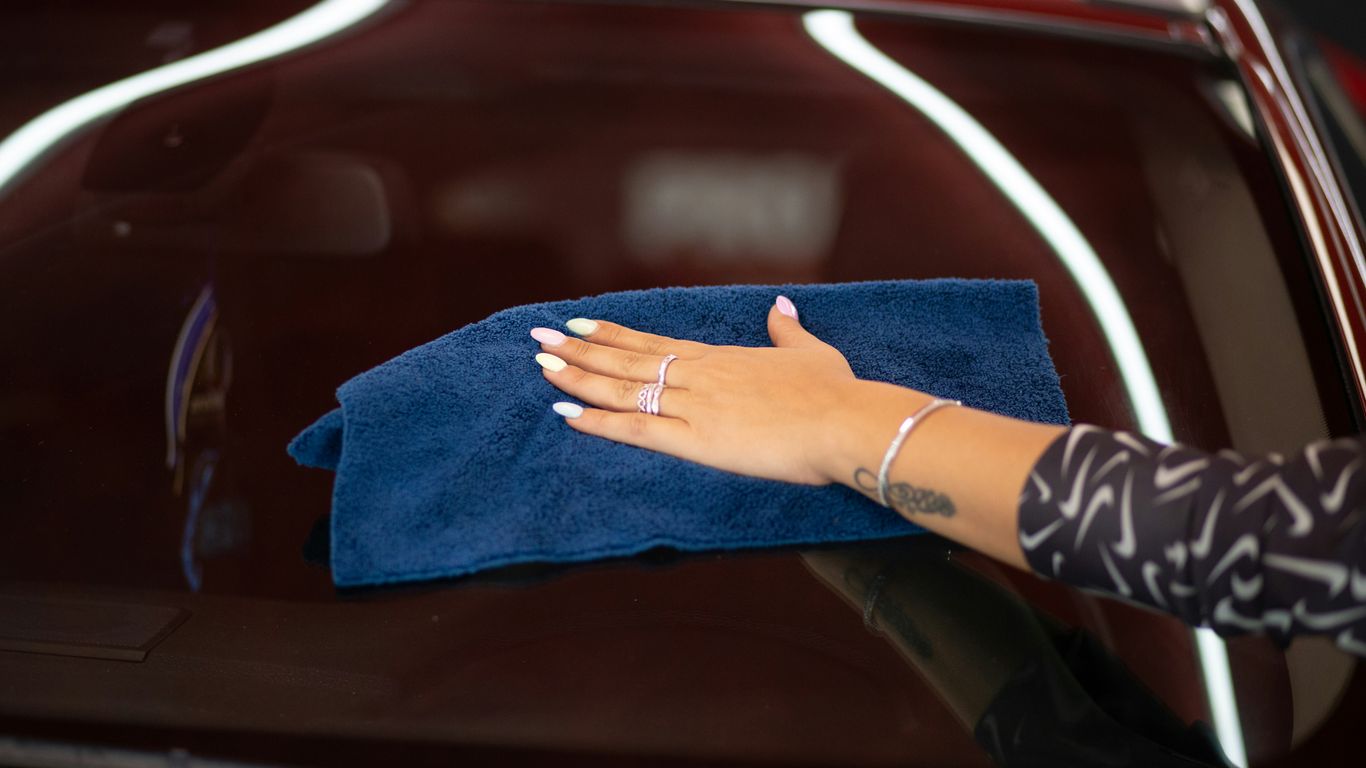
Gentle Wiping Techniques
Now for the actual cleaning. The key here is to be as gentle as possible. Dampen a clean, soft microfiber cloth with your chosen cleaning solution (we’ll cover solutions in the next section, but mild soap and water is usually a safe bet). Start wiping the surface using slow, deliberate strokes. Think long, sweeping motions rather than scrubbing back and forth. If you notice a stubborn spot, resist the urge to scrub harder. Instead, try going over it again with a clean section of the cloth or a slightly different angle. Remember, acrylic can scratch easily, so patience is your best friend.
Thorough Rinsing After Cleaning
Once you’ve wiped down the entire case, it’s time for another rinse. This step is critical for removing any leftover soap residue. If you leave soap behind, it can attract more dust and create streaks, making your case look smudged even after cleaning. Use clean, warm water again and make sure to rinse all surfaces thoroughly. Pay attention to corners and edges where soap might tend to linger. A good rinse ensures a clean slate for the final drying stage.
Proper Drying Methods
Air drying might seem like an easy option, but it often leads to water spots and streaks, especially if you have hard water. The best way to dry your acrylic display case is with another clean, dry microfiber cloth. Gently pat the surface dry, rather than rubbing vigorously. This method helps prevent static cling, which can attract dust shortly after you’ve finished cleaning. If you want to achieve a truly spotless finish, this final drying step is non-negotiable. For a bit of extra shine, you can consider using a specialized acrylic polish after drying.
Addressing Stubborn Smudges and Fingerprints
Spot Cleaning Techniques
Even with regular dusting, fingerprints and smudges can appear on your acrylic display case. The key is to tackle them quickly and gently. Don’t reach for just any cleaner; the wrong product can cause more harm than good. For everyday smudges, a simple approach is usually best. Start by lightly misting the affected area with plain water. Then, use a clean, soft microfiber cloth to gently wipe away the smudge. Work in a circular motion, applying just enough pressure to lift the mark without pressing too hard into the acrylic surface. If water alone isn’t cutting it, a very mild solution of dish soap and warm water can be effective. Remember to rinse the area afterward with a damp cloth to remove any soap residue, which can attract more dust.
Using Warm Water for Smudges
Warm water is surprisingly effective for many common smudges and fingerprints on acrylic. It helps to soften the oils and grime without introducing harsh chemicals. You can apply the warm water using a spray bottle for even coverage or by dampening a clean microfiber cloth. Gently wipe the smudged area, being careful not to scrub. For tougher spots, you might need to let the warm water sit for a moment to break down the residue before wiping. This method is particularly useful for areas that don’t require a full cleaning but just a quick touch-up. It’s a good idea to have a separate dry microfiber cloth ready to gently buff the area dry afterward, preventing water spots.
Avoiding Residue Buildup
Residue buildup is a common problem that can make your acrylic display case look dull and attract more dust. This often happens when cleaning solutions aren’t fully rinsed off or when the wrong cleaning products are used. Ammonia-based cleaners, for instance, can damage the acrylic surface over time, leading to cloudiness. Similarly, using paper towels or abrasive sponges will not only leave scratches but can also leave behind lint or particles that contribute to a hazy appearance. Always opt for mild, acrylic-safe cleaning agents and rinse thoroughly. A final wipe with a dry microfiber cloth can help remove any lingering moisture and prevent streaks. For those looking for an extra layer of protection and shine, consider using an acrylic polish specifically designed for plastics, which can help repel dust and fingerprints in the future. You can find good options for plastic-safe cleaners that won’t harm your display.
Restoring Shine and Removing Light Scratches
Even with the gentlest cleaning, acrylic can sometimes lose a bit of its luster or pick up minor scuffs. Don’t worry, there are ways to bring back that original sparkle and deal with those little imperfections.
Applying Acrylic Polish for Shine
To restore the original gleam to your acrylic display case, a good quality acrylic polish is your best friend. These products are specifically designed to clean, shine, and protect acrylic surfaces without causing damage. Always opt for a polish that is labeled as safe for plastics. You can find these at most hardware stores or online retailers specializing in plastic care. Applying it is pretty straightforward: put a small amount onto a clean, soft microfiber cloth and gently buff the surface in a circular motion. You’ll notice the difference almost immediately as the acrylic starts to look clearer and more reflective. It’s a good idea to do this after a thorough cleaning to get the best results.
Buffing Out Minor Surface Marks
For those faint, hairline scratches that mar the otherwise pristine surface, a bit of careful buffing can often make them disappear. The key here is patience and the right materials. You’re not trying to sand down the acrylic, but rather to gently smooth the edges of the scratch so light reflects off it more evenly. This process is best done after cleaning the case thoroughly. You might be surprised at how effective a good buffing can be for minor surface marks.
Using Polishing Compounds
When mild polishing isn’t quite enough, you might need to step up to a fine-grit polishing compound specifically made for plastics or acrylic. These compounds contain very mild abrasives that can actually level out the surface of the acrylic around a scratch. It’s important to use these sparingly and follow the product’s instructions precisely. Start with the least abrasive option available and test it on an inconspicuous area first. If you’re dealing with more than just a superficial scuff, a polishing compound can be quite effective.
Here’s a quick look at what you might use:
| Product Type | Best For |
|---|---|
| Acrylic Polish | Restoring shine, light smudges |
| Non-gel Toothpaste | Very light scratches, buffing |
| Baking Soda Paste | Mild scratches, cleaning and polishing |
| Plastic Polishing Kit | Deeper scratches, significant surface repair |
Remember, the goal is to gently restore the surface, not to remove material aggressively. Always work in a well-lit area so you can see exactly what you’re doing and avoid over-polishing any one spot. If you’re unsure, it’s always better to err on the side of caution and try a less aggressive method first.
Cleaning Acrylic Components Beyond the Main Surface
While the large, flat panels of your display case get most of the attention, don’t forget about the other parts. Often, these smaller bits and pieces, like plastic trim or wooden accents, can collect dust and grime just as easily. Taking care of them properly means your whole display case looks its best.
Caring for Plastic Trim
Plastic trim, often found around the edges or as decorative elements, needs a similar gentle approach to the main acrylic surfaces. The key is to avoid anything that could scratch or dull the finish.
- Use a soft microfiber cloth: Just like the main panels, a clean microfiber cloth is your best friend here.
- Mild soap and water: A simple solution of mild dish soap and warm water works well for most dirt.
- Avoid harsh chemicals: Steer clear of ammonia, alcohol, or abrasive cleaners, as these can damage the plastic.
For stubborn smudges on plastic trim, try using warm water and a microfiber cloth. If you’re cleaning a lot of trim, consider using a dedicated acrylic cleaner that’s safe for plastics.
Maintaining Wood Accents
If your display case includes wooden elements, the cleaning method changes. Wood requires different care than acrylic. While scratches on wood might not be as immediately obvious as on acrylic, they can still affect the appearance.
- Wood-safe cleaners: Use products specifically designed for wood. Always check the label.
- Damp cloth for smudges: For fingerprints or light marks, a slightly damp microfiber cloth is usually sufficient.
- Wood polish for shine: To restore luster to wooden parts, a wood polishing oil can be effective.
Remember to wipe wood in the direction of the grain. If you’re unsure about a cleaner, test it on an inconspicuous area first.
Cleaning Crevices and Edges
These tight spots are notorious for trapping dust and debris. Getting into these areas requires a bit more finesse.
- Folded microfiber cloth: Fold a clean microfiber cloth to create a narrow edge that can get into corners.
- Cotton swabs: For very small or intricate crevices, cotton swabs (Q-tips) are excellent. You can dampen them slightly with your cleaning solution.
- Compressed air: A can of compressed air can be useful for blowing dust out of hard-to-reach areas before you start wiping.
When cleaning tight spaces, patience is important. Rushing can lead to accidental scratches or damage to delicate parts. Take your time and use the right tools for the job to keep all parts of your display case looking pristine.
Regular attention to these smaller components will help maintain the overall aesthetic of your display case, ensuring it remains a beautiful showcase for your items. For information on calculating heart rate zones, which might be relevant if you’re also tracking fitness, you can look into formulas like the Nes formula Nes formula.
Preventative Measures for Long-Term Care
Keeping your acrylic display case looking its best long-term is all about being proactive. It’s not just about cleaning; it’s about how you handle and store the case when it’s not in active use. A little bit of care goes a long way in preventing damage that can be a real pain to fix later.
Regular Dusting Habits
Dust might seem harmless, but it’s a major culprit for those tiny scratches that build up over time. Think of it like fine-grained sandpaper. When you wipe a dusty surface without proper cleaning, you’re essentially dragging those particles across the acrylic.
- Daily quick dusting: Use a dry, clean microfiber cloth to gently wipe down the surface. This removes loose dust before it can settle in.
- Weekly deeper dust: If you notice more dust buildup, a slightly damp microfiber cloth (water only) can be effective. Make sure to dry it afterward.
- Avoid compressed air: While it might seem like a good idea, the force can sometimes embed dust or even cause static, attracting more dust.
Smart Storage Practices
When your display case isn’t being used, or if you have multiple cases, how you store them matters. Stacking things carelessly or leaving them exposed can lead to scratches and other damage.
- Padding is key: If you need to stack cases, always place a soft material like felt, foam, or bubble wrap between them. Never stack them directly on top of each other.
- Protect from impact: Store cases in a way that prevents them from being knocked over or having heavy objects placed on top of them. Consider using fabric covers or storing them in their original packaging if available.
- Designated space: Find a safe spot for your display cases, away from high-traffic areas where they could be bumped or scraped. This is especially important for museum-grade acrylic display cases that house valuable items.
Avoiding Direct Sunlight and Heat
Acrylic can be sensitive to environmental factors. Prolonged exposure to heat and direct sunlight can cause it to warp, yellow, or become brittle over time. This is why choosing acrylic sheets for long-term applications can be a smart move, as they offer durability when cared for properly.
- Location, location, location: Place your display case away from windows that receive direct sun, especially during peak hours. Also, keep it clear of heat sources like radiators, vents, or electronic equipment that generates heat.
- Temperature stability: Aim for a stable room temperature. Extreme fluctuations can stress the material.
- UV protection: For items particularly sensitive to light, consider display cases made with UV-protective acrylic. While this adds to the initial cost, it can significantly prolong the life and appearance of both the case and its contents, offering long-term energy savings too.
Proper storage and environmental control are just as important as gentle cleaning. They prevent the kind of damage that makes cleaning difficult in the first place, saving you time and effort down the line.
When to Seek Professional Repair or Replacement
Sometimes, despite your best efforts with gentle cleaning and polishing, damage to your acrylic display case goes beyond what you can fix at home. It’s important to know when to call in the pros or consider replacing the case altogether.
Identifying Deep Scratches
Minor scuffs and light scratches can often be buffed out with specialized acrylic polish. However, if you run your fingernail across a scratch and it catches or gets stuck, that’s a pretty good sign it’s too deep for simple home remedies. These kinds of marks can significantly detract from the clarity and overall look of your display. For these situations, you might need professional services that specialize in acrylic fabrication and repair.
Assessing Structural Damage
Beyond surface-level scratches, look out for any signs of structural compromise. This could include:
- Cracks radiating from corners or edges.
- Significant warping or bending, especially if the case has been exposed to heat.
- Loose or separating seams where panels are joined.
- Any damage that affects the case’s ability to stand securely or protect its contents.
If you notice any of these issues, it’s usually best to consult a professional rather than attempt a repair yourself. Trying to fix structural problems without the right tools and knowledge could make the damage worse.
Understanding When Repair is Not Feasible
There comes a point where the cost and effort of repairing a damaged acrylic display case outweigh the benefits. Generally, if the damage is extensive, affects multiple areas of the case, or compromises its integrity, replacement is the more practical option. Think about the age of the case, the original cost, and the value of what it holds. For severe damage, like deep cracks or widespread hazing that polishing can’t fix, getting a new case might be the most straightforward solution. It’s also worth considering that some types of damage, particularly those involving chemical etching or severe discoloration from UV exposure, are often irreversible. In Massachusetts, for example, understanding the legal implications of certain types of damage or charges might be complex, similar to how assessing the feasibility of repair requires careful consideration.
When deciding between repair and replacement, weigh the cost of professional services against the price of a new display case. Sometimes, a new case offers better features or a more pristine appearance, making it a worthwhile investment.
If your acrylic item is cracked, deeply scratched, or just looks old and worn out, it might be time to get it fixed or replaced. Don’t let minor damage turn into a bigger problem. Visit our website today to see how we can help restore your acrylic!
Conclusion
Keeping your acrylic display case looking its best doesn’t have to be a chore. By understanding acrylic’s unique needs and sticking to gentle cleaning methods, you can maintain its clarity and shine for years. Remember, a little patience and the right tools go a long way in preventing scratches and keeping your valuable items looking great.
Frequently Asked Questions
What’s the biggest mistake people make when cleaning acrylic?
The most common mistake is using the wrong cleaning stuff. Things like Windex, which has ammonia, or even paper towels can really mess up the surface. They can cause tiny scratches that make the acrylic look cloudy over time.
Can I just use a regular dish soap?
Yes, mild dish soap mixed with warm water is usually okay. Just make sure it’s a small amount of soap, so it rinses off easily. You don’t want any soap left behind, as that can attract dust.
How do I get rid of fingerprints?
Fingerprints are usually easy to handle. Just use a damp microfiber cloth with a little bit of mild soap and water. Wipe gently, then rinse and dry with another clean, soft cloth.
What if my case has deeper scratches?
If a scratch is deep enough that you can feel it with your fingernail, it might be too much for simple cleaning. You might need special polishing compounds or even professional help to fix it. Sometimes, it’s better to replace the panel.
Why can’t I use glass cleaner?
Glass cleaner often has ammonia or other strong chemicals that are too harsh for acrylic. These chemicals can actually eat away at the plastic, making it cloudy or even causing it to crack over time. It’s like a chemical burn for acrylic.
How often should I clean my display case?
It really depends on where it is. If it’s in a dusty area or somewhere people touch it a lot, you might want to dust it weekly and give it a good clean monthly. For less used cases, cleaning every few months might be fine.
Can I use a soft sponge to clean it?
It’s best to avoid sponges. Even soft ones can have tiny bits that might scratch the acrylic. Microfiber cloths are your best bet because they are designed to be non-abrasive and pick up dirt without damaging the surface.
What about cleaning the edges and corners?
For tight spots, you can fold your microfiber cloth to get into corners. Sometimes, a clean cotton swab dipped lightly in your cleaning solution can help get into very small crevices. Just be gentle!