So, you’ve got a project that needs a nice, clean bend in some acrylic, huh? Maybe you’ve seen those fancy displays or custom parts and thought, ‘I could do that.’ Well, you probably can! Bending acrylic sheets might sound tricky, but it’s totally doable once you get the hang of it. This guide is all about showing you the ropes, from what you need to how to actually do it, so you can stop wondering how to bend acrylic sheets and start making things.
Key Takeaways
- Acrylic is a great material for bending because it’s clear and can be shaped with heat, but it can also crack if you’re not careful.
- You don’t always need super specialized tools; sometimes a basic heat source and some common items can get the job done for simple bends.
- Proper preparation, like removing protective films and maybe annealing the acrylic, makes the bending process much smoother.
- Even heating is super important for a good bend; hot spots or uneven heat can lead to bubbles or weak spots.
- Safety first! Always wear protective gear and make sure your workspace is set up to handle hot materials and potential fumes.
Understanding Acrylic Bending Basics
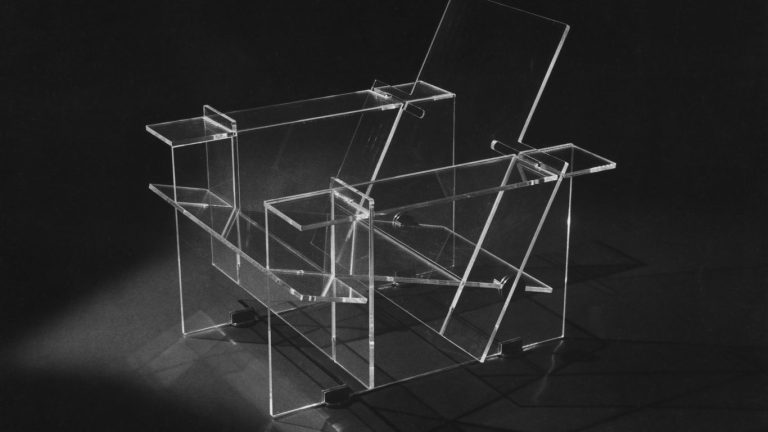
Acrylic is a popular plastic for many projects because it’s clear, relatively strong, and can be shaped with heat. When you heat acrylic, it softens and becomes pliable, allowing you to bend it into different forms. Once it cools down, it holds its new shape. This makes it great for creating custom displays, enclosures, or decorative items.
Properties of Acrylic for Bending
Acrylic, specifically cast acrylic, is known for its clarity and impact resistance, though it can be brittle compared to some other plastics. It has a relatively low melting point, which is why it’s suitable for heat bending. The key is to heat it evenly to avoid damaging the material. Different types of acrylic might have slightly different bending characteristics, so it’s good to know what you’re working with.
When to Choose Acrylic for Bending Projects
Acrylic is a good choice when you need a clear, rigid material that can be shaped. It’s often used for:
- Display cases and stands
- Signage and lettering
- Custom enclosures for electronics or models
- Artistic sculptures and decorative pieces
- Aquarium components
It’s generally not the best choice if your project requires extreme flexibility or high impact resistance in a way that might cause it to shatter easily. For projects needing very precise, repeatable bends on a large scale, you might look into professional fabrication services.
Basic Bending Without Specialized Tools
While there are specialized tools for bending acrylic, you can achieve simple bends with common household items and a bit of patience. For instance, a heat gun or even a carefully managed stovetop flame can be used to soften the acrylic along a line. You’ll need something to hold the acrylic in place while it cools, like blocks of wood or a simple jig. This method requires careful attention to heat application to prevent bubbles or scorching. It’s a good way to get started and understand how the material reacts to heat before investing in more advanced equipment. You can find some great examples of basic acrylic bending that don’t require fancy tools.
Working with acrylic involves a learning curve. It’s important to practice on scrap pieces first to get a feel for how much heat is needed and how long it takes for the material to become pliable. Rushing the process often leads to less-than-ideal results like cracks or uneven bends.
Essential Tools for Bending Acrylic
To bend acrylic effectively, you’ll need a few key pieces of equipment. While it’s possible to achieve simple bends with just a heat source and some patience, specialized tools make the process much easier, more precise, and safer. Having the right gear can really make a difference in the quality of your finished project.
Heat Sources for Softening Acrylic
The first step in bending acrylic is softening it with heat. The goal is to get the material pliable without overheating it, which can cause bubbles or even burning. Several tools can help you achieve this:
- Heat Gun: This is a versatile tool that blows hot air. You can control the temperature and direct the airflow to heat a specific area of the acrylic sheet evenly. It’s great for general bending and for heating larger sections.
- Strip Heater: These are designed specifically for bending acrylic sheets. They have a heating element that runs along a narrow strip, allowing you to create very precise, straight bends. They’re ideal for making clean, sharp folds.
- Oven: For larger projects or when you need to heat an entire piece of acrylic uniformly, a dedicated oven can be useful. This method provides very even heating but requires more space and careful monitoring.
Always remember that acrylic can overheat quickly. It’s better to apply heat gradually and in stages rather than trying to rush the process. Overheating can lead to irreversible damage like bubbles or discoloration.
Forming and Shaping Aids
Once the acrylic is soft and pliable, you’ll need tools to help you shape it into the desired form. These aids help you achieve consistent angles and smooth curves:
- Bending Jigs/Forms: These can be made from wood, metal, or specialized plastic. They act as a mold or guide to help you create specific angles or curves. For straight bends, a simple jig with a stop can work well. For more complex shapes, you might need custom-made forms.
- Clamps: You’ll likely need clamps to hold the acrylic in place while it cools, especially if you’re creating a bend that needs to hold a specific angle. This prevents the material from springing back to its original shape.
- Gloves: Working with heated acrylic means handling potentially hot materials. High-temperature resistant gloves are a must to protect your hands from burns. You can find these at most hardware stores.
Measuring and Marking Tools
Accuracy is key in any fabrication project, and bending acrylic is no exception. Before you start heating, make sure you have your measurements and marks precise:
- Measuring Tape/Ruler: For marking the bend line and ensuring your dimensions are correct.
- Marker/Pencil: Use a marker or pencil that is easily visible on the acrylic surface. A fine-tip permanent marker often works well. Remember to remove these marks after bending if they are on a visible surface.
- Square: A carpenter’s square or a combination square is helpful for marking straight lines and checking that your bends are at the intended angles. This is particularly useful when using a strip heater for precise line bends.
Having these tools ready before you begin will make the entire bending process smoother and lead to better results. It’s always a good idea to have a few extra pieces of scrap acrylic on hand for practice runs, especially when you’re first starting out.
Preparing Your Acrylic Sheet
Before you even think about heating up that acrylic, there are a few important steps to take to make sure your bending project goes smoothly. Skipping these can lead to a lot of frustration, like cracks or uneven bends. It’s all about setting yourself up for success.
Removing Protective Films
Most acrylic sheets come with a protective film on both sides. This film is usually paper or plastic and it’s there to prevent scratches during shipping and handling. It’s really important to remove this film before you start heating the acrylic. If you heat it with the film on, it can melt and fuse to the acrylic, making it incredibly difficult, if not impossible, to remove later. Plus, the heat can cause the film to bubble and warp, messing up your surface. Take your time and peel it off carefully. Sometimes, especially on older sheets, the adhesive can be a bit stubborn, so a little gentle scraping with a plastic scraper might be needed, but be careful not to scratch the acrylic itself.
Cutting Acrylic for Bending
Often, you’ll need to cut your acrylic sheet down to a specific size before bending. The way you cut it matters. For straight cuts, a table saw with a fine-tooth blade designed for plastics works well. If you’re doing more intricate shapes or don’t have a table saw, a jigsaw with a plastic-cutting blade can do the job. Always measure twice and cut once. If you’re planning a bend, it’s a good idea to cut your piece a little larger than you think you’ll need, especially if you’re using jigs or forms for the bend. This extra bit can give you something to hold onto during the heating and bending process. For precise cuts, consider using a specialty plastic supplier who can often cut to size for you.
Annealing Acrylic for Stress Relief
Acrylic, like many plastics, can develop internal stresses during manufacturing or even from cutting. These stresses are like tiny fault lines waiting to happen. If you try to bend acrylic that has a lot of internal stress, it’s much more likely to crack or fracture, especially at the bend point. Annealing is a process that helps relieve these stresses. It involves heating the acrylic to a specific temperature, holding it there for a while, and then allowing it to cool down very slowly. This slow cooling is key. You can do this in a large oven, but you need to be very careful with temperature control. A common method involves heating the acrylic to around 150-170°F (65-75°C) for about an hour per quarter-inch of thickness, then turning off the oven and letting the acrylic cool down completely inside the oven over several hours. This step might seem like extra work, but it significantly improves the success rate of your bends.
Proper preparation is half the battle when working with acrylic. Taking the time to remove films, make clean cuts, and relieve internal stresses through annealing will save you a lot of headaches down the line and result in a much better final product. It’s about respecting the material and giving it the best chance to perform as you intend.
Here’s a general guideline for annealing, though specific recommendations can vary by manufacturer:
- Temperature: Typically between 150°F and 170°F (65°C – 75°C).
- Time: Approximately 1 hour per 1/4 inch (6mm) of thickness.
- Cooling: Slow cooling is critical. Allow the acrylic to cool gradually in the oven for several hours after it’s turned off. Avoid rapid temperature changes. This slow cooling process is detailed in guides on heating and shaping acrylic.
The Heat Bending Process
So, you’ve got your acrylic sheet prepped and ready to go. Now comes the part where you actually give it a new shape. This is where the magic happens, but it requires a bit of patience and attention to detail. Getting the heat right is probably the most important step.
Achieving Even Heating
To get a good, clean bend, you need to heat the acrylic evenly along the line where you want the bend to occur. If you just blast one spot with heat, you’re likely to get a weak bend, or worse, the acrylic could bubble or crack. A strip heater is great for this, as it provides a consistent line of heat. If you’re using a heat gun, keep it moving back and forth over the area. You’re aiming for the plastic to become pliable, not molten. A good indicator is when the surface gets a bit glossy.
- Watch for visual cues: The acrylic will start to look slightly shiny when it’s ready.
- Keep the heat source moving: Don’t let it sit in one spot for too long.
- Consider the thickness: Thicker sheets will take longer to heat up evenly.
The goal is to reach the plastic’s glass transition temperature, making it flexible enough to bend without breaking. Overheating can cause irreversible damage, so it’s better to err on the side of caution and apply heat gradually.
Forming the Bend
Once the acrylic is heated and feels pliable, it’s time to make the bend. You’ll want to do this quickly, as the plastic will start to cool and stiffen up. Use your jig or form to guide the bend to the desired angle. If you’re doing a simple 90-degree bend, for example, you’ll want to press the acrylic firmly against the corner of your jig. Be prepared for a little bit of spring-back; the acrylic might not hold the exact angle you initially bend it to. You might need to over-bend it slightly to compensate.
- Work fast: The pliable window is short, usually only a minute or two.
- Use a jig: This helps ensure consistent angles and prevents the bend from going off-course.
- Apply steady pressure: Avoid jerky movements that could stress the plastic.
Cooling and Solidifying the Shape
After you’ve made the bend, you need to let the acrylic cool down completely. Don’t try to move it or put any stress on the bend while it’s still warm. Letting it cool slowly is key to preventing internal stresses that can lead to cracking later on. You can leave it in the jig to cool, or prop it up so that air can circulate around the bend. Avoid rapid cooling, like dunking it in cold water, as this thermal shock can cause fractures. Patience here really pays off for a durable final product. You can find some helpful tips on bending plexiglass if you need more guidance on the process.
Advanced Bending Techniques
Once you’ve got the hang of basic bends, you might want to try some more complex shapes. This is where things get really interesting, allowing you to create custom parts for all sorts of projects.
Line Bending for Straight Folds
Line bending is perfect for making sharp, straight creases in acrylic sheets. You’ll typically use a strip heater for this. The idea is to heat a narrow line across the sheet until it becomes pliable. You want to apply heat evenly along the intended bend line. Too much heat in one spot can cause bubbling or scorching, while too little won’t let you get a clean bend. The key is consistent heat application.
Here’s a quick rundown:
- Mark your line: Use a non-permanent marker or masking tape to clearly define where you want the bend.
- Position the strip heater: Set it up so the heated element is just above the acrylic, directly over your marked line.
- Heat evenly: Slowly move the strip heater back and forth along the line, or rotate the sheet if the heater is stationary. Watch for the acrylic to start softening and slightly sagging.
- Form the bend: Once heated, carefully move the sheet to your jig or form and apply gentle pressure to create the desired angle. Work quickly before the acrylic cools too much.
- Cool and set: Hold the bend in place until it solidifies. You can use a cooling jig or simply let it air cool.
Achieving a perfect line bend often comes down to practice. Pay close attention to the material’s response to heat and adjust your technique accordingly. Don’t be afraid to test on scrap pieces first.
Creating Complex Curves
For curves that aren’t simple 90-degree angles, you’ll need a different approach. This often involves using molds or forms. You can buy pre-made forms or create your own from wood, metal, or even dense foam. The process is similar to line bending, but instead of a sharp crease, you’re coaxing the softened acrylic to conform to a rounded shape.
- Prepare your mold: Ensure the mold is smooth and free of any imperfections that could transfer to the acrylic. You might want to apply a release agent if you’re concerned about sticking.
- Heat the sheet: Heat a larger area of the acrylic than you would for a line bend, focusing on the section that needs to curve. Even heating is still important here.
- Shape the curve: Once pliable, carefully press the acrylic sheet into or around your mold. You might need to use clamps or weights to hold it in place while it cools.
- Allow ample cooling time: Complex curves can take longer to set. Rushing this step can lead to distortion.
Sequential Bending for Intricate Designs
For designs that require multiple bends or very specific, non-linear shapes, you’ll employ sequential bending. This means heating and bending one section at a time, allowing each bend to cool and solidify before moving on to the next. This is how you build up more elaborate structures, like custom enclosures or decorative elements. It’s a bit like building with LEGOs, but with heat and plastic.
- Plan your bends: Sketch out your design and mark all the bend locations on the acrylic sheet.
- Heat and bend the first section: Use the appropriate heating method (strip heater for straight lines, heat gun for broader areas) and form the first bend.
- Cool completely: Let the first bend fully harden before proceeding. This prevents unwanted warping or distortion of previously made bends.
- Repeat for each subsequent bend: Move to the next marked section, heat, and bend. Always allow cooling time between each step.
This methodical approach allows for precise control over the final shape, even for very complicated designs. If you’re looking for custom acrylic fabrication, many suppliers can help with precision cutting and bespoke designs to get your project started right.
Troubleshooting Common Bending Issues
Even with careful preparation, things can sometimes go sideways when you’re bending acrylic. Don’t get discouraged; most problems have straightforward solutions. Understanding what went wrong is the first step to fixing it and improving your technique for next time.
Preventing Cracking and Fractures
Cracking is usually a sign of uneven stress. This can happen if the acrylic isn’t heated evenly, if you try to bend it too sharply, or if it cools too quickly. Sometimes, the material itself might have internal stresses that weren’t relieved before bending. Always anneal your acrylic before attempting to bend it, especially for thicker sheets.
Here are a few things to check if you’re hearing cracking sounds:
- Uneven Heating: Did you heat the entire bend area uniformly? A heat gun might require more passes than a strip heater.
- Bend Radius: Are you trying to make a bend that’s too tight for the thickness of the acrylic? A tighter radius increases stress.
- Cooling Rate: Was the acrylic cooled too rapidly, perhaps with a fan or in cold water? Allow it to cool slowly in the air.
- Annealing: Was the material properly annealed beforehand? This process removes internal stresses that can lead to cracks.
If you encounter cracking, step back and assess your heating and cooling process. Sometimes, a slight adjustment in temperature or heating time can make all the difference.
Addressing Warping and Distortion
Warping or distortion, where the acrylic bends in unintended ways or loses its shape over time, often points to residual stresses. This is closely related to cracking issues. If the material wasn’t heated evenly or cooled too quickly, internal tensions can cause the piece to warp as it settles.
- Consistent Heating: Ensure the heat is applied evenly across the entire section you intend to bend. Avoid concentrating heat in one spot.
- Gradual Cooling: Allow the acrylic to cool slowly and naturally. Avoid drafts or forced cooling methods.
- Support During Cooling: For larger pieces or complex shapes, you might need to support the acrylic as it cools to maintain its intended form. Using a jig or form can help here.
Resolving Uneven Bend Angles
Inconsistent bend angles are frustrating, especially when you need identical parts. This usually comes down to your setup or your heating consistency.
- Jig Accuracy: If you’re using a jig or form, make sure it’s accurately made and provides a positive stop for the bend. Metal jigs are often more precise than wood ones for repeatable results.
- Heating Time and Temperature: Variations in how long or how hot you heat the acrylic can lead to different degrees of flexibility and springback.
- Springback: Acrylic will naturally try to spring back slightly after bending. You might need to over-bend slightly to compensate for this. This is where having a good jig with a defined angle is helpful. If you’re struggling with precision, consider consulting with a professional acrylic fabricator who has specialized equipment.
Remember, practice makes perfect. Keep notes on your settings and results, and don’t be afraid to experiment with small test pieces to dial in your technique.
Safety Considerations for Bending Acrylic
Working with heat and plastic means you need to be mindful of safety. It’s not overly dangerous if you take the right steps, but it’s definitely something to pay attention to.
Personal Protective Equipment
Before you even think about heating up that acrylic, make sure you’re geared up. This isn’t just about looking the part; it’s about preventing injuries. You’ll want to wear:
- Eye Protection: Safety glasses or a face shield are a must. Hot plastic can sometimes pop or splatter, and you don’t want that in your eyes.
- Gloves: Use heat-resistant gloves, rated for high temperatures. Acrylic gets quite hot when it’s soft enough to bend, and you’ll be handling it directly.
- Protective Clothing: Long sleeves and pants made of non-flammable material are a good idea. Think cotton or denim, not synthetic fabrics that can melt.
- Respirator Mask: When acrylic heats up, it can release fumes. While not always intensely toxic, it’s best to avoid breathing them in. A respirator mask will help keep your lungs clear. Proper ventilation is also key here.
Workspace Safety
Your workspace setup matters a lot for safety. You need a clear area where you won’t accidentally knock things over or set something unintended on fire.
- Ventilation: This is super important. Work in a well-ventilated area, ideally with a fan or an open window, to disperse any fumes. Overheating acrylic can release fumes, so proper airflow is crucial for safety during these processes.
- Clear Area: Keep flammable materials away from your heat source and the acrylic you’re working with. This includes paper, rags, and certain plastics.
- Stable Surface: Make sure your workbench or table is sturdy and won’t wobble. You don’t want your setup to shift while you’re handling hot material.
- Fire Extinguisher: It’s always wise to have a fire extinguisher nearby, just in case. Know how to use it before you need it.
Handling Hot Materials
This is where most of the direct risk lies. Once the acrylic is heated, it’s pliable but also very hot.
- Patience: Don’t rush the process. Wait for the acrylic to reach the right temperature and become pliable. Forcing it too early or too late can lead to problems.
- Gentle Handling: Even though it’s soft, try to handle the heated acrylic with care. Avoid sudden movements that could cause it to snap or break unexpectedly.
- Cooling: Allow the bent acrylic to cool completely before you move it or put any stress on it. Trying to move it too soon can ruin the bend or even cause it to crack. This guide details how to safely curve plexiglass using heat bending and emphasizes crucial safety precautions.
Always remember that the plastic will retain heat for a while after bending. Be mindful of where you place it to cool down, ensuring it’s on a heat-resistant surface and won’t be bumped by accident. Also, never assume it’s cool to the touch; always test carefully with a gloved hand.
When working with acrylic, safety is super important. You’ll want to know the best ways to handle it, especially when bending. We’ve put together some tips to help you stay safe and get great results. Want to learn more about keeping yourself safe while working with acrylic? Visit our website for all the details!
Wrapping Up Your Acrylic Bending Journey
So, you’ve learned about the tools and some ways to bend acrylic sheets. It might seem a bit tricky at first, and yeah, sometimes things don’t go perfectly. You might get a bubble, or a bend might not be quite straight. That’s okay. The key is to just keep trying. Practice makes a difference, and you’ll get a feel for the heat and how the plastic moves. Don’t be afraid to experiment a little, and remember to always put safety first. With a bit of patience and these techniques, you’ll be creating some neat things with bent acrylic in no time.
Frequently Asked Questions
What’s the best temperature to bend acrylic?
For bending acrylic, you want to aim for a temperature between 325°F and 375°F (160°C to 190°C). It’s a good idea to start with the lower end of that range, especially if your material is already prepared (annealed) or if you’re making a simple bend. For more complicated shapes that need the plastic to be super flexible, you might need to go closer to 375°F. Just remember not to go over 300°F, as the plastic can start to break down and create yucky fumes.
How long do I need to heat acrylic before bending it?
Heating time can vary depending on how thick your acrylic sheet is. Generally, you’ll need about 3 to 5 minutes of direct heat to get the plastic warmed all the way through. Thicker pieces will take longer. Using a temperature tool can help you know for sure when it’s ready.
Can I bend acrylic without special tools?
Yes, you can! While special tools make things easier and more precise, you can bend acrylic with basic items. You can carefully heat a section with a portable stove on a low setting until it’s soft. Then, you can shape it using things you find around the house or workshop. Just be patient and gentle!
What’s the difference between line bending and oven bending?
Line bending, also called strip bending, heats up just a thin line on the plastic, which is great for making straight folds. Oven bending heats the whole sheet of plastic. Line bending is usually faster and more exact for single, straight bends, while oven bending is better for heating larger areas evenly.
How can I stop my acrylic from cracking when I bend it?
Cracking usually happens because the heat wasn’t even, or the plastic was cooled down too quickly. Make sure you heat the acrylic evenly all the way across the bend area. Also, let it cool down slowly and naturally. Sometimes, preparing the plastic beforehand by ‘annealing’ it can help release built-up stress, which also prevents cracks.
What kind of plastics can be bent using a line bender?
Line bending works best on thermoplastics, which are plastics that soften when heated and keep their new shape when they cool down. Acrylic and polycarbonate are common examples. Plastics like polypropylene or those that don’t soften nicely when heated, or can get damaged by reheating, aren’t suitable for this method.