Here are the main points to remember when you’re planning and building your acrylic display stand. Keep these in mind to make the process smoother and your final product better.
Key Takeaways
- Plan your design carefully, considering the purpose and size of the stand.
- Gather the right materials, including appropriate acrylic sheets and strong adhesive.
- Measure and cut your acrylic with precision, always prioritizing safety.
- Smooth and polish the edges for a clean, professional look.
- Assemble with care, allowing ample time for the adhesive to cure fully.
Designing Your Acrylic Display Stand
Before you even think about cutting or gluing, you need a solid plan. This is where you figure out exactly what you want your stand to do and how it’s going to look. Getting this part right saves a lot of headaches later on.
Define The Purpose Of Your Stand
First off, what exactly is this stand going to hold? Is it for a single, heavy item, or a collection of smaller, lighter things? Knowing the purpose helps determine the size, shape, and even the thickness of acrylic you’ll need. For example, a stand for a few delicate figurines will have different requirements than one for a couple of hefty books. Think about the weight and dimensions of the items you plan to display. This initial step is really about understanding the function before you get to the form.
Determine Dimensions And Layout
Once you know what the stand is for, you can start figuring out the actual measurements. How tall does it need to be? How wide? How deep? Consider the space where the stand will live. Will it fit comfortably without being too big or too small? Sketching out a rough layout on paper, or even using some simple design software, can be super helpful here. You can map out where each piece will go and how they’ll connect. This is also a good time to think about how many tiers or shelves you might need. A good starting point for planning is to list the items you’ll be displaying and their measurements; this list will be your guide. Planning your display.
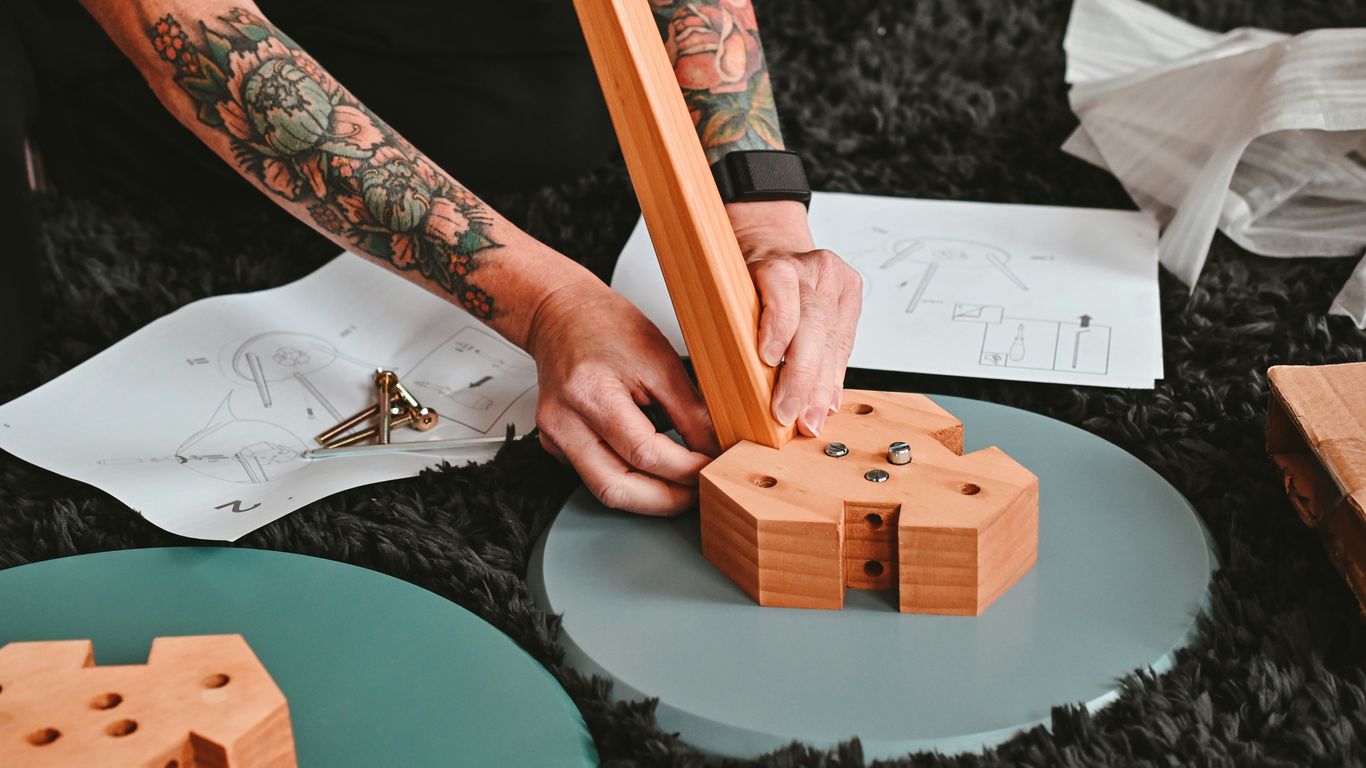
Sketch Your Design Concept
Now for the fun part – drawing it out! Grab a pencil and paper, or fire up a design app. This is where you translate your ideas into a visual. Don’t worry about perfection at this stage; just get your concepts down. Think about the overall style. Do you want something modern and minimalist, or a bit more decorative? Consider how the pieces will fit together. You might want to draw a few different versions to see which one you like best. This visual representation is what you’ll use when you start gathering materials and eventually cutting the acrylic. It’s your blueprint for the whole project.
Proper planning prevents poor performance, as the saying goes. Taking the time to design thoughtfully upfront means fewer mistakes and a much better final product. It’s about being smart with your materials and your time.
Gathering Essential Materials
Alright, before we get too deep into cutting and assembling, let’s talk about what you’ll actually need to build your acrylic display stand. It might seem obvious, but picking the right stuff makes a huge difference. You don’t want to end up with a wobbly stand or glue marks all over the place, right?
Selecting Appropriate Acrylic Sheets
The main event here is the acrylic sheet itself. You’ll find it comes in different thicknesses, usually measured in millimeters (mm) or inches. For a small stand holding lighter items, something like 1/8" (around 3mm) might be fine. But if you’re planning to display heavier things, you’ll want to go thicker, maybe 1/4" (about 6mm) or even more. The thickness directly impacts how much weight your stand can hold. It’s also available in various finishes – crystal clear is standard, but you can get frosted, tinted, or even mirrored acrylic if you’re feeling fancy. For a beginner, sticking with clear acrylic is usually the easiest way to go. You can find good quality acrylic sheets at most home improvement stores or online suppliers. If you’re unsure about the load-bearing needs, check out material specifications.
Choosing The Right Adhesive
This is super important. Regular household glue just won’t cut it for acrylic. You need a special solvent cement designed for plastics. This stuff works by slightly melting the edges of the acrylic where you apply it, creating a chemical bond as it dries. It’s what gives you those super strong, clean joints that look like the pieces are fused together. You can usually get this at the same places you buy acrylic sheets. It often comes with a small applicator tip, or you might use a syringe with a fine needle for precise application, especially for tight seams. Avoid super glues or epoxies, as they can leave white marks or damage the surface.
Identifying Necessary Tools
Beyond the acrylic and glue, you’ll need a few tools to get the job done. A good measuring tape or ruler is a must for accuracy. For cutting, depending on the thickness of your acrylic, you might use a fine-tooth saw or even a scoring knife and straight edge for thinner sheets. Clamps are incredibly useful for holding pieces together while the adhesive cures. You’ll also want some sandpaper in various grits (from coarse to very fine) for smoothing edges later on, and some microfiber cloths to keep everything clean and free of smudges. A small vacuum cleaner can also be handy for cleaning up acrylic dust. If you’re planning on making multiple stands, investing in a good set of tools upfront will save you a lot of hassle.
Here’s a quick rundown of what you’ll likely need:
- Acrylic Sheets: The main building material.
- Acrylic Solvent Cement: For bonding the pieces.
- Measuring Tape/Ruler: For accurate dimensions.
- Cutting Tool: Fine-tooth saw, utility knife, or similar.
- Clamps: To hold pieces during assembly.
- Sandpaper: Various grits for edge finishing.
- Microfiber Cloths: For cleaning.
- Safety Gear: Goggles and gloves are highly recommended.
Working with acrylic and adhesives requires some care. Always make sure you’re in a well-ventilated area when using solvent cement, and wear safety glasses to protect your eyes from any dust or flying bits. Gloves are also a good idea to keep your hands clean and protected from the cement.
Preparing For Precision Cutting
Before you even think about picking up a tool, setting up your workspace and marking your acrylic sheets accurately is super important. This step might seem a bit tedious, but trust me, it saves a lot of headaches later on. Getting your lines just right means your final stand will look professional and hold together well.
Ensuring A Safe Work Environment
Working with acrylic and cutting tools means you need to be mindful of safety. Always make sure you have good ventilation, especially if you’re using solvent cement, as the fumes can be strong. Wear safety glasses to protect your eyes from any flying debris, and consider wearing gloves to protect your hands. A clean, well-lit space is also key to preventing accidents and making sure you can see your markings clearly. It’s also a good idea to have a fire extinguisher nearby, just in case, especially when working with adhesives or power tools.
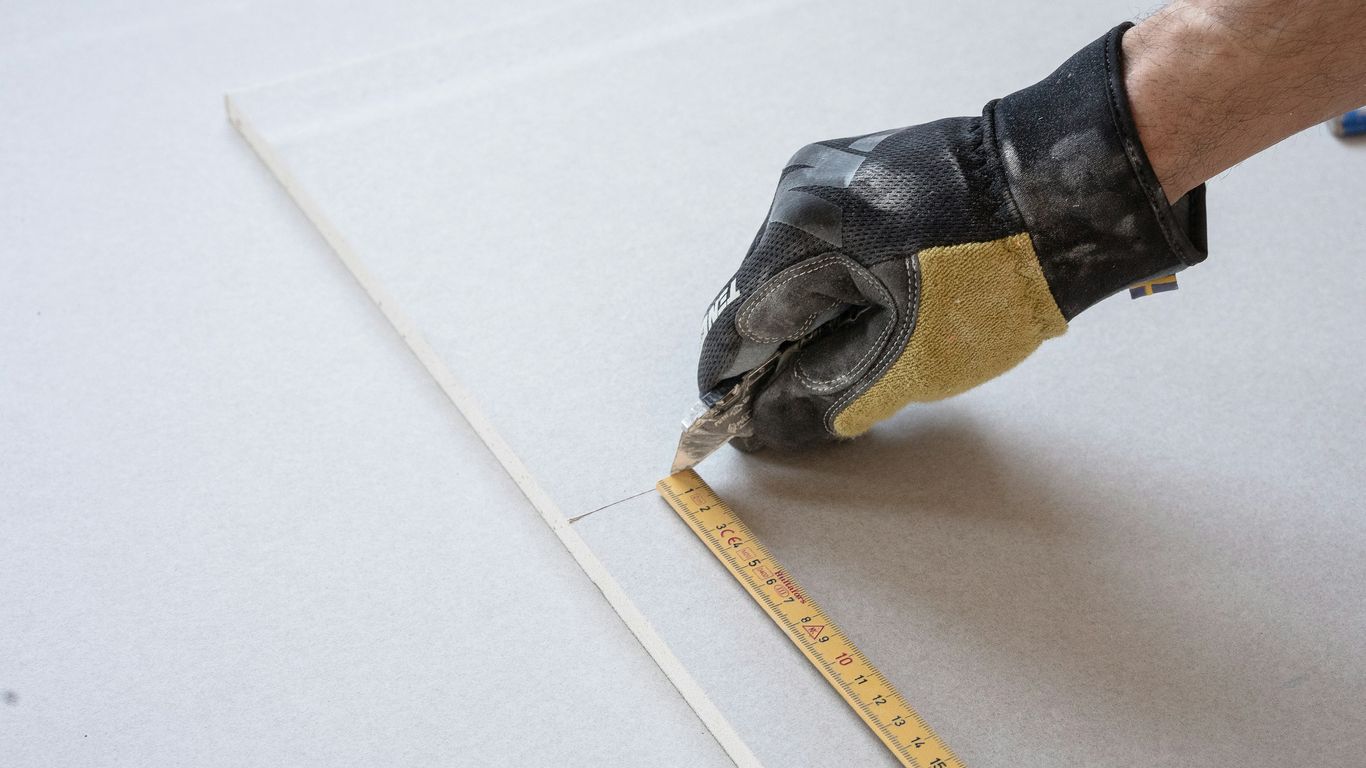
Marking Acrylic Sheets Accurately
Precision starts with your marks. Use a fine-tip marker or a sharp pencil that won’t scratch the surface. Measure twice, cut once is the golden rule here. Double-check all your measurements before you make any marks. Running a strip of painter’s tape along your cutting line can help prevent chipping and gives you a clear line to follow. If you’re making multiple identical pieces, consider using a jig or a template to ensure consistency. For really precise cuts, especially on thicker sheets, you might want to look into custom-cut acrylic sheets.
Protecting Surfaces During Cutting
Your workbench and the acrylic sheet itself need protection. Lay down a soft cloth or a piece of cardboard on your work surface to prevent scratches. When cutting, support the acrylic sheet fully. If you’re using a saw, ensure the sheet is stable and won’t vibrate or flex excessively. You can use scrap wood or foam boards underneath the sheet to provide support and catch any offcuts. This also helps prevent the acrylic from cracking under pressure. Remember, a little bit of care during this stage makes a big difference in the final look of your stand.
Mastering Acrylic Sheet Cutting
Cutting acrylic sheets is where your design starts to take physical form. This step requires a steady hand and the right approach to ensure your pieces fit together perfectly. Getting clean, precise cuts now will save you a lot of trouble later during assembly. It’s not overly complicated, but it does demand attention to detail.
Utilizing Cutting Tools Effectively
The tool you choose really matters. For thinner acrylic, say under 1/8 inch, a plastic-scoring knife can work well. You score the line repeatedly and then snap the sheet. It’s a simple method that can yield clean results if done carefully. For thicker sheets, you’ll need something more robust. A fine-tooth blade on a circular saw or jigsaw is a common choice. Make sure the blade is designed for plastics to minimize chipping. If you have access to a laser cutter, that’s the gold standard for precision and edge finish, though it’s often overkill for simple projects. Always use a test piece first to get a feel for how the tool interacts with the material. This is a good way to practice your technique.
Achieving Clean, Straight Edges
To get those perfect edges, preparation is key. Start by marking your cut lines clearly with a fine-tip marker. Then, apply painter’s tape along the line. This simple step helps prevent chipping and gives you a visual guide. Support the acrylic sheet fully on a flat surface, perhaps with some scrap wood underneath, so it doesn’t flex or break during the cut. When you actually make the cut, go slowly. Rushing generates heat, which can melt or warp the acrylic. Let the tool do the work; don’t force it. Consistent, steady pressure is much better than aggressive sawing. A slow, controlled cut is the best way to achieve a clean edge.
Handling Different Acrylic Thicknesses
Acrylic comes in various thicknesses, and each requires a slightly different approach. Thin sheets (under 3mm) are more forgiving and can often be cut with a scoring knife or a utility knife with multiple passes. Thicker sheets (over 3mm) will require power tools. For these, a circular saw with a fine-tooth blade or a jigsaw is suitable. The key is to manage the heat generated. If you’re making a long cut, pause periodically to let the acrylic cool down. Overheating can lead to melting, which makes for a messy edge and can even distort the piece. Always ensure the sheet is well-supported, regardless of thickness, to prevent cracking.
Cutting acrylic is a process that benefits greatly from patience. Trying to speed through it often leads to mistakes like chips, cracks, or melted edges. Taking your time, using the right tools, and preparing your material properly are the most important factors for success.
Achieving Smooth Acrylic Edges
So, you’ve cut your acrylic pieces, and now you’re looking at edges that are a bit rough. That’s totally normal. To make your display stand look really professional, you’ve got to smooth these edges out. It’s not super complicated, but it does take a bit of care and the right approach. Think of it like prepping a surface before painting – you wouldn’t skip that, right? Well, this is kind of the same idea for acrylic.
Sanding Techniques For Acrylic
Sanding is your first step to getting rid of those sharp, uneven bits left over from cutting. You’ll want to start with a coarser grit sandpaper, something like 220-grit. This is good for knocking down any high spots or burrs. Don’t press too hard; just let the sandpaper do the work. After you’ve gone over it with the 220-grit, you’ll move to finer grits. Progressing through grits like 400, 600, and even up to 800 or 1000 will gradually remove the scratches left by the previous grit. It’s important to sand in one direction, not in circles, as circular motions can leave marks that are hard to get rid of later. Using a sanding block can help keep things even, especially on longer edges.
- Start with 220-grit sandpaper.
- Move to finer grits: 400, 600, 800.
- Sand in a single direction with light, even pressure.
Keeping your workspace clean during sanding is key. Tiny dust particles can get embedded in the acrylic and cause more scratches, which means more work for you later.
Polishing To A High Shine
Once you’ve sanded the edges smooth, they’ll look much better, but they might still have a bit of a hazy look. This is where polishing comes in to give you that crystal-clear, glass-like finish. If you have a rotary tool, like a Dremel, you can use a buffing wheel attachment. Make sure you’re using a polishing compound specifically made for acrylic or plastics. These compounds are designed to clean and shine without damaging the material. Apply a small amount of compound to the wheel and gently buff the edge. Go slow and keep the tool moving to avoid building up too much heat, which can actually melt or cloud the acrylic. If you don’t have a power tool, you can still achieve a good shine by hand. Use a soft microfiber cloth and an acrylic polish, rubbing in steady, circular motions. It takes a bit more elbow grease, but it works.
| Grit/Step | Tool/Material | Purpose |
|---|---|---|
| 220-grit | Sandpaper | Remove burrs and rough edges |
| 400-800 | Sandpaper | Smooth out scratches from previous grit |
| Buffing | Polishing wheel/cloth | Achieve high gloss and clarity |
Removing Scratches And Imperfections
Sometimes, even after sanding and polishing, you might notice a few small scratches or imperfections. If they’re minor, you can often fix them by going back to a finer grit of sandpaper and then re-polishing. For deeper scratches, you might need to start the sanding process over on that specific area. It’s also really important to keep the acrylic cool while you’re working. If you feel the edge getting warm to the touch, stop for a bit and let it cool down. Overheating is a common cause of cloudiness and can make your edges look worse than when you started. Taking your time and being patient is the best way to get those edges looking perfect. Remember to protect those finished edges with painter’s tape once you’re done, so they don’t get scratched up during assembly. This step is really about attention to detail, and it makes a big difference in the final look of your acrylic display stand.
Assembling Your Acrylic Stand
Now that your acrylic pieces are cut and their edges are looking sharp, it’s time to bring them all together. This is where your stand really starts to take shape, but it’s also a step where you need to be careful. Rushing through assembly can undo all the good work you’ve done so far. Think of it like putting together furniture; a little patience now saves a lot of headaches later.
Dry Fitting Components Before Adhesion
Before you even think about applying any glue, do a test run. This is called dry fitting. It means putting all the pieces together without any adhesive to see how they fit. You want to check that everything lines up correctly and that the orientation is right – you don’t want to accidentally glue a piece on backwards. This is also your chance to spot any small imperfections in the cuts or edges that might prevent a snug fit. If something isn’t quite right, you can make minor adjustments now, like a little extra sanding, before the glue makes it permanent. It’s a simple step, but it’s a big one for a clean final product. You can find some helpful tips on assembly in this video.
Applying Acrylic Solvent Cement
When you’re ready to make things permanent, you’ll use acrylic solvent cement. This isn’t like regular glue; it actually melts the edges of the acrylic slightly, creating a molecular bond as it dries. This makes for a really strong, clear seam. You’ll want to work in a well-ventilated area because the fumes can be strong. Apply the cement sparingly to the edges that will join. Too much can ooze out and make a mess, but too little won’t create a strong enough bond. Follow the instructions on the cement bottle closely. A small applicator bottle with a needle tip is often best for precise application.
Securing Pieces During Curing
Once the solvent cement is applied and the pieces are joined, you need to hold them in place while the bond cures. This is where clamps, jigs, or even painter’s tape can be really useful. You don’t want the pieces to shift at all while the cement is setting. The time needed for curing varies depending on the type of cement and the thickness of the acrylic, but it’s usually best to let it sit for at least 24 hours to reach full strength. Resist the urge to move or test the stand too soon; patience is key here. For more assembly ideas, check out this tutorial.
Reinforcing Your Stand’s Structure
Sometimes, a basic acrylic stand just won’t cut it, especially if you’re planning on displaying heavier items or creating a multi-tiered setup. That’s where reinforcement comes in. It’s all about making sure your stand doesn’t wobble or, worse, collapse under pressure. Think of it as giving your stand a little extra backbone.
Adding Support For Larger Designs
For bigger stands, especially those with long, unsupported spans, you might need to add some internal structure. This could involve adding vertical supports along the back or sides, or even creating a hidden frame within the design if it’s complex. The goal is to distribute the weight more evenly and prevent any bowing or flexing of the acrylic panels. This is where careful planning during the design phase really pays off. You don’t want to realize halfway through assembly that a key panel is going to sag.
Utilizing Corner Gussets
Corner gussets are small, often triangular pieces of acrylic that you can glue into the inside corners of your stand. They add a surprising amount of strength where two panels meet at a right angle. They’re particularly useful for taller stands or those that might experience lateral forces, like being bumped. You can cut these yourself from scrap acrylic or purchase pre-made ones. Applying them neatly is key to maintaining a clean look.
Incorporating Seam Rods For Stability
If you have long seams, like along the edges of a large rectangular stand or where multiple shelves meet a vertical panel, seam rods can be a game-changer. These are typically solid acrylic rods that are glued along the seam, running parallel to the edge. They act like a reinforcement bar in concrete, adding significant rigidity to the joint. This is a great technique for display stands that need to hold a lot of weight or for stands that will be moved around frequently. You’ll want to make sure the rod is the same type of acrylic as your main panels for the best bond.
Reinforcement isn’t just about preventing breakage; it’s about ensuring the longevity and professional appearance of your display. A well-built stand looks better and lasts longer, protecting whatever you choose to showcase.
Adding Functional Enhancements
Your acrylic display stand is built, but we can make it do more than just hold things. Adding a few extra features can really make it stand out and work better for what you need. Think about how you’ll use the stand and what would make that easier or more impressive.
Installing Shelving for Multi-Level Displays
Adding shelves inside your stand can turn a simple display into a multi-tiered showcase. This is great for organizing different items or creating visual depth. You can use clear acrylic for shelves that seem to float, or opt for tinted or frosted panels to add a different look. When planning your shelves, consider the height of the items you want to display. You don’t want them too cramped, but you also don’t want too much wasted space above them. Making them adjustable is a nice touch if you think you might change what you’re displaying later on. It’s a good idea to plan the shelf placement carefully before you glue everything together, or you might need to add brackets later.
Integrating Hinges For Access
If your display stand needs to be opened, like for adding or removing items, hinges are the way to go. You can use standard piano hinges that run the length of the door for a clean look, or special acrylic hinges that almost disappear into the design. Proper alignment is key here; a door that binds or doesn’t close right is frustrating. Make sure to leave a small gap between the door and the frame so it moves freely. For added security, especially if the stand will be in a public area, consider adding a small lock or latch. This makes the stand both accessible and secure.
Considering Locks Or Latches
Sometimes, you need to keep what’s on display safe. This is where locks and latches come in. A simple latch can keep a door from swinging open accidentally, which is useful if your stand might get bumped. If you need more security, like for valuable items or in a retail setting, a small lock can be integrated. You can find locks designed specifically for acrylic cases, or adapt small cabinet locks. Think about how often you’ll need to open the stand; if it’s often, a simple latch might be better than a complex lock. For custom retail fixtures, Caamatech can help design stands with integrated security features.
Adding these functional elements transforms your stand from a static object into a dynamic display solution. It’s about making it work harder for you and look good doing it.
Elevating Aesthetics With Lighting
Adding lights can really make your acrylic stand pop. It’s not just about seeing what’s on display; it’s about creating a mood and drawing attention to your items. Think about how a spotlight can highlight a specific piece or how soft backlighting can give your whole stand a sophisticated glow. Proper lighting transforms a simple stand into a captivating showcase.
Implementing Spotlights For Focus
Spotlights are your best friend when you want to draw the eye to particular items. You can use small, adjustable LED spotlights mounted on the top or sides of your stand. This lets you precisely aim the light where you need it most. It’s a great way to make your prize possessions stand out, especially if you have a lot of things on the stand. You can even use different colored spotlights for a bit of flair. Just remember to keep the heat output low; LEDs are usually a good choice for this reason, unlike older halogen types that can warp acrylic [033a].
Using Backlighting For Ambiance
Backlighting offers a different kind of effect. Instead of shining light directly on an item, you place lights behind or around the edges of the stand. This creates a soft halo or glow that makes the stand itself look more premium. It’s particularly effective for stands that are placed against a wall. You can use LED strips tucked away behind the back panel or along the base. This method adds depth and a touch of drama without being overpowering. It really makes the acrylic material itself look more interesting.
Managing Wiring For A Clean Look
Nobody likes seeing a mess of wires. When you’re adding lights, it’s important to think about how you’ll hide the wiring. You can use adhesive cable clips or channels that stick to the inside of the acrylic to keep wires neat and out of sight. For battery-powered LEDs, this is less of an issue, but for plug-in lights, a clean wiring job makes a big difference. Planning this out from the start means your stand will look polished and professional, not like a DIY project with exposed cords. It’s all about that finished look [8d1c].
Personalizing Your Acrylic Creation
Now that your acrylic stand is built and looking sharp, it’s time to make it truly yours. This is where you can add those little touches that turn a functional piece into something special, something that really reflects your style or the items you’re displaying. It’s not just about holding things anymore; it’s about presentation.
Adding Engraved Plaques
Engraving a plaque is a fantastic way to add a professional and personal mark to your stand. You can etch your name, a company logo, or a meaningful date directly onto a small piece of acrylic or metal. This adds a touch of class and helps identify the stand’s purpose or owner. For a really polished look, consider using a laser engraver. It gives a clean, precise finish that’s hard to achieve by hand. You can even get creative with the font choice to match the overall aesthetic of your display. This is a great way to make your stand feel more official, whether it’s for a business or a personal collection. It’s a small detail that makes a big difference, giving your stand a unique identity. Think about adding one to the base or a prominent side panel for maximum visibility. It’s a simple step that really makes your creation stand out from the crowd.
Incorporating Tinted Or Frosted Acrylic
Want to add a bit of mystery or a softer look? Swapping out clear acrylic for tinted or frosted panels can completely change the vibe of your stand. Frosted acrylic diffuses light beautifully, creating a soft glow and hiding what’s directly behind it, which can be great for displaying items you want to hint at rather than show fully. Tinted acrylic, on the other hand, can add a pop of color or a sophisticated hue, like smoky grey or deep blue. This is particularly effective if you want to complement the colors of the items being displayed or just add a specific mood to the space. You can use these materials for entire panels or just as accents. For instance, a frosted top panel can diffuse light from above, while clear sides allow for full viewing. It’s all about playing with light and color to achieve the look you want. This technique can really make your display pop and draw attention in a subtle yet effective way. It’s a way to control how people see your items, adding an artistic layer to the display itself. You can find these types of acrylic sheets at most good plastic suppliers.
Choosing Decorative Bases
The base of your stand is often overlooked, but it’s a prime spot for personalization. Instead of a plain acrylic base, consider something more decorative. You could opt for a base made from a different material, like wood or polished metal, to create a contrast. Or, if you’re sticking with acrylic, you could use a thicker piece, perhaps with a colored or mirrored finish. Another idea is to add small decorative feet to the bottom of your acrylic base. These can be anything from simple rubber nubs to more ornate metal or ceramic pieces. They not only look good but can also help protect your surfaces from scratches. Think about what you’re displaying and choose a base that complements it. For delicate items, a stable, heavier base might be best. For a more modern look, a sleek metal base could work wonders. It’s about grounding your display and adding that final touch of style. This is where you can really let your personality shine through and make the entire piece feel complete and intentional. It’s a great way to add a bit of flair and make your stand a real conversation starter.
Final Touches And Cleaning
Removing Protective Film
Alright, you’ve reached the home stretch! It’s time to peel off all that protective film that’s been guarding your acrylic pieces. Take your time with this step. Gently lift a corner with your fingernail or a plastic scraper (avoid metal, which can scratch). Pull the film off slowly and steadily. If you encounter any sticky residue left behind, a bit of Goo Gone or a similar adhesive remover can help, but test it on a scrap piece first to make sure it doesn’t cloud the acrylic. This is your first real look at the finished product, so enjoy the reveal!
Cleaning Acrylic Surfaces
Now that the film is off, you’ll probably see some fingerprints or dust from the assembly process. For a basic clean, warm water with a drop of mild dish soap works wonders. Use a soft, microfiber cloth – this is key to avoiding scratches. Dampen the cloth, wipe down the surfaces, and then use a dry microfiber cloth to buff it dry. This prevents water spots and streaks. If you have tougher smudges, a cleaner specifically made for acrylic is your best bet. Just be sure to follow the product instructions carefully. You can find good options for cleaning acrylic displays.
Polishing For A Professional Finish
This is the step that really makes your stand pop. Even after cleaning, a final polish can bring out an incredible shine. If you used a solvent cement, there might be some slight haziness or residue right at the seams. A dedicated acrylic polish, applied with a clean microfiber cloth, can often buff this out. Work in small, circular motions, applying gentle pressure. If you’re aiming for that showroom look, a power polisher with a soft foam pad and acrylic polish can speed things up, but be careful not to overheat the material. A clean, polished surface makes all the difference.
A clean workspace is important throughout the entire process, but it’s especially vital here. Tiny dust particles can easily get trapped in polish or cleaning solutions, leading to micro-scratches that detract from the final look. Make sure your cloths are clean and your work area is free of debris before you start the final cleaning and polishing stages.
Testing Stability And Making Adjustments
So, you’ve put all the pieces together, and the adhesive has had plenty of time to cure. That’s fantastic! But before you start loading up your new acrylic stand with your prized possessions, it’s super important to give it a good once-over. We need to make sure it’s not going to wobble or, worse, collapse. Think of this as the final quality check before your stand goes into service.
Evaluating Load-Bearing Capacity
First things first, let’s see how much weight this thing can actually handle. You don’t want to find out it can only hold a feather when you were planning on displaying a bowling ball. Start by placing a few lighter items on the stand, distributing the weight evenly. Gradually add more weight, observing closely for any signs of stress. Look for bending, creaking, or any shifting in the joints. If you’re building a multi-tiered stand, test each level individually before stacking everything up. It’s a good idea to have a rough idea of the maximum weight you expect it to hold and test slightly beyond that. For instance, if you plan to display books, test it with a few heavier ones to gauge its strength. This is where knowing your acrylic’s properties can be helpful.
Identifying Areas For Improvement
As you’re testing the weight, keep an eye out for any weak spots. Maybe one corner seems a little less secure than the others, or perhaps a shelf is starting to sag slightly under pressure. These are the areas that might need a little extra attention. Don’t be afraid to mark these spots or make a note of them. Sometimes, a small adjustment now can prevent a bigger problem down the line. It’s all part of the process of making sure your stand is as robust as possible.
Ensuring A Level And Secure Stand
Finally, let’s make sure your stand isn’t leaning like the Tower of Pisa. Place a level on the top surface and check it from different angles. If it’s not perfectly level, you might need to add small shims or pads under the base to correct it. Also, give the stand a gentle nudge from different sides. It should feel solid and not sway excessively. If it does move more than you’re comfortable with, revisit the assembly and curing steps, or consider adding reinforcements like corner gussets or seam rods if you haven’t already. A stable stand is a safe stand, and that’s what we’re aiming for.
This final check is your last chance to catch any issues before your stand is put to regular use. It’s better to spend a little extra time now making sure it’s solid than to deal with a damaged stand or items later. Think of it as a final polish on your hard work.
Making sure things work well and tweaking them as needed is super important. We constantly check our products to see how they hold up over time and make small changes to keep them top-notch. Want to see how we ensure quality? Visit our website to learn more!
Conclusion
Making your own acrylic display stand can be a rewarding project, offering a custom way to show off your items. By following these steps, you can create a sturdy and attractive stand that suits your needs perfectly. Don’t be afraid to experiment with different designs and finishes to make it truly yours. Remember, patience and careful work lead to the best results. Happy building!
Frequently Asked Questions
What kind of acrylic should I use for a display stand?
For most display stands, standard acrylic sheets, often called PMMA or Plexiglas, work well. You can find them in different thicknesses, like 1/8 inch or 1/4 inch. Thicker sheets are stronger, so pick one that can hold the weight of what you plan to display.
Can I cut acrylic with regular tools?
It’s best to use tools made for cutting plastic. A fine-tooth saw or a special acrylic cutting tool will give you cleaner cuts without chipping. If you have access to a laser cutter, that’s also a great option for precise shapes.
What’s the best way to stick acrylic pieces together?
You’ll want to use a special acrylic solvent cement. This isn’t like regular glue; it actually melts the edges of the acrylic slightly, creating a super strong bond when it dries. Make sure to use it in a well-ventilated area because the fumes can be strong.
How do I get smooth, shiny edges on my acrylic stand?
After cutting, you’ll need to sand the edges. Start with a coarser grit sandpaper and move to finer grits to get them super smooth. Then, you can polish them with a special acrylic polish or even a buffing wheel to get that high shine.
Is it hard to assemble an acrylic display stand?
It takes some patience, but it’s definitely doable for beginners. The key is to dry fit everything first to make sure it all lines up before you apply any glue. Take your time with the adhesive, and let it cure properly.
How do I make my acrylic stand stronger?
For bigger or heavier displays, you can add extra support. This might mean using thicker acrylic, adding corner braces (called gussets), or even using small rods along the edges for more stability. Planning for this during the design phase is smart.
What’s the best way to clean an acrylic display stand?
Use a soft cloth with a little bit of mild soap and water, or a cleaner made specifically for acrylic. Avoid abrasive cleaners or paper towels, as they can scratch the surface. Always wipe gently.
Can I add lights to my acrylic display stand?
Absolutely! Adding LED strip lights can really make your display pop. You can place them around the edges, under shelves, or behind the stand for a cool effect. Just be sure to manage the wires neatly so they don’t distract from your display.