Here are the main points to remember when you’re thinking about making your own acrylic box.
Key Takeaways
- Choose the right thickness and quality of acrylic sheets based on how you plan to use the box.
- Select a lock type that matches your security needs and budget.
- Use special acrylic glue and apply it evenly for strong, clear bonds.
- Measure carefully and cut precisely, using tools like laser cutters or saws.
- Allow ample time for the glue to fully cure and finish with polishing for a professional look.
Essential Materials For Your Acrylic Box Project
Before you start cutting and gluing, getting the right materials together is half the battle. It might seem straightforward, but picking the correct items can really make a difference in the final look and durability of your box. Let’s break down what you’ll need.
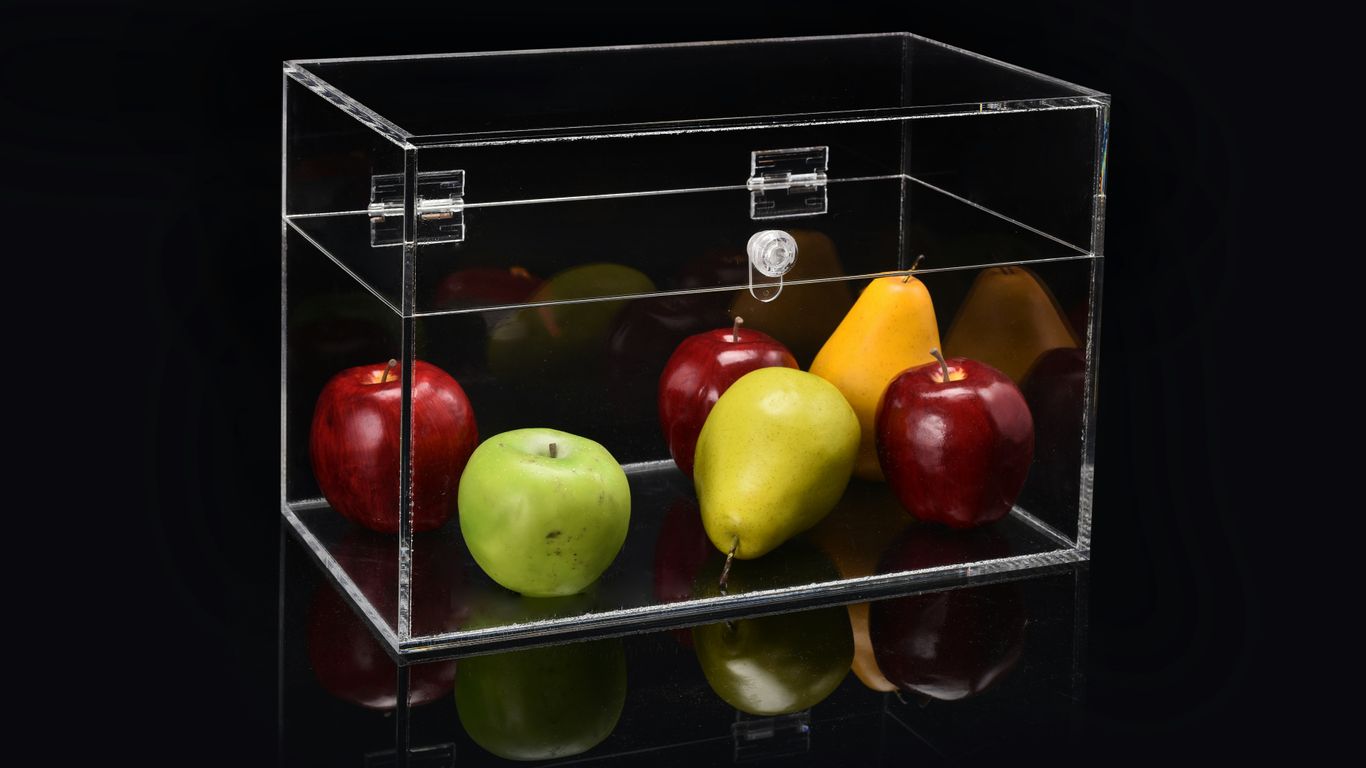
Selecting The Right Acrylic Sheets
This is your main building block, so don’t skimp here. Acrylic sheets, often called plexiglass or Perspex, come in various thicknesses. For most general storage or display boxes, something between 3mm and 5mm thick is usually good. If you plan on storing heavy items or need a sturdier build, you might want to go thicker, maybe 8mm to 10mm or even more. Pay attention to the clarity and quality of the sheet. You want something with high transparency and minimal imperfections like bubbles or scratches. A clear, clean sheet makes for a much nicer-looking finished product. You can find pre-cut sheets or larger panels depending on your project size.
Choosing Appropriate Locks
If your box needs to be secure, the lock is key. There are a few common types:
- Pin-tumbler locks: These are pretty standard and usually the most budget-friendly. They work well for basic security needs.
- Combination locks: Great if you don’t want to worry about keys. They’re convenient for frequent access.
- Fingerprint locks: These offer higher security and a modern touch, ideal for valuable items.
Think about what you’re storing and how often you’ll need to access it. The lock needs to fit the overall design and security level you’re aiming for. Make sure the lock you choose is designed for the thickness of your acrylic panels. Acrylic boxes with locks are popular for many uses.
Understanding Acrylic Adhesives
This is where things get sticky, literally. You can’t just use any old glue. You need a specific acrylic adhesive, often called solvent cement. This type of glue actually melts the surfaces of the acrylic slightly, creating a strong, fused bond that’s as clear as the acrylic itself when done right. Different brands have different drying times and strengths, so read the labels carefully. Some are fast-acting, while others give you a bit more working time. It’s important to use the right amount – too much can ooze out and look messy, while too little won’t hold.
Gathering Auxiliary Supplies
Beyond the main components, a few other bits and pieces will make your life easier:
- Masking tape: This is super helpful for holding panels together while the glue sets and also for protecting surfaces or creating clean lines.
- Sandpaper: You’ll need this for smoothing edges after cutting and for preparing surfaces if needed. Start with a coarser grit and move to finer ones.
- Cleaning cloths and solution: For wiping down surfaces before and after assembly.
- Gloves: To keep fingerprints off the acrylic.
Having all your supplies ready before you begin assembly will prevent interruptions and help maintain a clean working environment. It’s better to have a few extra supplies than to run out mid-project.
If you’re looking for a pre-made solution, you might consider a 5-sided clear acrylic box as a starting point for customization.
Tools Required For Precision Acrylic Fabrication
To build a neat acrylic box, you’ll need a few specific tools. Getting the right equipment makes a big difference in how clean and accurate your final product turns out. It’s not just about having tools, but having the right ones for working with acrylic.
Cutting Implements For Acrylic
Cutting acrylic cleanly is key. You have a couple of main options here. For very precise cuts, especially with intricate designs, a laser cutter is the way to go. It offers high accuracy and leaves a smooth edge, though the equipment is a significant investment. If you’re working on a smaller scale or don’t have access to a laser cutter, you can use manual methods. A fine-toothed saw blade designed for plastics, or a specialized acrylic cutter like a Plasticutter, can work well for straight lines. Always remember to support the acrylic sheet properly to avoid cracking during the cut.
Drilling Equipment For Lock Installation
If your design includes a lock, you’ll need to drill holes for it. An electric drill is standard, but the drill bits are what matter. You’ll want bits specifically made for plastics or acrylic to prevent chipping or melting. The size of the bit needs to match the screws or the lock mechanism you’re installing. It’s a good idea to have a set of different sizes on hand. Marking the drill points accurately before you start is super important.
Grinding And Polishing Tools
After cutting, the edges might be a bit rough. To get that smooth, professional finish, you’ll need grinding and polishing tools. Sandpaper in various grits is a basic requirement, starting with a coarser grit to remove any sharp edges and moving to finer grits for a smooth surface. For a really polished look, a cloth wheel polishing machine can be very effective. This step is what makes the box look finished and safe to handle.
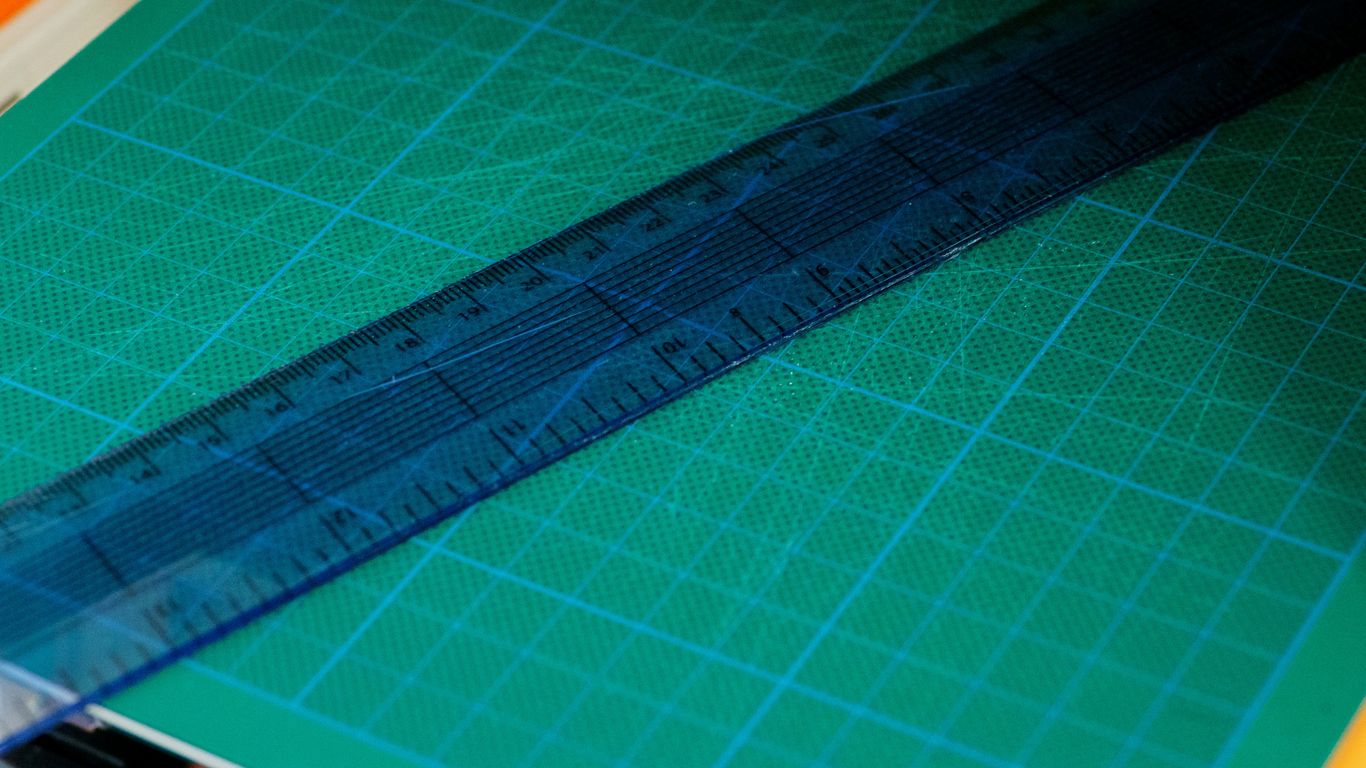
Accurate Measuring Instruments
Precision starts with measurement. You can’t build a good box if your measurements are off. A reliable tape measure is a must. For ensuring right angles and straight lines, a square ruler is indispensable. These simple tools help you mark your cuts and drill points accurately, preventing mistakes before you even start cutting. Having good measuring tools is like having a solid foundation for your project; accurate measurements prevent headaches later on.
Designing Your Custom Acrylic Box
Before you even think about cutting or gluing, you need a solid plan. This is where you figure out exactly what your acrylic box will look like and how it will function. Getting this part right saves a lot of headaches later on.
Determining Optimal Box Dimensions
First things first, what are you putting in this box? The size of the items you plan to store will dictate the internal dimensions. Let’s say you need to store some important papers. You’ll want the box to be a bit bigger than the papers themselves, giving you some wiggle room. If you’re storing, I don’t know, a collection of vintage bottle caps, you’ll need to measure those and add a little extra space for easy access. Don’t forget to factor in the thickness of the acrylic sheets themselves when calculating the external dimensions. A common mistake is forgetting that the walls take up space. You can get custom-sized Ready-to-Assemble display cases made from acrylic, which gives you an idea of how precise these measurements need to be.
Here’s a quick way to think about it:
| Dimension | Calculation Basis |
|---|---|
| Length | Item Length + Clearance |
| Width | Item Width + Clearance |
| Height | Item Height + Clearance |
Remember, ‘Clearance’ is that extra bit of space you add for ease of use. For a box with a lock, you also need to consider if the lock mechanism will take up any internal space. It’s usually best to plan for the lock to be on the outside or integrated into a thicker edge.
Planning The Box Shape
Most acrylic boxes are simple rectangles or squares. They’re easy to design and build, and they make good use of space. But you’re not limited to that! You could go for a cylinder, a hexagon, or even something more complex. Just keep in mind that the more complicated the shape, the trickier the cutting and assembly will be. For a beginner, sticking to straight lines and 90-degree angles is probably the way to go. If you’re aiming for something unique, like a round box, you’ll need to be extra careful with your measurements and cuts to make sure everything lines up perfectly.
Strategizing Lock Placement
If your box needs a lock, where you put it matters. You want it to be secure, but also easy for you to use. For a typical rectangular box, placing the lock on the front edge where the lid meets the base is common. This makes it accessible. If you’re using a key lock, make sure there’s enough room to turn the key comfortably. For combination locks, you’ll want the numbers to be easy to see and dial. The thickness of the acrylic at the lock’s location is really important; it needs to be sturdy enough to hold the lock securely. You don’t want a lock that feels loose or wobbly. Think about the type of lock you’re using and how it attaches. Some locks screw in, others might need a specific cutout. Planning this early means you won’t be stuck trying to figure it out after you’ve already assembled the box.
When designing, always sketch out your ideas first. A simple drawing can help you visualize the final product and catch potential problems before you start cutting. Consider how the lid will open and close, and if any hinges or supports are needed.
Cutting Acrylic Sheets With Precision
Getting clean, straight cuts on acrylic is super important for a professional-looking box. Mess up here, and your whole project can look a bit wonky. There are a couple of main ways to go about this, each with its own pros and cons.
Utilizing Laser Cutting Technology
Laser cutting is pretty much the gold standard for acrylic fabrication. It offers incredible accuracy and leaves a smooth, flame-polished edge right off the machine. This means you often skip the extra sanding and polishing steps on the cut edges, saving you time and effort. The precision of a laser cutter is hard to beat for intricate designs or perfectly square corners.
Here’s a general idea of how it works:
- Design Preparation: You’ll need your design in a vector format (like DXF or AI) that the laser cutter can read. This is where you’ll map out all the pieces of your box.
- Machine Setup: Turn on the laser cutter and check its settings. Things like focal length and power need to be just right for the thickness of your acrylic. For a common 3-5mm sheet, you might look at settings around 30-50W power, 20-30mm/s speed, and 20-30kHz frequency, but always test on a scrap piece first.
- Cutting: Place your acrylic sheet on the laser cutter’s bed and secure it. Load your design file, set your parameters, and let the machine do its thing. Keep an eye on it to make sure everything is going smoothly.
- Post-Cut: Once it’s done, carefully remove the pieces. A quick light sanding might still be needed to remove any tiny bits of residue, but usually, the edges are quite clean.
While laser cutters are fantastic, they do represent a significant investment if you’re not using a service. If you’re just making one box, this might be overkill, but for frequent projects or complex shapes, it’s definitely the way to go. You can find services that will cut your designs for you, which can be a good middle ground.
Manual Cutting Techniques
If a laser cutter isn’t in the cards, don’t worry. You can still get good results with more traditional methods, though it requires a bit more care and practice. The key is to use the right tools and techniques for a clean score and break.
- Scoring and Snapping: For thinner acrylic (up to about 3mm), this is a common method. You use a specialized scoring knife or a utility knife to make a deep, consistent score line along your cut path. Then, you carefully apply pressure to snap the acrylic along that line. It takes a steady hand to get a straight break.
- Using Saws: For thicker acrylic, a saw might be necessary. A jigsaw with a fine-tooth blade designed for plastics, or even a table saw with the right blade, can work. The trick here is to go slow and steady to avoid melting or chipping the acrylic. You’ll definitely need to plan for sanding and polishing the edges afterward with this method.
No matter which manual method you choose, always measure twice and cut once. Accuracy is paramount. If you’re unsure about the best way to cut acrylic, checking out a guide on different cutting methods can be really helpful.
Regardless of the cutting method, always wear safety glasses. Acrylic can chip and splinter, and eye protection is non-negotiable. Also, ensure your workspace is well-ventilated, especially if you’re using any power tools or solvents.
After cutting, you’ll likely need to clean up the edges. A bit of sanding, starting with a medium grit and moving to a fine grit, will smooth out any rough spots. For a really polished look, you might even use a polishing compound. This preparation is what separates a hobby project from something that looks professionally made.
Assembling Your Acrylic Box
Now that you have all your pieces cut and ready, it’s time to put them together. This is where your box really starts to take shape. Getting the joints right is key to a strong and good-looking final product.
Applying Acrylic Glue Evenly
Applying the adhesive correctly is probably the most important step for a strong bond. You want a consistent layer of glue along the edges that will join. Too little, and the bond will be weak. Too much, and it’ll squeeze out and make a mess, which is hard to clean up later.
- Use a fine-tip applicator or a small brush for control.
- Apply a steady bead along the entire edge that will be joined.
- Avoid gaps or thick blobs of glue.
The goal is a continuous, even application. If you’re working with a larger box, you might want to work in sections, applying glue and joining panels one at a time. This gives you more control and prevents the glue from drying out before you can make the connection. For a really clean look, you can use masking tape to hold pieces in place, but be careful not to get tape residue on the surfaces that will be glued.
Joining Acrylic Panels
Once the glue is applied, carefully bring the panels together. Align them precisely according to your design. This is where those accurate measurements from earlier really pay off. If you’re building a simple rectangular box, you’ll likely be joining edges at 90-degree angles. Make sure the corners are square.
Take your time during this step. Rushing can lead to misaligned panels, which will be noticeable and can weaken the overall structure. It’s better to take a few extra minutes to get the alignment perfect.
Securing Panels During Bonding
After the panels are joined, they need to stay put while the adhesive cures. Clamps designed for delicate materials or even strong masking tape can be used to hold the pieces firmly in place. You want to apply just enough pressure to keep the panels snug against each other without causing them to bow or distort. If you’re installing a lock, now is also a good time to ensure the drilled holes for the lock mechanism are aligned properly before the glue fully sets. For those looking to integrate advanced security features, exploring options for smart lock systems might be a consideration for future projects.
Here’s a quick look at common securing methods:
- Masking Tape: Good for holding edges together, especially on smaller boxes. Use painter’s tape to avoid residue.
- Corner Clamps: These are helpful for maintaining 90-degree angles.
- Specialized Fixtures: For repetitive tasks or complex shapes, custom jigs can be made.
Remember, the bond forms as the glue cures, so keeping the pieces perfectly still is important. Don’t try to move or handle the box too much until the adhesive has had sufficient time to harden.
Allowing The Adhesive To Cure
Once your acrylic panels are glued together, the real work isn’t quite over. You need to give that adhesive time to do its job. This period, known as the cure time, is when the bond reaches its full strength. Rushing this step can lead to a weak connection or even a complete failure of your box.
Optimal Drying Environment
Where you let your acrylic box cure can make a difference. Ideally, you want a place that is:
- Stable: Avoid areas with a lot of vibration or movement. This could be a workbench that gets bumped or a shelf near a busy doorway.
- Clean: Dust and debris can settle into any tiny gaps, weakening the bond or making the finished product look messy. A covered area or a clean room is best.
- Temperature Controlled: Most acrylic adhesives perform best within a specific temperature range. Extreme heat or cold can affect how the adhesive sets. Check the manufacturer’s recommendations for your specific glue.
Understanding Cure Times
Cure times can vary quite a bit depending on the type of adhesive you used. Some specialized acrylic cements can achieve a full cure in a matter of hours, which is a big plus if you’re on a deadline. Others, like certain epoxies or even some pressure-sensitive adhesives, might take several days to reach their maximum strength. It’s important to remember that "handling strength" (when the box can be moved without falling apart) is often much shorter than the full cure time. For instance, some adhesives improve in strength over time with good pressure applied. Always refer to the adhesive’s product data sheet for the most accurate information. For example, thermosetting acrylic adhesives are known for their rapid curing properties.
Don’t assume that because the glue feels dry to the touch, it’s fully cured. The internal chemical process takes time to complete, and this is what provides the lasting bond. Patience here will pay off in the long run for the durability of your acrylic box.
Post-Assembly Finishing Touches
Once your acrylic box has fully cured, it’s time to make it look really good. This stage is all about refining the edges and surfaces so your project looks professionally made, not just something you put together at home. It’s the difference between a functional box and a display-worthy piece.
Edge Grinding and Surface Polishing
After the glue has set completely, you’ll likely have some slight imperfections or rough edges where the panels meet. This is where grinding and polishing come in. You’ll want to start with a coarser grit sandpaper to smooth down any high spots or excess glue residue. Gradually move to finer grits to remove the scratches left by the previous ones. The goal is to achieve a perfectly smooth transition between panels. For a truly professional finish, consider using specialized polishing compounds. These can bring back the clarity and shine of the acrylic, making the joints almost disappear. You can find guides on how to smooth and polish plexiglass edges that go into more detail on the specific grits and techniques.
Final Cleaning and Inspection
With the polishing done, give the entire box a thorough cleaning. Use a soft, lint-free cloth and an acrylic-safe cleaner. Avoid abrasive materials or harsh chemicals, as these can scratch or cloud the acrylic. Wipe down all surfaces, inside and out, to remove any dust, fingerprints, or polishing compound residue. Finally, do a careful inspection. Check all seams for strength, look for any remaining imperfections, and ensure the locks are functioning correctly. This is your last chance to catch any issues before calling the project complete.
Here’s a quick rundown of what to look for:
- Seam Integrity: Gently test the strength of the glued joints. They should feel solid and not flex.
- Surface Clarity: Ensure there are no smudges, scratches, or haziness on the acrylic surfaces.
- Lock Functionality: Open and close the locks several times to confirm they operate smoothly.
- Overall Appearance: Step back and look at the box from different angles. Does it meet your expectations?
Taking the time for these finishing steps makes a significant difference. It transforms a basic assembly into a polished creation that you can be proud of. Don’t skip this part if you want the best results for your acrylic box.
Troubleshooting Common Acrylic Box Issues
Even with the best planning, sometimes things don’t go exactly as planned when building an acrylic box. Don’t worry, most common problems have straightforward fixes. Let’s look at a few.
Addressing Uneven Sheet Cuts
This can happen if your cutting tool isn’t quite right for the job, if the settings are off, or if the acrylic sheet shifted during cutting. The key is to fix the cut before assembly. If you’re using a saw, make sure it’s sharp and set to the correct speed for acrylic. For minor imperfections, you can often use fine-grit sandpaper or a specialized acrylic file to carefully trim the edge until it’s straight. If the cut is significantly off, you might need to re-cut the piece entirely. Always double-check your measurements and secure the sheet firmly before making any cuts.
Resolving Loose Lock Installations
A wobbly lock usually comes down to a few things: the hole drilled is too big, the screws aren’t tight enough, or the acrylic is too thin to support the lock properly. First, check if the lock itself is the right size for the hole. If the hole is slightly too large, you might be able to use a bit of acrylic cement or even a small shim to create a tighter fit before re-inserting screws. Make sure you’re using the correct drill bit size for the screws you’re using. If the screws just keep turning without tightening, the threads might be stripped in the acrylic. In this case, you might need to fill the hole and re-drill, or consider using slightly larger screws if the lock design allows. For any issues with parts or assembly, reaching out to Boxory support can provide specific guidance.
Fixing Weak Glue Bonds
If you notice a weak bond, it’s often because the glue wasn’t applied evenly, or the pieces weren’t held together long enough. Too much glue can sometimes cause issues too, as it might not cure properly or can create stress points.
Here’s a quick checklist:
- Surface Prep: Ensure both acrylic surfaces are clean and free of dust or oils before applying glue. Even a fingerprint can weaken the bond.
- Glue Application: Use a fine applicator or a brush to apply a thin, even layer of acrylic cement. Avoid puddles or dry spots.
- Clamping: Use masking tape or specialized clamps to hold the pieces firmly together while the glue cures. Don’t rush this step.
- Cure Time: Always allow the recommended cure time for your specific adhesive. This can vary significantly based on the product and environmental conditions.
Sometimes, a weak bond isn’t immediately obvious. It might appear solid at first but fail under stress later. It’s always better to err on the side of caution and ensure a strong, complete bond during the initial assembly. If a bond fails after assembly, you may need to carefully remove the old glue and re-bond the pieces.
If you’ve tried these steps and are still having trouble, don’t hesitate to seek help. For persistent problems, contacting customer support with details about your issue can be very helpful.
Advanced Gluing Techniques For Acrylic
Sometimes, the standard acrylic glues just won’t cut it for that perfectly seamless, super-strong bond you’re after. When you need something a bit more specialized, there are a few advanced methods to consider. These techniques can offer superior clarity, faster curing, or just a different approach to joining your acrylic pieces.
UV Resin For Clear Acrylic Bonds
UV resin is a fantastic option when you’re working with clear or translucent acrylic and need a bond that’s virtually invisible. It cures quickly under UV light, which means you have plenty of time to position your pieces perfectly before it hardens. You’ll need a UV lamp for this, like a nail lamp, as the little keychain UV lights often aren’t strong enough for a solid cure. For larger projects, you might want to look into mechanical fasteners instead, but for smaller, detailed work, UV resin is a winner. Just apply a bit, press the pieces together, and cure it. It’s pretty straightforward, and the results can be surprisingly strong and clear. Remember to prepare your surfaces first; cleaning them thoroughly is key for any adhesive.
Specialized Acrylic Cements
Beyond the basic solvent cements, there are more advanced formulations designed for specific acrylic applications. Some are thicker, offering better gap-filling properties, while others are engineered for maximum optical clarity, making them ideal for display cases or artistic pieces where any visible seam would be a distraction. Companies like S&D Solutions offer specialized products that focus on achieving bubble-free, crystal-clear joins. When choosing a specialized cement, always check the manufacturer’s recommendations for the type of acrylic you’re using and the desired outcome.
Adhesive Sheets For Layering
For projects involving layering multiple sheets of acrylic, especially if they are the same size, adhesive sheets can be a game-changer. These are essentially double-sided tapes that are optically clear and often laser-safe. You apply the sheet to one piece of acrylic, peel off the backing, and then carefully place the second piece on top. This method creates a strong bond without any messy liquid glue. It’s particularly useful if you’re cutting intricate shapes from layered acrylic, as you can sometimes fuse the sheets before cutting, saving you the hassle of aligning and gluing individual pieces later. It’s a clean way to achieve a solid bond, especially for opaque acrylics where clarity isn’t the main concern.
Want to take your acrylic projects to the next level? Our section on "Advanced Gluing Techniques For Acrylic" dives deep into methods that ensure strong, clean bonds. Learn how to achieve professional-looking results every time. Visit our website today to explore these expert tips and elevate your crafting!
Conclusion
Building your own acrylic box with a lock can be a rewarding project. It takes some careful work at each step, from picking out your supplies and planning the design to cutting, putting it all together, and finishing it up. By choosing the right stuff and taking your time with the steps, you can end up with a really nice acrylic box that fits just what you need. Whether it’s for keeping your stuff safe, showing off items, or something else, a custom acrylic box offers a secure and good-looking place for your things. We hope this guide helps you make the acrylic box you’ve been wanting.
Frequently Asked Questions
What kind of acrylic sheet should I use?
For most projects, like a simple storage box, acrylic sheets that are 3 to 5 mm thick work well. If you need something stronger, like for holding heavier items, you might want to go with 8 to 10 mm thick sheets or even thicker. Always check for clear sheets without many bubbles or spots for the best look.
What’s the best glue for acrylic boxes?
You really need to use a special acrylic glue, sometimes called acrylic cement. This kind of glue is made to stick acrylic together really well, making a strong and clear connection. Regular glues might not hold or could make the acrylic cloudy.
How do I get clean cuts on acrylic?
Laser cutters give very precise and smooth edges, which is great if you have access to one. If you’re cutting by hand, use a sharp blade designed for plastic or a fine-toothed saw. Make sure the acrylic is held steady while you cut to avoid jagged edges.
How long does acrylic glue take to dry?
It really depends on the glue you use and the environment, like how warm and humid it is. Usually, it takes a few hours to a full day for the glue to be completely dry and strong. It’s best to let it sit undisturbed for at least 24 hours before handling it too much.
Can I use a regular drill for lock holes?
Yes, you can use a regular drill, but you need the right drill bit. Use a bit made for plastic or acrylic, and make sure the size matches the screws or parts of your lock. Drill slowly and steadily to prevent cracking the acrylic.
What if my glue bond isn’t strong enough?
This could happen if you didn’t use enough glue, if the edges weren’t clean, or if you moved the pieces before the glue dried. Make sure you apply the glue evenly to clean, dry edges and clamp the pieces together firmly while they cure.
How do I make the edges of my acrylic box smooth?
After cutting, you can smooth the edges using sandpaper. Start with a coarser grit and move to finer grits for a really smooth finish. You can also use a polishing compound with a soft cloth to make the edges shiny and clear again.
Is it hard to install a lock on an acrylic box?
It can be a bit tricky, but it’s doable. You’ll need to measure and drill holes accurately for the lock. Make sure the acrylic is thick enough to hold the lock securely. Taking your time and double-checking your measurements will help a lot.